
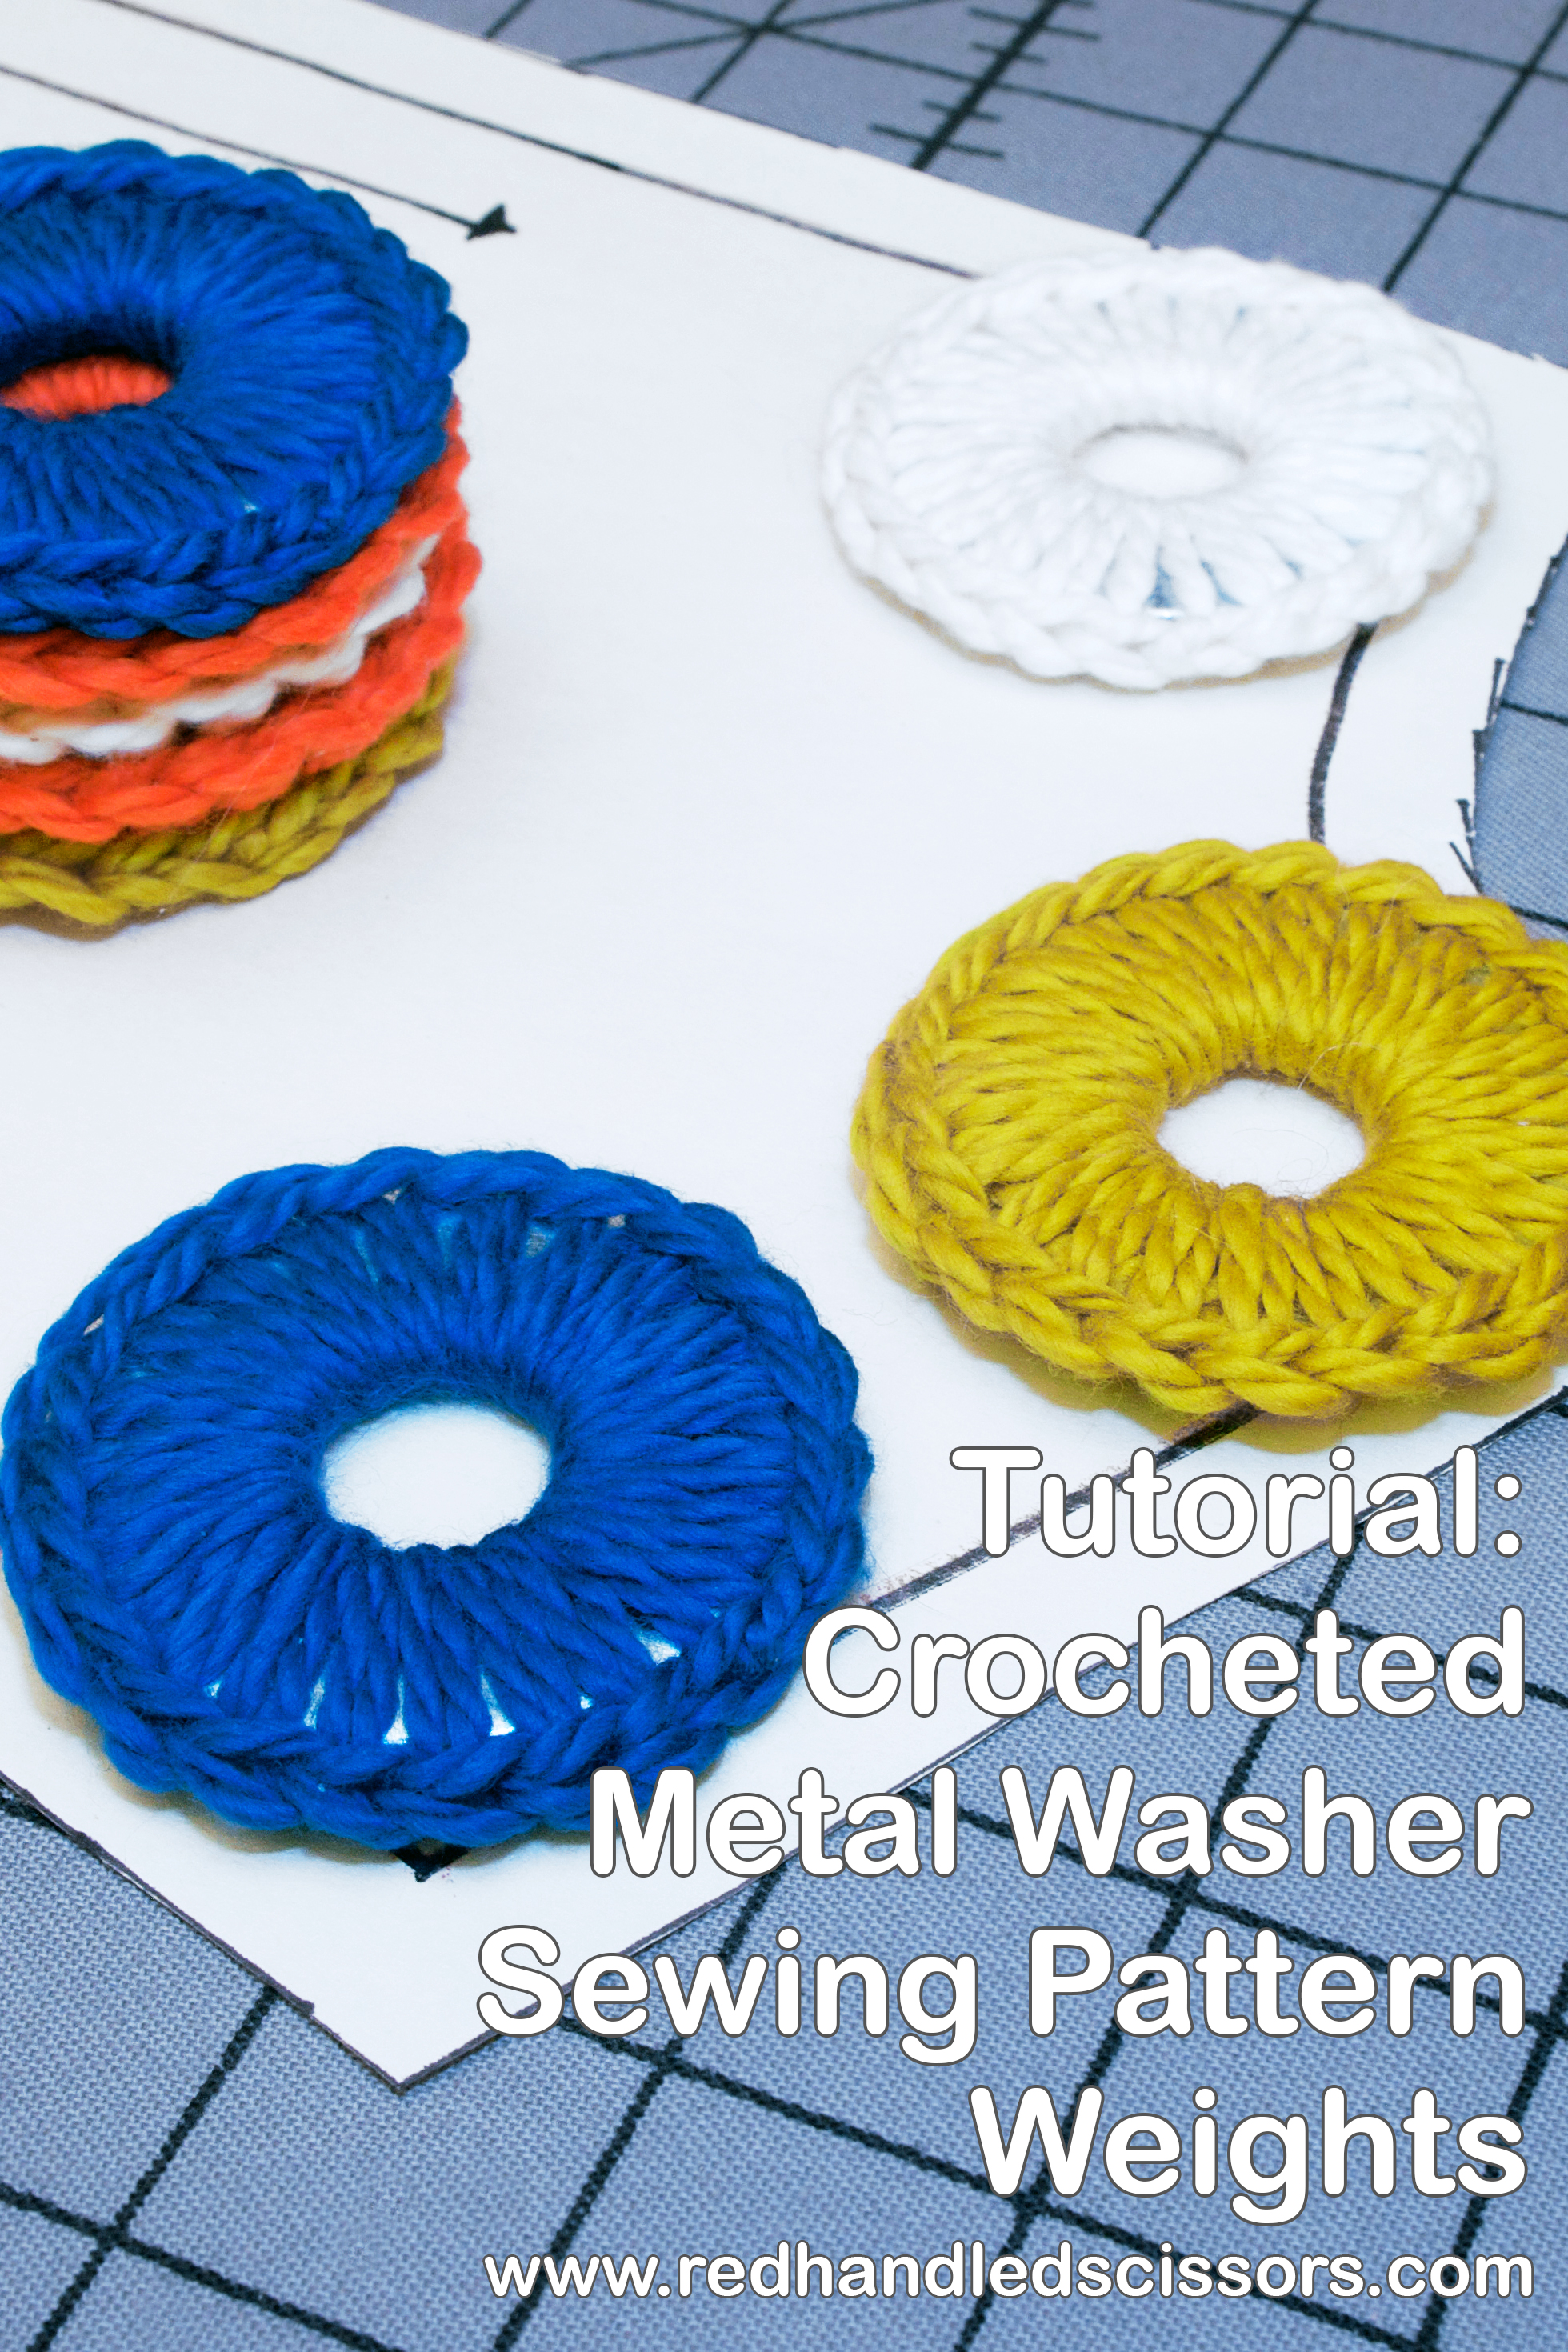
As an especially neurotic sewer, when it comes to my studio, there’s no such thing as too many pattern weights. So, to satisfy my paper-wrangling needs—and to avoid spending ridiculous amounts of money on “real” sewing pattern weights from the fabric shop—I headed to the hardware store in search of a cheap solution. Then, once I’d plopped down a whopping $2.00 for a set of 8 fender washers, the next logical step was personalize them. And, what do huge hunks of metal need more than anything else in the world? Cozies. (Obviously.) Thus, my handy new tutorial for crocheted metal washer pattern weights was born!
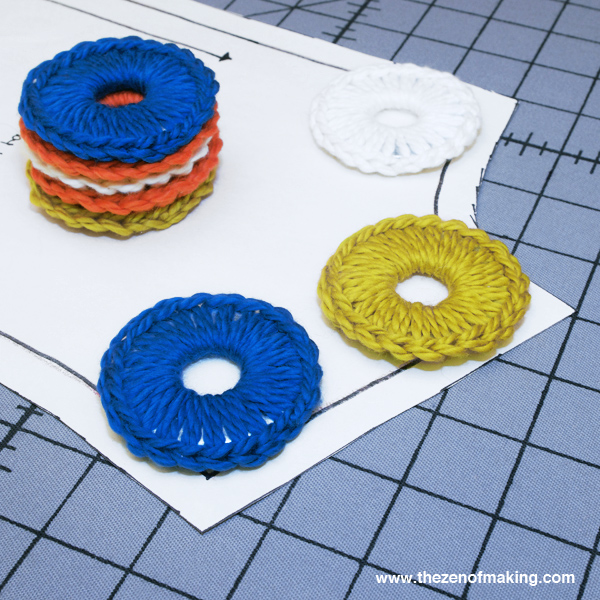
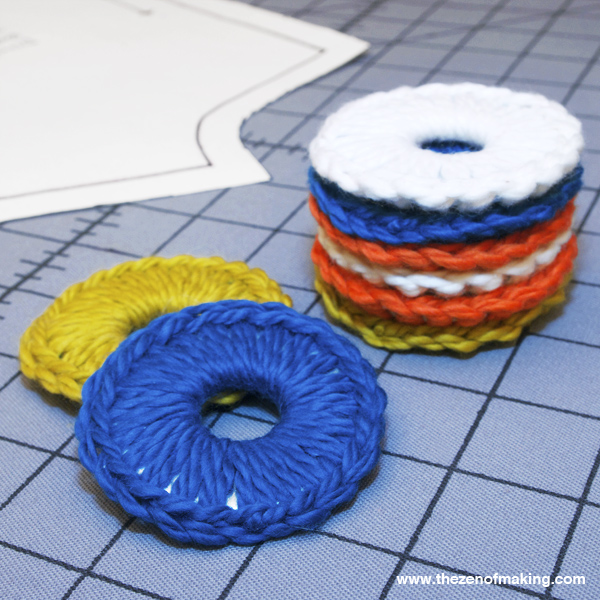
Now, I’ll be the first to admit that this isn’t exactly a new idea—tons of sewers use giant washers (or soup cans, or coffee cups, or beanbags, or bottles of booze) in place of more traditional sand-filled pattern weights every day. But, I’ve found that, in addition to making them look cute, adding a crocheted border around the edges prevents my washers from getting lost and keeps them from magically vanishing from my worktable.
Here’s what you’ll need to get started:
Please note that the links to supplies and tools that are provided below are affiliate links, and I will be compensated if you choose to make a purchase after clicking through.
Supplies:
* Large metal washers (I used ⅜" x 1½" fender washers.)
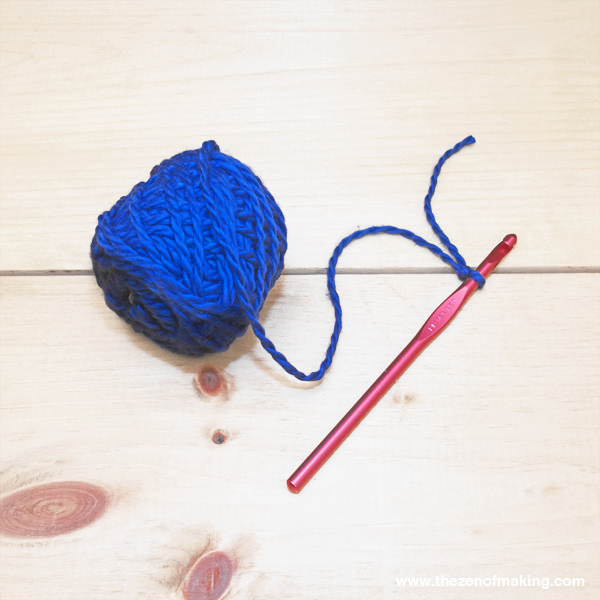
* Cotton yarn scraps, worsted weight
Tools:
* Scissors
* Darning needle
* Crochet hook, 5.5mm (US I-9)
Want to give it a try? You’ve got two tutorial choices:
Since crochet is a technique that translates really well to video, I decided to put together one of my rare (gasp!) video tutorials for this project:
(Make sure you listen for the bonus cat meows in the background!)
And, for those of you who prefer words and pictures to a how-to video (yeah, me too), here are the photo step-outs:
Part 1: Crocheting around the washer:
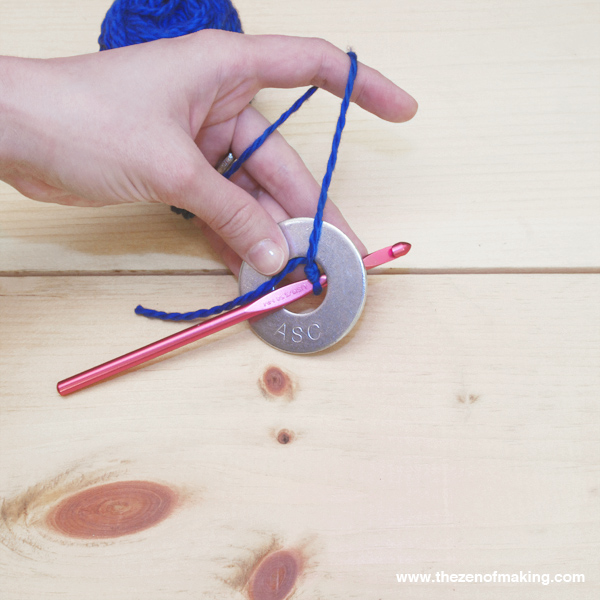
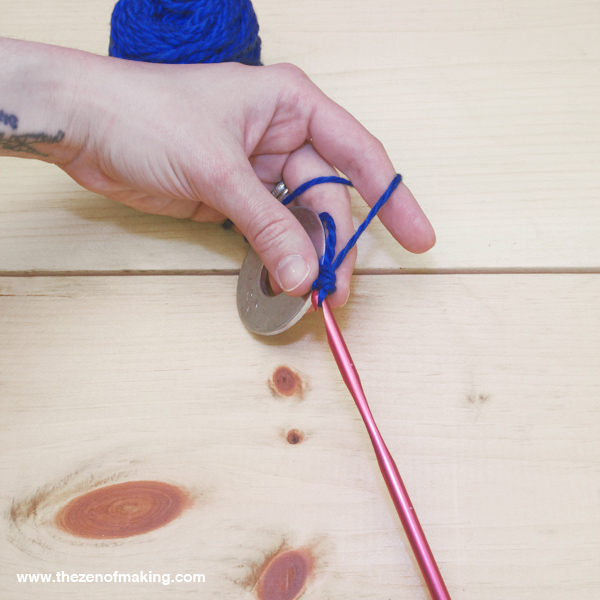
Step 1:
Make a slipknot, then insert your crochet hook into the loop.
Note: If you’re new to crochet, you can learn the basics in my Crochet 101 tutorials.
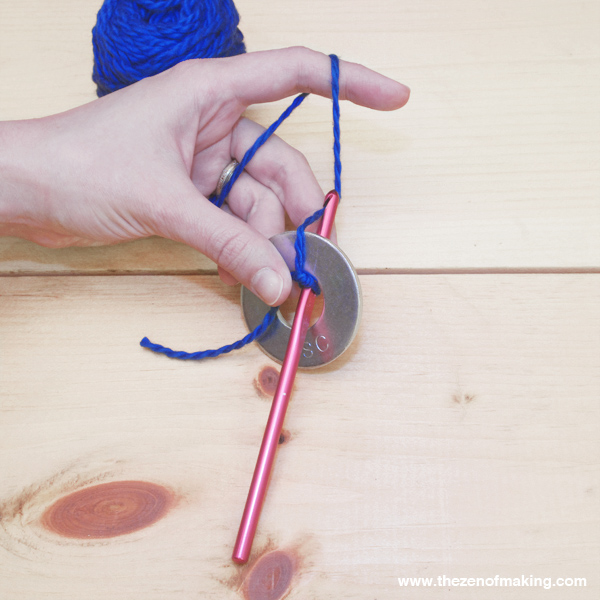
Step 2:
Insert the hook into the center hole of the washer, then grab the working yarn with the hook and pull the yarn around the outside edge of the washer and back down through the center hole.
You should now have two loops on your crochet hook.
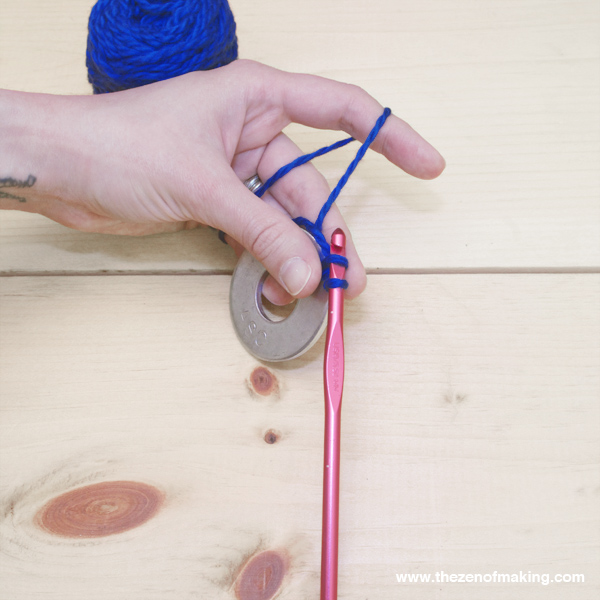
Step 3:
Grab the working yarn with your hook, then pull it through the two loops on your crochet hook.
You should now have only one loop on your crochet hook.
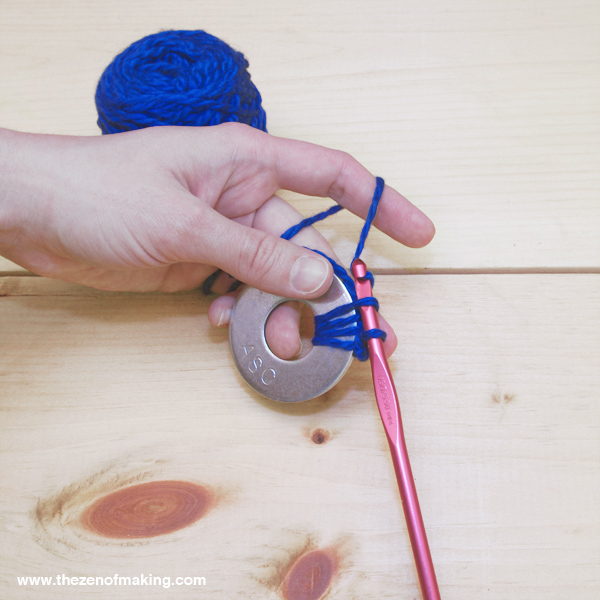
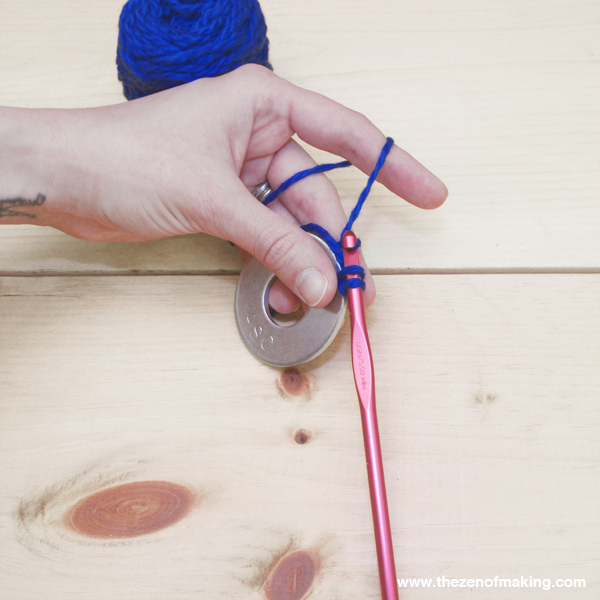
Step 4:
To make your second stitch, follow the same motions shown in steps 1-3 for the first stitch: Insert your hook into the center hole of the washer and grab the working yarn and bring it back through the center hole, wrapping the yarn around the outside edge of the washer. Next, grab the working yarn again with your hook, then pull it through the two loops on your crochet hook to finish the stitch.
Continue working single crochet stitches all the way around the outside edge of the washer.
When you’ve made it all the way around the edge, cut the the working yarn, leaving a 2-3" tail.
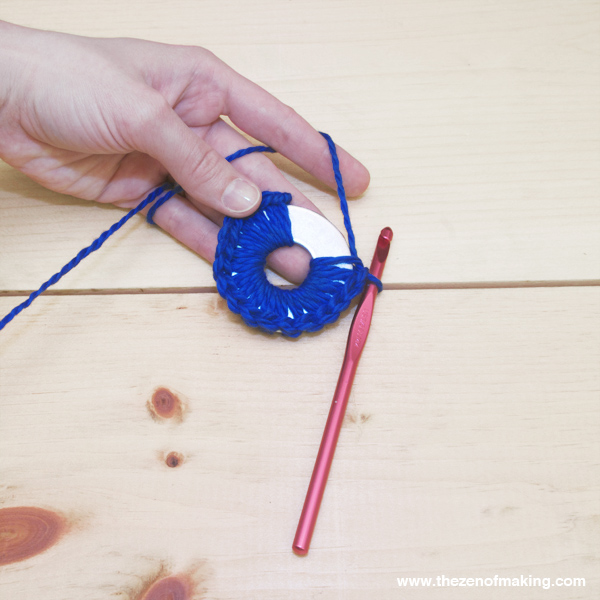
Part 2: Fastening off and weaving in the ends:
Instead of knotting off, which is hard to disguise in smaller projects, I like to use the following finishing technique to join the first stitch with the last stitch when crocheting in the round.

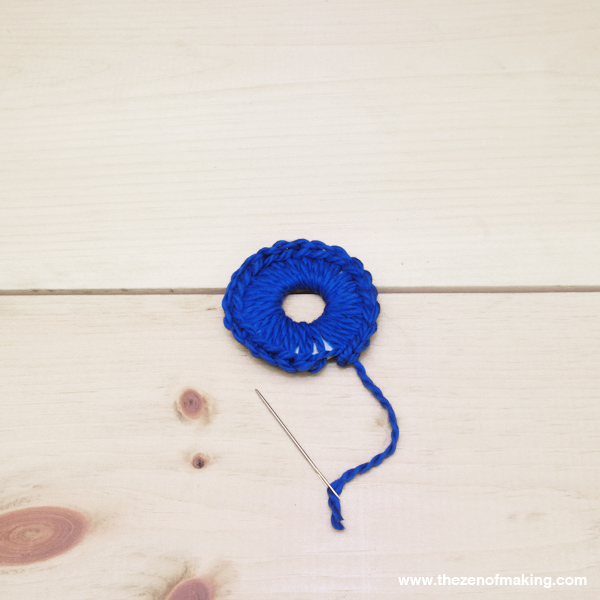
Step 1:
Remove the crochet hook from the loop.
Step 2:
Gently pull the tail of the yarn all the way through the last stitch in the round.
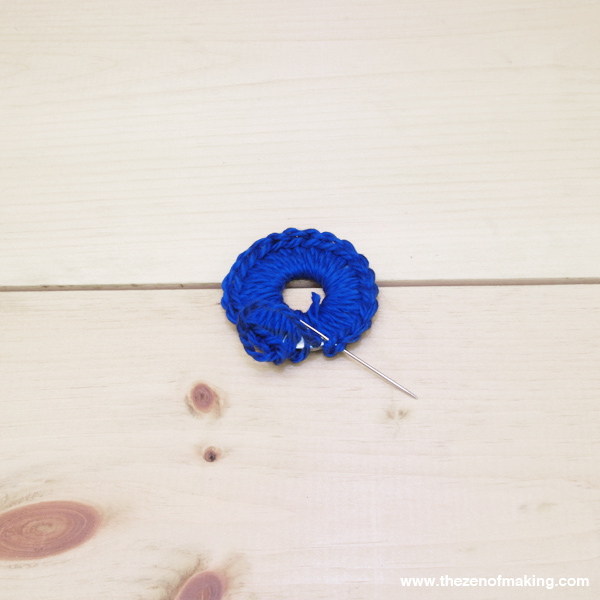
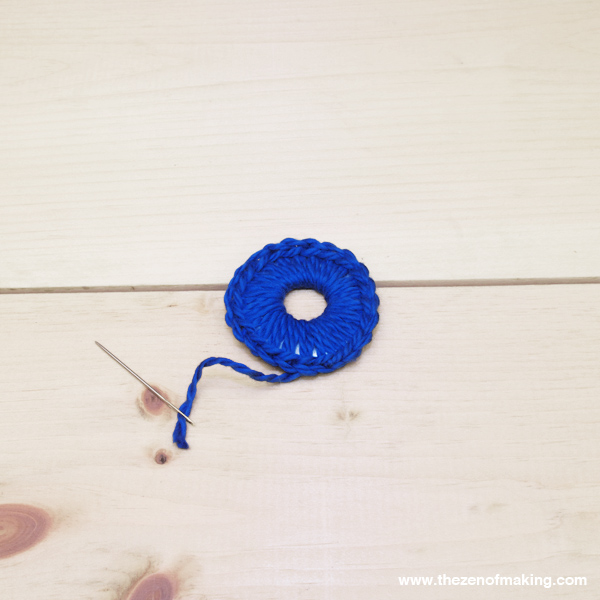
Step 3:
Thread the darning needle onto the yarn tail, then insert the needle under the two v-shaped loops at the top of the very first stitch in the round.
Pull the yarn tail through the stitch.
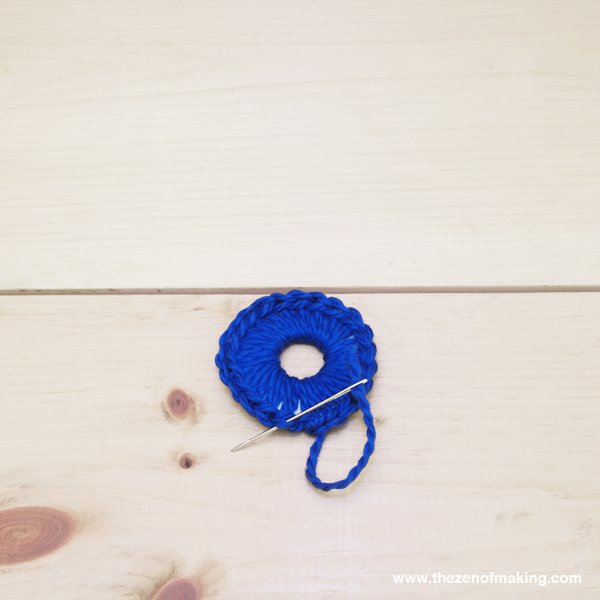
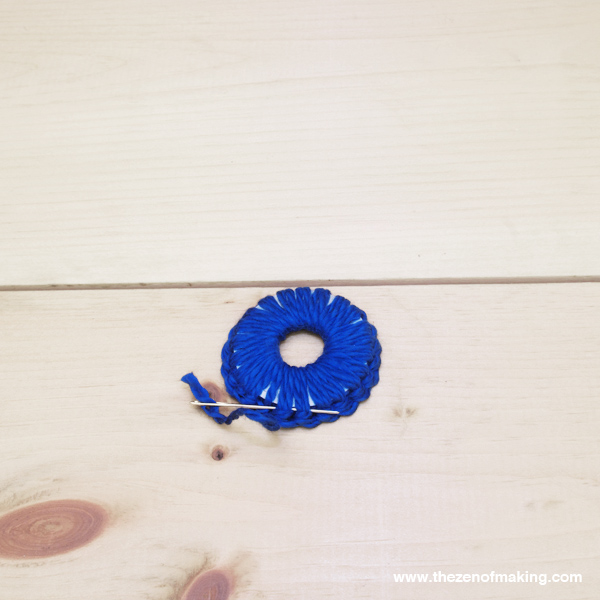
Step 4:
Insert the darning needle into the center of the final stitch in the round, then pull the yarn tail through that stitch as well.
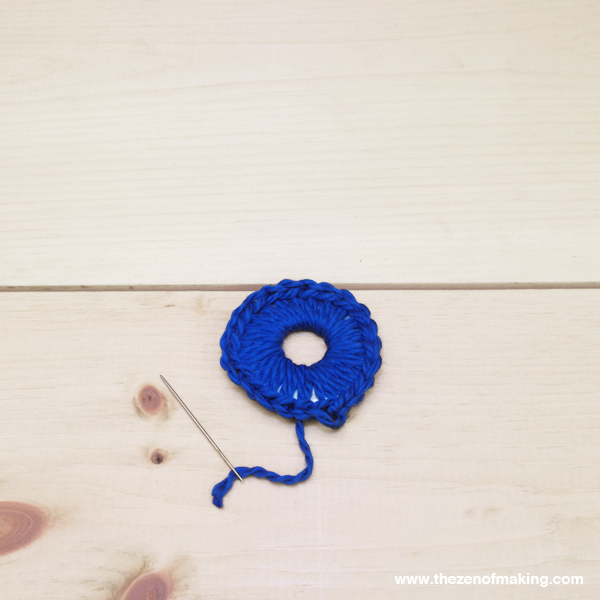
Step 5:
Gently pull the yarn tail until the loop between the first stitch and the last stitch is the same size as the other stitches in the round.
This loop should now blend in perfectly with the rest of the stitches, creating a neat, uninterrupted edge all the way around the pattern weight.
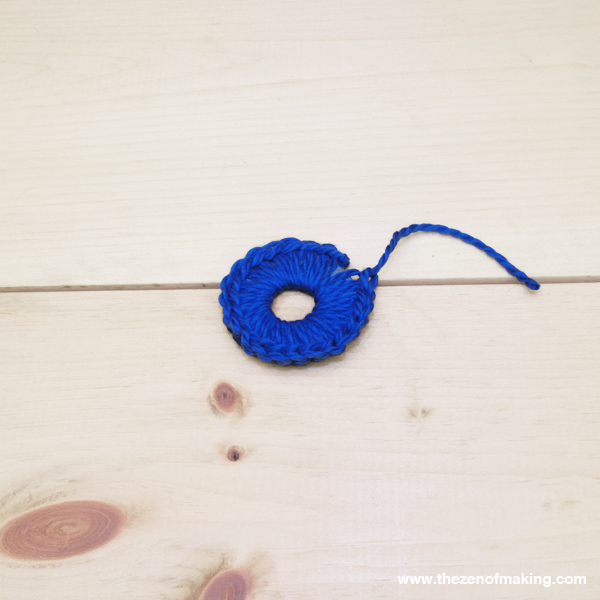
Step 6:
To finish, weave the yarn tail under a few stitches, then cut off any remaining length.
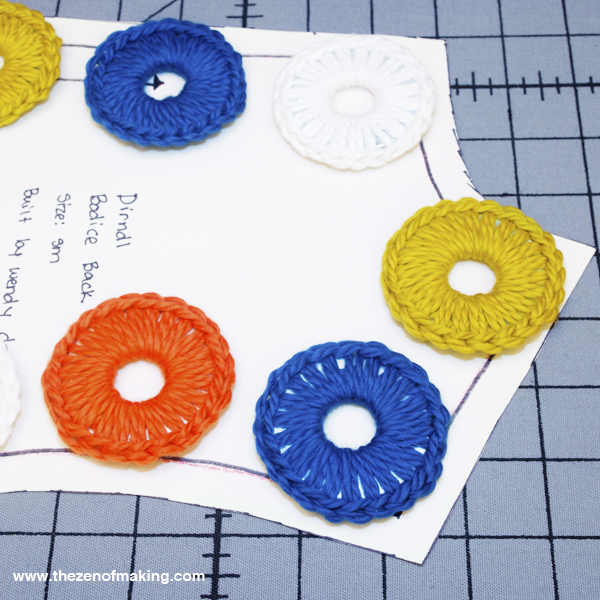
Cheap, cute, AND useful? I mean, what more could you want in a pattern weight?
Wow! Great idea! I have washers for my patterns sprayed them with krylon and it chipped off. Then I thought to wrap them yarn. Took forever. I’ll get to this ASAP!
Thanks! This project is super-quick, so you should have your washers covered in no time. :)
Great idea, Haley! I love crochet, and I love sewing, so this is perfect for me :)
I have a quick question for you (not second-guessing or trying to be narky, just curious): was there a reason why you chose to stitch the ends together and didn’t slip-stitch, bind off and then weave the ends in?
Cheers!
Thanks, Kate! (And thanks for the question, too!)
I finished the ends by sewing a loop between the first and last stitches because, in my opinion, it’s the method that looks the prettiest. ;) But, finishing with a slip stitch and weaving in the ends is also totally fine. (I just find it to be a bit more bulky, and therefore a bit more visible.)
Bottom line: There’s absolutely no structural reason that you need to finish the project the same way that I did, so you should definitely use the method that you like best. :)
Did you find one washer heavy enough to be effective? I’ve seen tutorials for fabric wrapped washers that used a stack of 4, but if single ones work, I’d rather not use a stack. Thank you!