

Make your own recycled wine bottle planter with my special Earth Day tutorial!

Supplies:
* Empty glass wine bottle, cleaned and dried
* Thick rubber band that will fit snugly around the bottle
* Wet/dry sandpaper, 1 sheet coarse grain and 1 sheet fine grain
* Tealight candle
* Paper towel
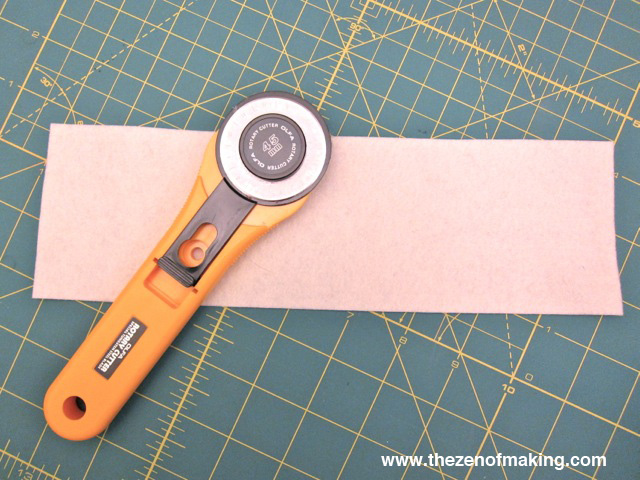
* Wool felt, 10″ x 3″ rectangle
* Cotton sewing thread
* Baked clay pellets, 1 cup
* Potted herb of your choice (I used rosemary)
* Hydroponic fertilizer
Tools:
* Glass cutter
* Ruler
* Lighter or matches
* Close fitting household cleaning gloves
* Safety goggles or glasses
* Protective face mask that covers nose and mouth
* Sewing machine (you can also sew by hand)
Or, if you want the look without all the work, you can always pick up a recycled Growbottle kit! (No judgement here—all green is good green!)
**Please note that the links provided above are affiliate links, and I will be compensated if you choose to make a purchase after clicking through.**
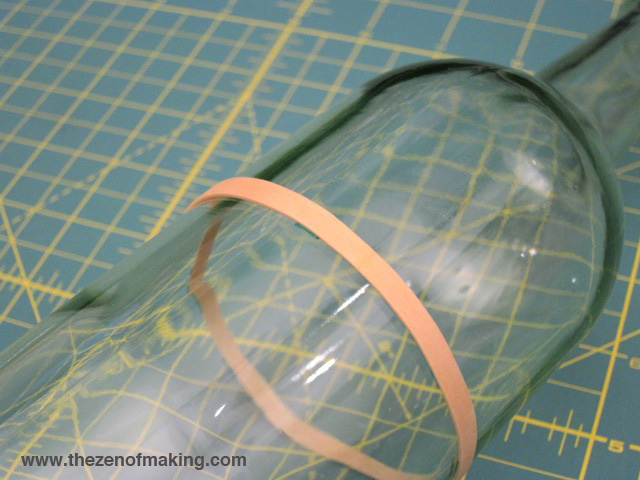
Step 1
Measure 5″ up from the bottom of the wine bottle, then use a rubber band to mark the measurement.
Once your line is marked, go ahead and put on your safety goggles and gloves. You’ll want to wear them through step 6.

Step 2
Using your glass cutter, carefully but firmly score a continuous line around the bottom edge of the rubber band.

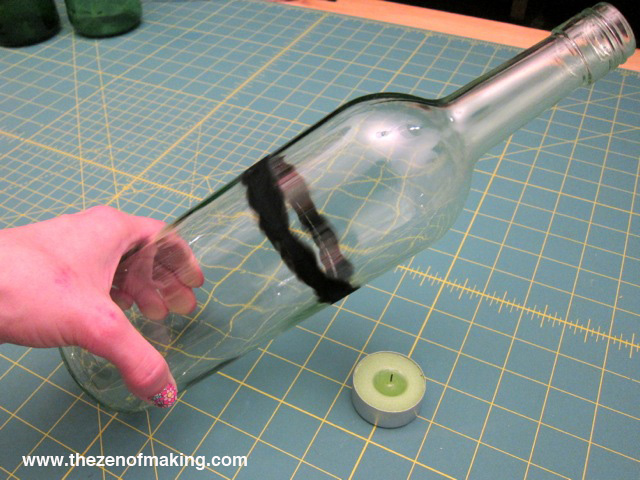
Step 3
Use a candle to heat up the line you just scored. To increase the temperature of the glass sufficiently, you’ll need to hold the bottle very close to the frame and turn it slowly and steadily. Don’t be alarmed if you hear popping or cracking noises as the temperature of the glass rises.
When you’re done, you should see a dark mark all the way around the bottle.

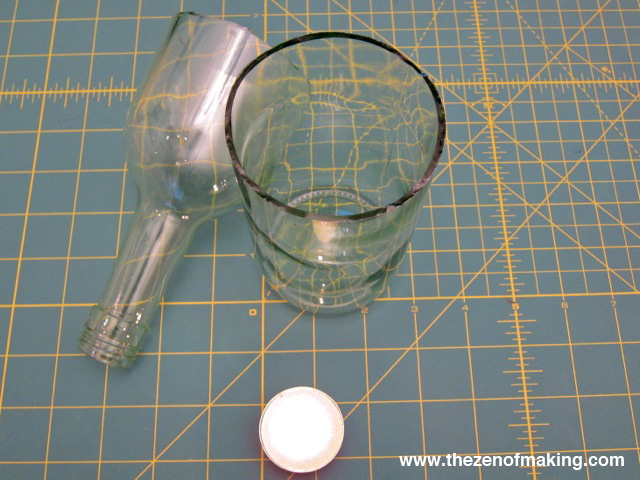
Step 4
While the glass is still hot, submerge the bottle in a sink filled with ice cold water. Because of the drastic temperature change, the top and the bottom should separate right away. If they don’t, try tapping the bottle firmly on the bottom of the sink.
If you’re having trouble getting a clean cut, your scoring might not be deep enough, or your glass might have cooled. Before picking up the glass cutter again, try another round or two of heating the glass and submerging it in cold water.
Step 5
Use a paper towel or cloth to dry the two sides of the bottle, carefully cleaning the black marks off of each side. The cut glass edges will be very sharp, so make sure you’re wearing gloves and paying attention.
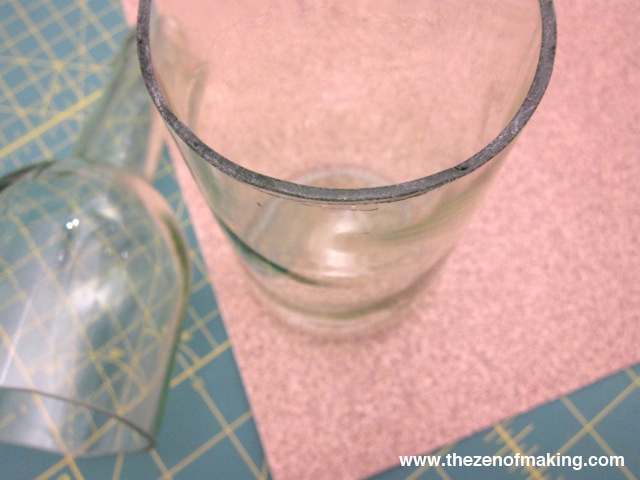
Step 6
It’s time to sand the rough edges on each side of the cut bottle.
Put on your face mask (you should already be wearing your goggles and gloves). Then, standing over the sink with a trickle of water running, use your course grain sandpaper to smooth the sharp edges around the top and the bottom pieces of the bottle, keeping the place that you’re sanding wet at all times. Continue sanding until both sides of the bottle are smooth to the touch, and there are no sharp edges. Smooth away any remaining rough spots with your fine grain sandpaper.
When you’re done, the entire cut edge should look dull—if you see any shiny spots, keep sanding.
Note: Unless you’re using a grinder, your edges are never going to be perfectly straight and flat. Embrace the imperfection!
Caution: Glass dust can be extremely hazardous to your health if inhaled. You should wear a mask and goggles to protect your eyes and lungs while working, and always sand glass using water, which cuts down on the amount of glass dust that is released into the air.
Step 7
Set your glass bottle aside, then cut a felt rectangle that is 10″ x 3″.
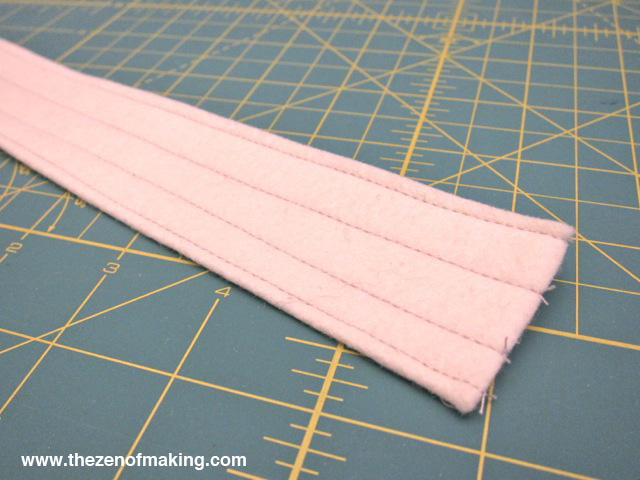
Step 8
To create the wick, fold the felt rectangle in half length-wise, then use your sewing machine to stitch the two sides together along the edge opposite the fold. Once the fold is secure, stitch two or three additional lines down the length of the felt strip.
Note: If you’re using a plant that requires a high volume of water, you may want to use thick cotton or braided polyurethane yarn. If you choose cotton, you will need to replace the wick as needed, as it will eventually rot.
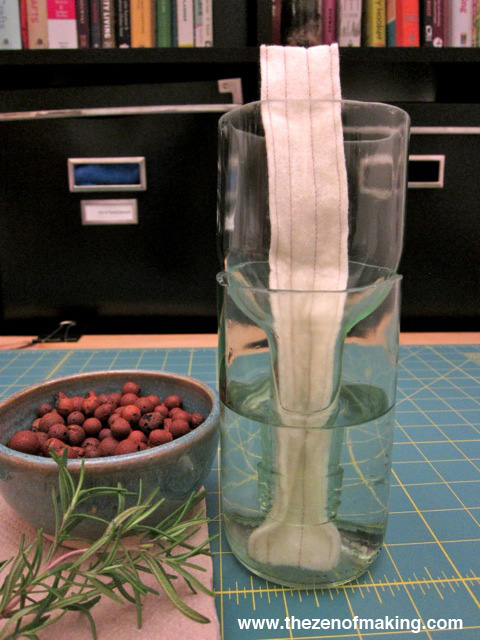
Step 9
Wet the felt wick thoroughly, then insert it into the top part of the wine bottle, fishing the end through the neck of the bottle so that it sticks out about an inch below the opening. Place the top half of the wine bottle into the bottom half. (You may fill the bottom with water now or wait until after you’ve added the plant.)

Step 10
Fold the extra length of the wick over to cover the opening between the top and bottom of the bottle. The end of the strip should now reach just below the top of the rim.
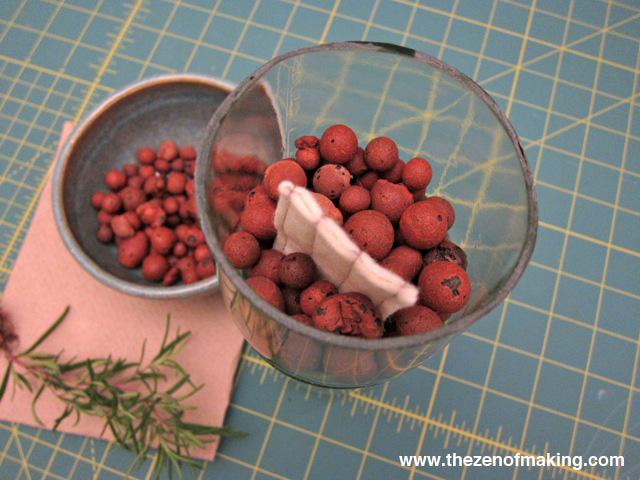
Step 11
Rinse your clay pellets thoroughly to remove any dust, then fill the planter slightly less than halfway, feeding the wick up through the middle.
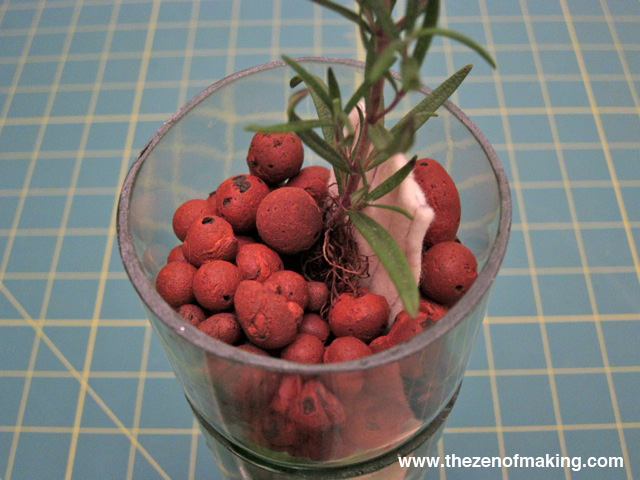
Step 12
Clean any dirt off of the roots of your plant, then insert it into the center of the planter.

Step 13
Fill the planter the rest of the way with clay pellets, securing the plant in place. If you haven’t already filled the bottom of the planter with water do so now.

Step 14
Your plant doesn’t have any soil to provide its nutrients, so don’t forget to add some hydroponic fertilizer to the water to keep it healthy!
I hope you enjoyed this bonus Sunday project! Happy upcycling and happy Earth Day!
Shared on Find Your Direction!
What a fantastic idea! I've been saving wine bottles to recycle into new fabulous things but haven't yet been brave enough to try cutting the glass. Thanks so much for sharing your link at 100directions.com
I need to try this. I've done it with plastic bottles but glass is so much classier plus I've got plenty of wine bottles :? Now what to do with all the corks!
Create coasters!!
Great idea. I have never cut glass before but now I know how :)
No problem! Glass cutting is easy–it just takes a little practice. :)
If I ever manage to save enough corks, I'm going to make a cork bath mat. Alas, I keep using my corks for other crafts, so I never seem to have enough of them on hand!
Have you tried contacting a restaurant near you that serves finer wines to get the corks? I have been told that if you are willing to supply a bag or container they can easily be tossed into, many will save them for you. Just make sure to return to pick them up! :)
Love the bath mat idea, but can’t do it myself because of my furry housemates. And no, I don’t mean my husband and son!
Keep doing what you do cause you do it so well!
Happy to help!
Oh, I have them! I have a Pinterest board on ideas what to do with all my $2 buck Chuck wine corks. I just found your iphone cover with accented corks- it's pinned!
What a brilliant idea, Haley. I've never-ever seen anything like this. I would love to have to nerve to cut a bottle. We shall see! Great inspiration. (fantastic tutorial and photos, as always)-Molly
I love this idea! I definitely have some plants that will benefit from this kind of planter.
This is so great! I’m going to have to try this sometime! Thanks!
Thanks for the great tutorial. I have made my take on this planter here:
http://cobrainnovations.blogspot.com/2013/03/wine-bottle-hydroponic-planter-tutorial.html
I think the boiling water cutting method leads to more consistent results.
The boiling water method does look like it yields a nice clean cut–I’ll definitely try it out. Thanks for sharing!
Question: What about starting from a seed in the hydroponic bottle, rather than transplanting a plant from a soil environment. Any advice?
I haven’t tried starting seeds directly in the hydroponic bottle (and I’m certainly not an expert in hydroponic gardening), so I’m afraid I can’t offer much help. It looks like these folks had luck creating a greenhouse-like environment by covering the tops of the bottles with a plastic wrap and spraying the clay pellets daily with a water bottle: http://mywildthingandtwinkletoes.blogspot.com/2012/05/visual-guide-make-your-own-hydroponic.html. If you give it a try, I’d love to hear if it worked for you. :)