

My father-in-law is a violin maker, and he always has a giant box full of beautiful pieces of scrap wood in his shop. For years, I have dreamed of turning those extra pieces into my own handmade wooden buttons. So, when Jeremy and I visited his family in Vermont earlier this month, I finally took the opportunity to learn how to make them, and now I’m going to teach you! My friends, your days of shilling out huge sums of money for expensive wooden buttons are numbered. :)
Don’t panic if you don’t have power tools!
I made my buttons in a full wood shop with any tool that I could possibly need at my disposal. But, in the “Tools” list below, you’ll find both the tool that I used AND a more accessible alternative listed after it in parentheses. It may take a little longer to make buttons without power tools, but you can definitely achieve similar results with tools that you probably already have around the house!
**I’m sure it goes without saying, but whenever you’re working with any kind of tool or chemical, please take the proper safety precautions and wear the appropriate protective gear.**
Supplies:
* Wood scraps, cut down to manageable sizes
* Tung oil or other wood stain/sealant
* Cotton rags
Tools:
* Band saw (Alternative tool: handsaw or hacksaw)
* Drill press (Alternative tool: cordless drill or hand drill)
* Hand plane (Alternative tool: sandpaper)
* Round file (Alternative tool: sandpaper wrapped around a ballpoint pen)
* Hand clamps (we used Quick Grips)
* Safety glasses
* Try square or small t-square
* Ruler
* Pencil
Step 1
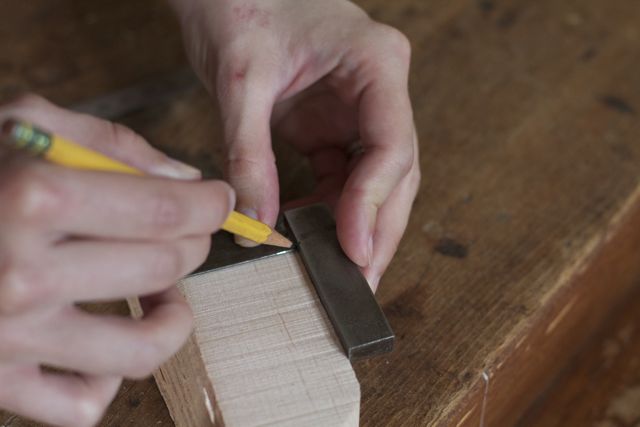
Select a wood scrap that is large enough for the buttons that you plan to make, and cut a straight edge along one side of the wood if there isn’t one already. (You’re making a square button, so as long as you start out with a straight edge on at least one side, the try square will make sure that the rest of the sides line up properly.) Line up one side of the try square against the straight edge. Using the second side of the try square as a guide, draw a perpendicular line across the wood scrap, creating a right angle.
Step 2
Use a saw to carefully cut along the line you just drew, creating a straight edge. If you’re sawing by hand or want to be extra-careful, you can use hand grips to hold the wood steady.
Step 3
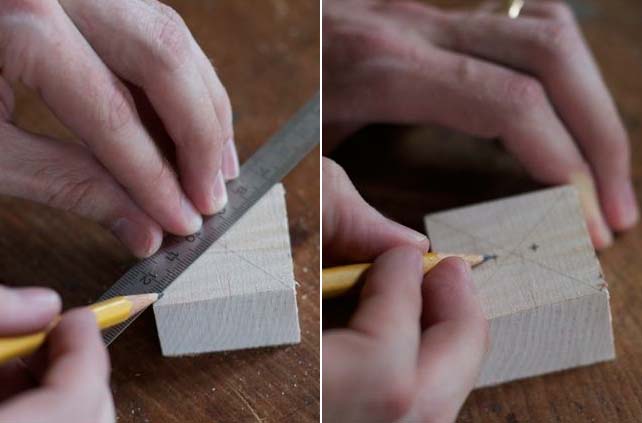
Now is the time to decide how big your button will be. Using a ruler to measure along the edge you just cut, make a mark at your desired button width. Set one edge of the try square against the newly cut edge, lining up the second edge of the try square with the width mark you just made. Then, using the second edge of the try square as a guide, draw a straight line away from width mark down the full length of your piece of wood, creating a right angle with the edge that you cut in step 2.
Step 4
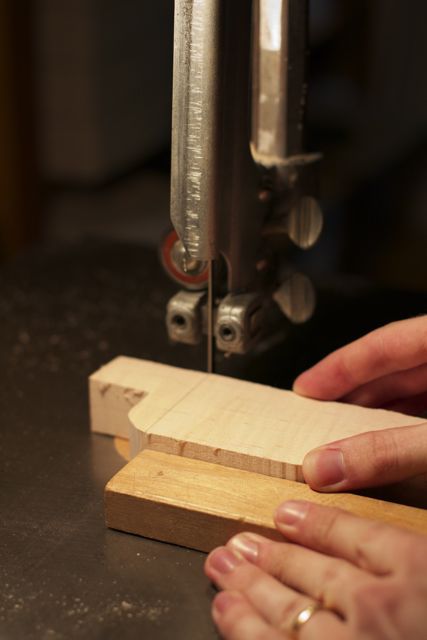
Using a saw, cut a straight edge along the line you just drew.
Step 5
Like you did in step 3, mark your desired button width along the edge you just cut (measuring away from the edge you cut in step 2). Rest one edge of the try square against the line you just cut, lining up the second edge of the try square with the new width mark. Draw your final line across the piece of wood, measuring all edges before you cut to make sure that your square is actually square. Trim the edges if needed.
Step 6
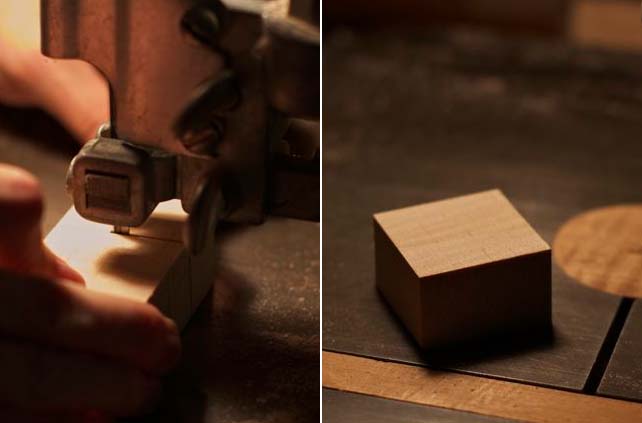
Saw along the line you just drew. You should now have a rectangle with a square end, which you will later slice to make the individual buttons.
Step 7
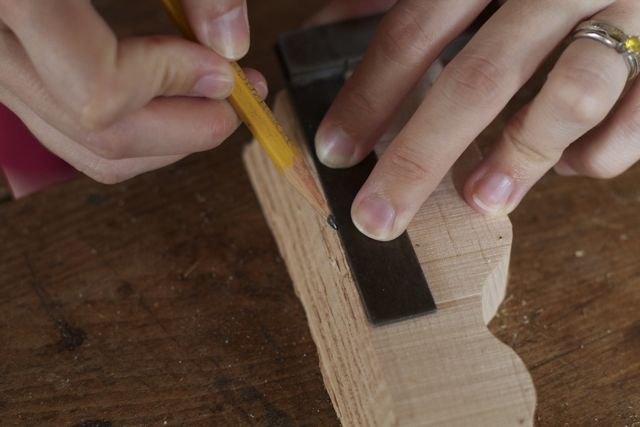
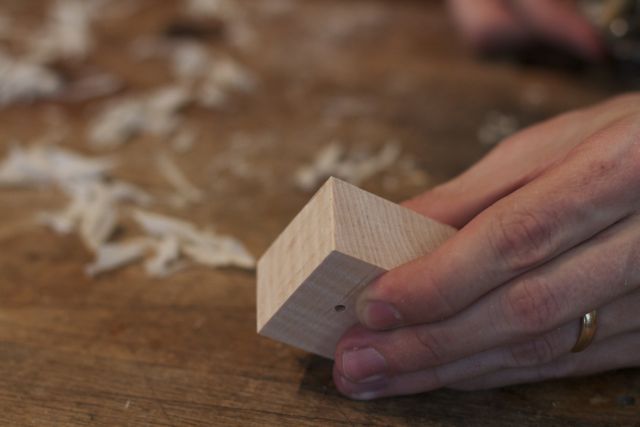
Position your button holes. I did this by drawing diagonal lines from corner to corner on my square, making two evenly spaced dots on either side of the center.
Step 8
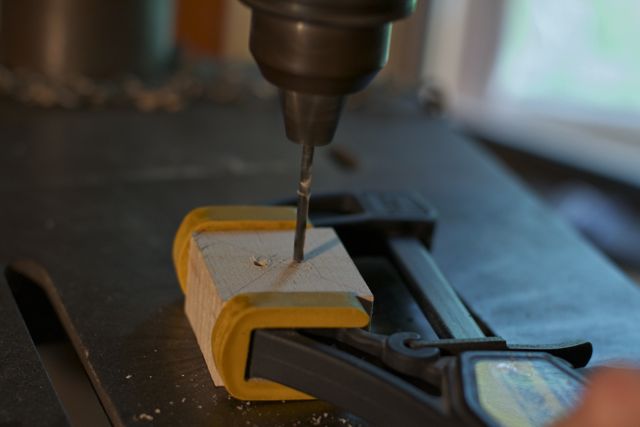
Using a bit size that makes sense for your buttons, drill the button holes through the wooden block. You will definitely want to use hand grips to hold the wood, especially if you’re making smaller buttons.
Step 9
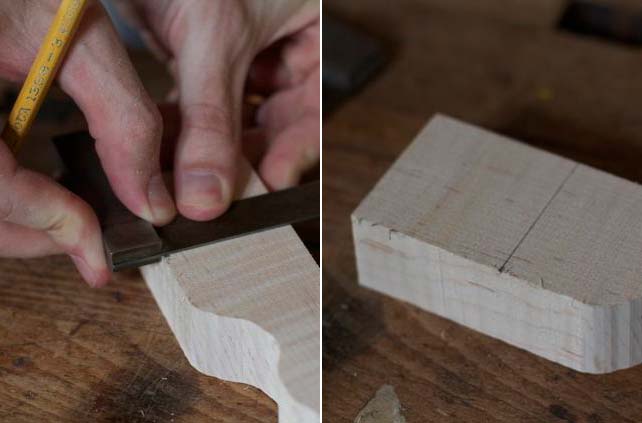
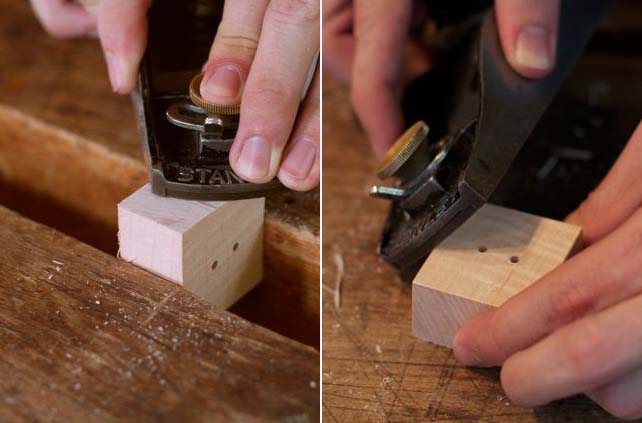
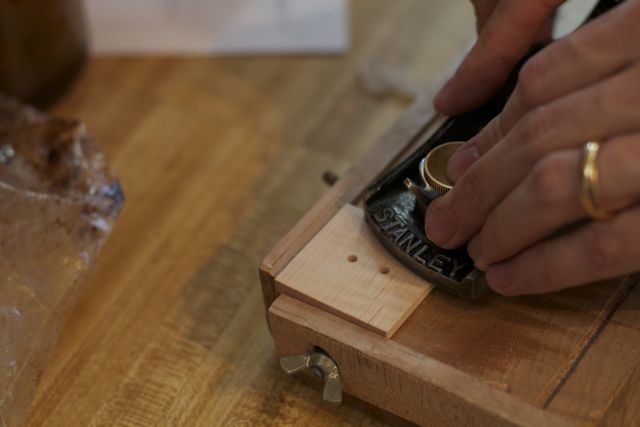
Using a hand plane or sandpaper, refine all sides until the block is completely smooth, then round the corners slightly so they won’t poke or snag when you use them.
Step 10
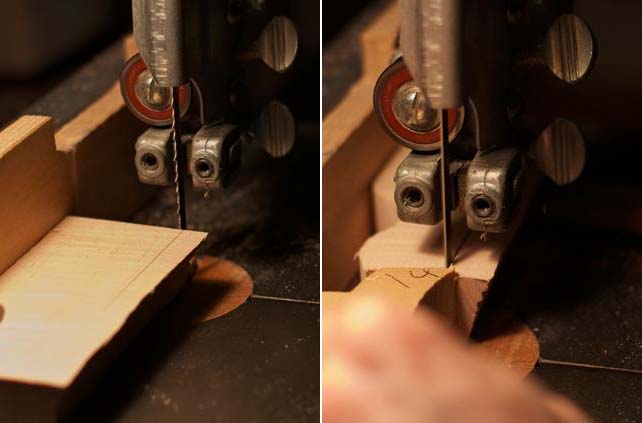
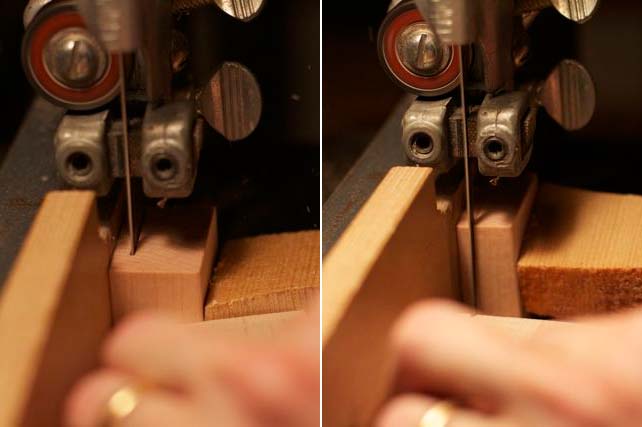
Use a saw to slice the buttons to your desired width, cutting with the grain and making sure that the buttons are thick enough that they won’t be fragile. Again, you’ll want to use hand grips if you’re sawing by hand.
Step 11
Using a hand plane or sandpaper, thoroughly smooth the sides and edges of the buttons after you cut them.
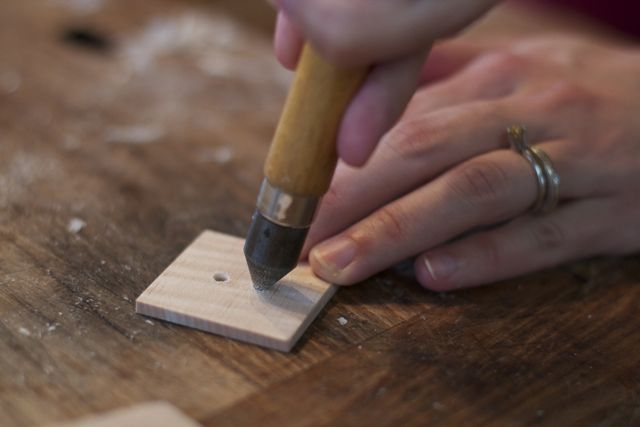
Step 12
Using a file, round the edges of the button holes so they won’t cut the thread when you use them.
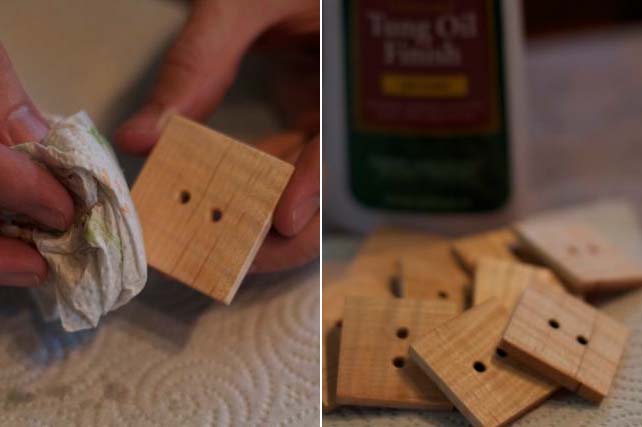
Step 13
With a cotton cloth, rub tung oil (or your favorite wood stain/sealant) on your finished buttons to seal them and bring out the wood grain.
Step 14
Add additional layers of oil/stain/sealant as desired. Allow the sealed buttons to dry for 24 hours (or as directed on the sealant package) before using them.
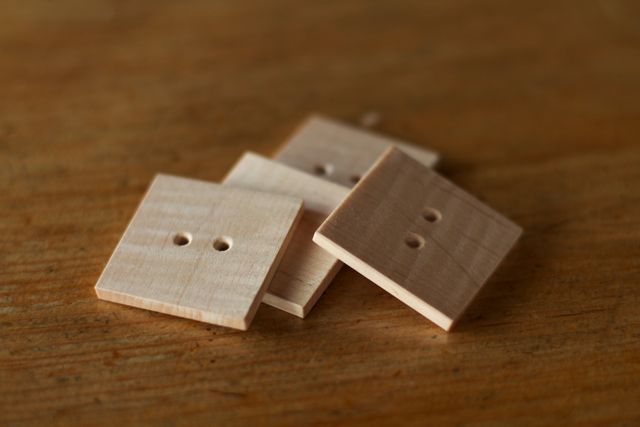
Squee! Wooden buttons!
thanks for a great tutorial – they look lovely !
superbe j aime a plus
very cool.