
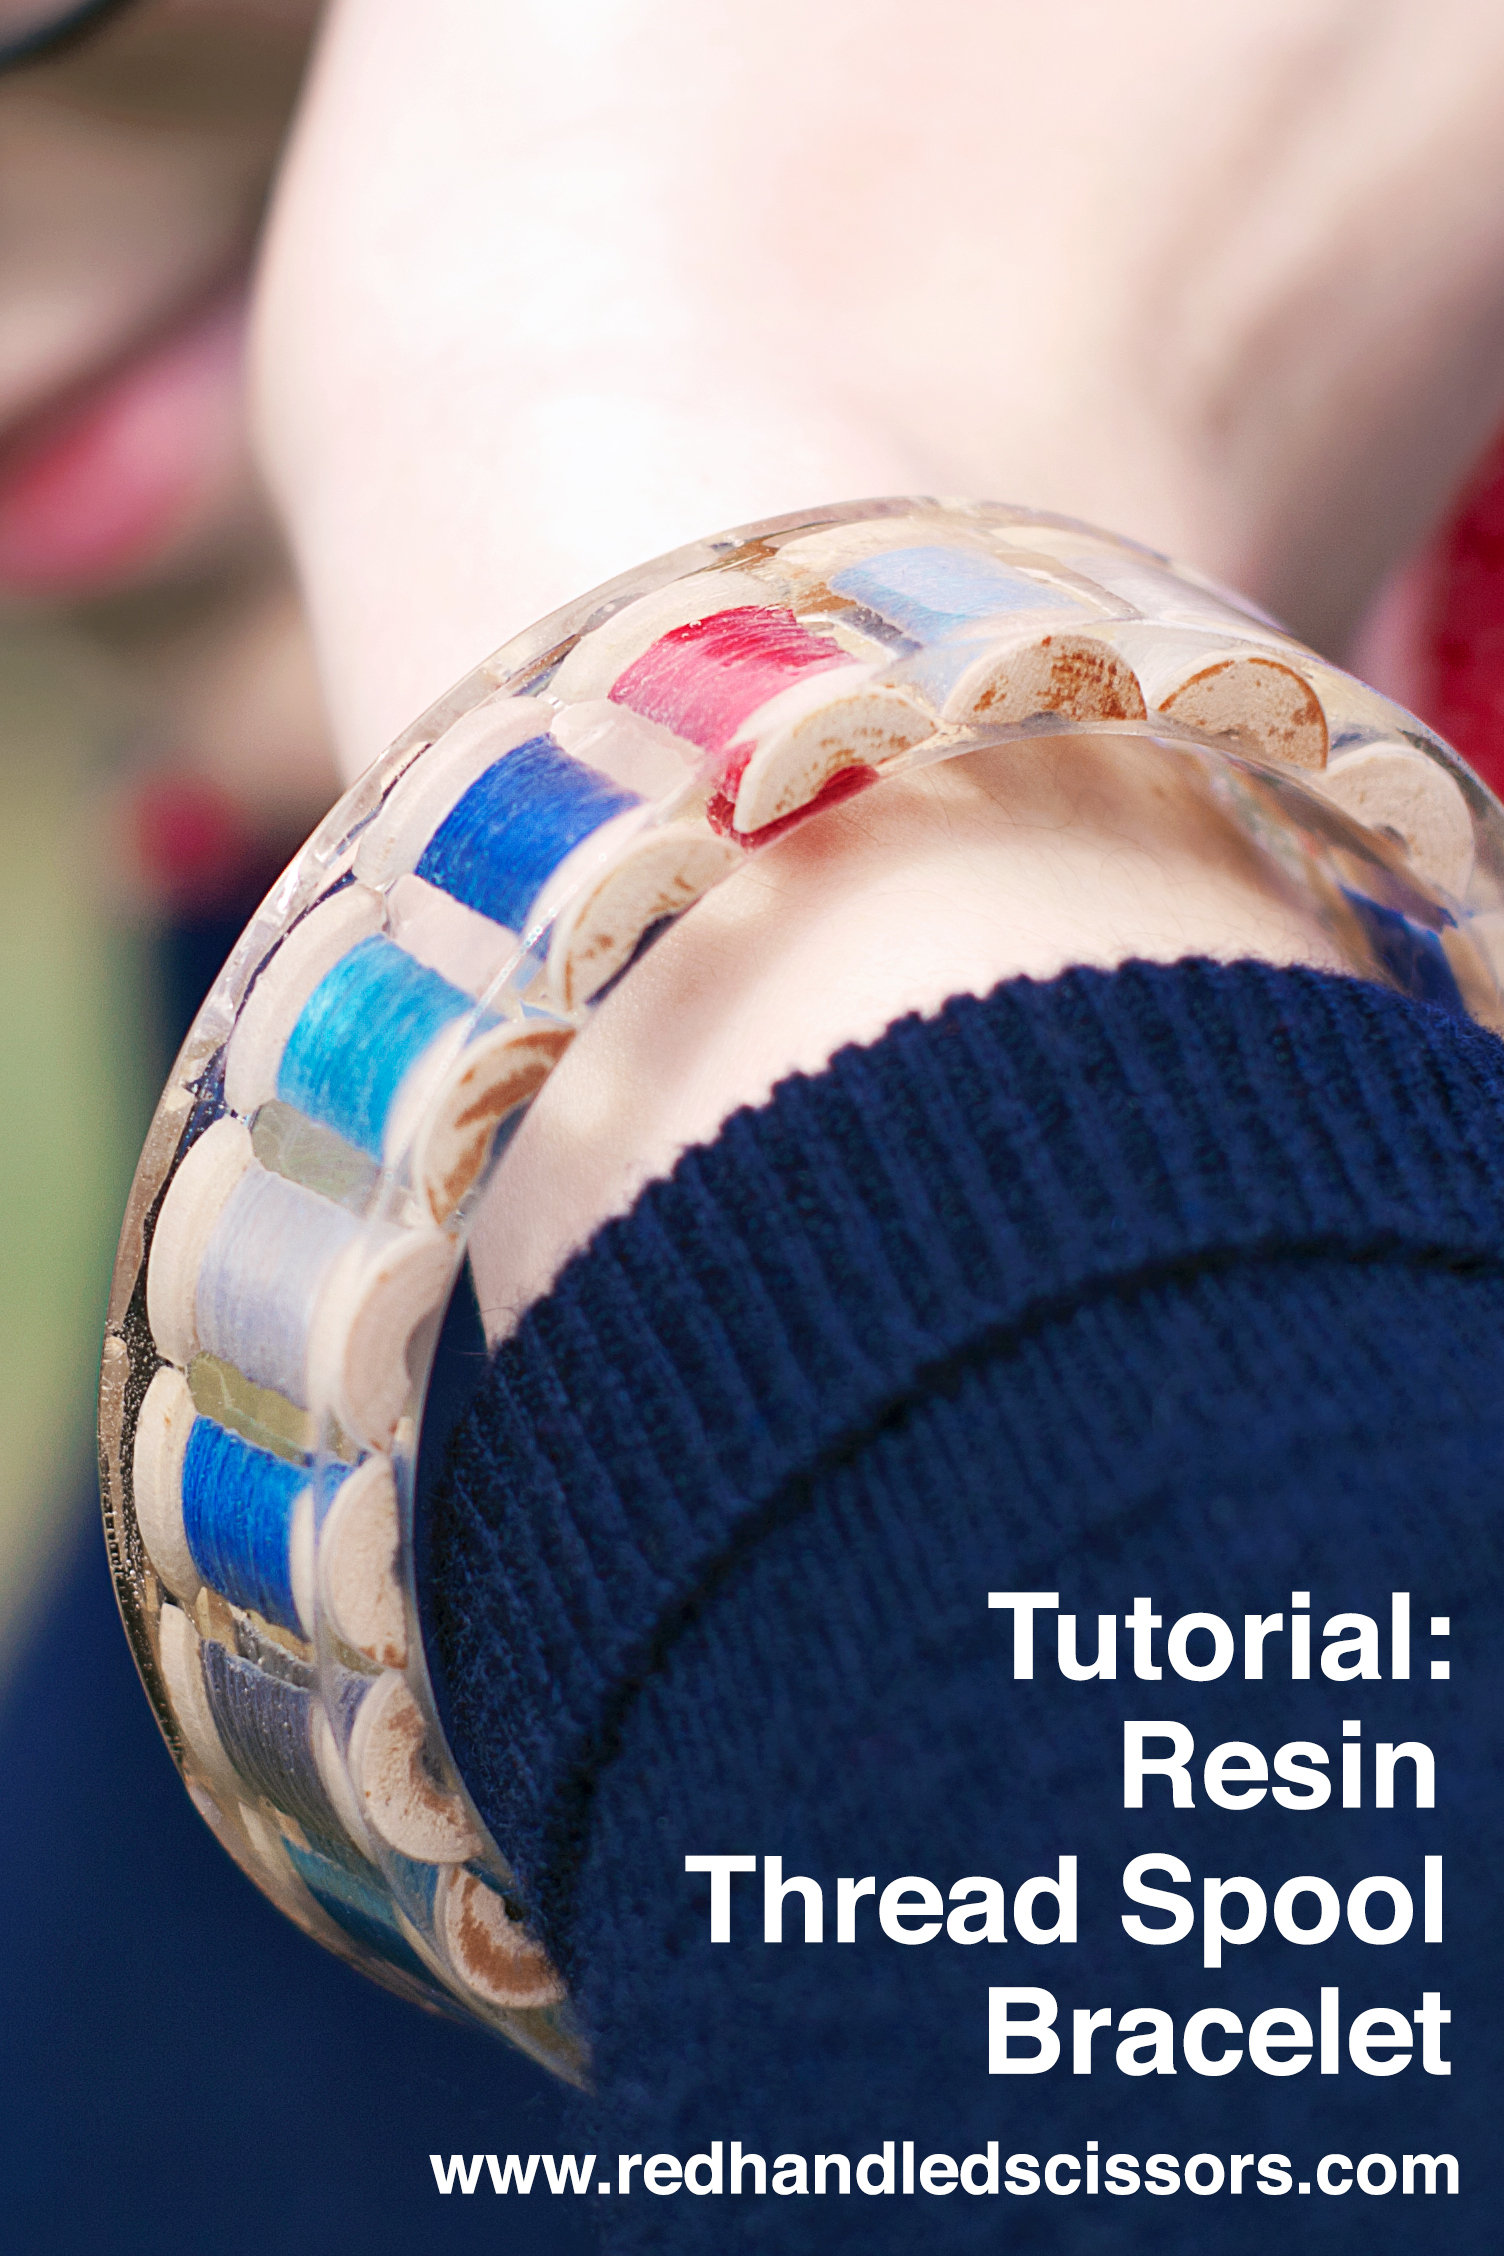
On my desk sat a jar of mini wooden thread spools, a jewelry resin kit, and a huge list of other projects that I was actually supposed to be working on. So, clearly, stoping to design a resin thread spool bracelet was the only logical response, right? Right. (I’m glad you’re with me on this one!)
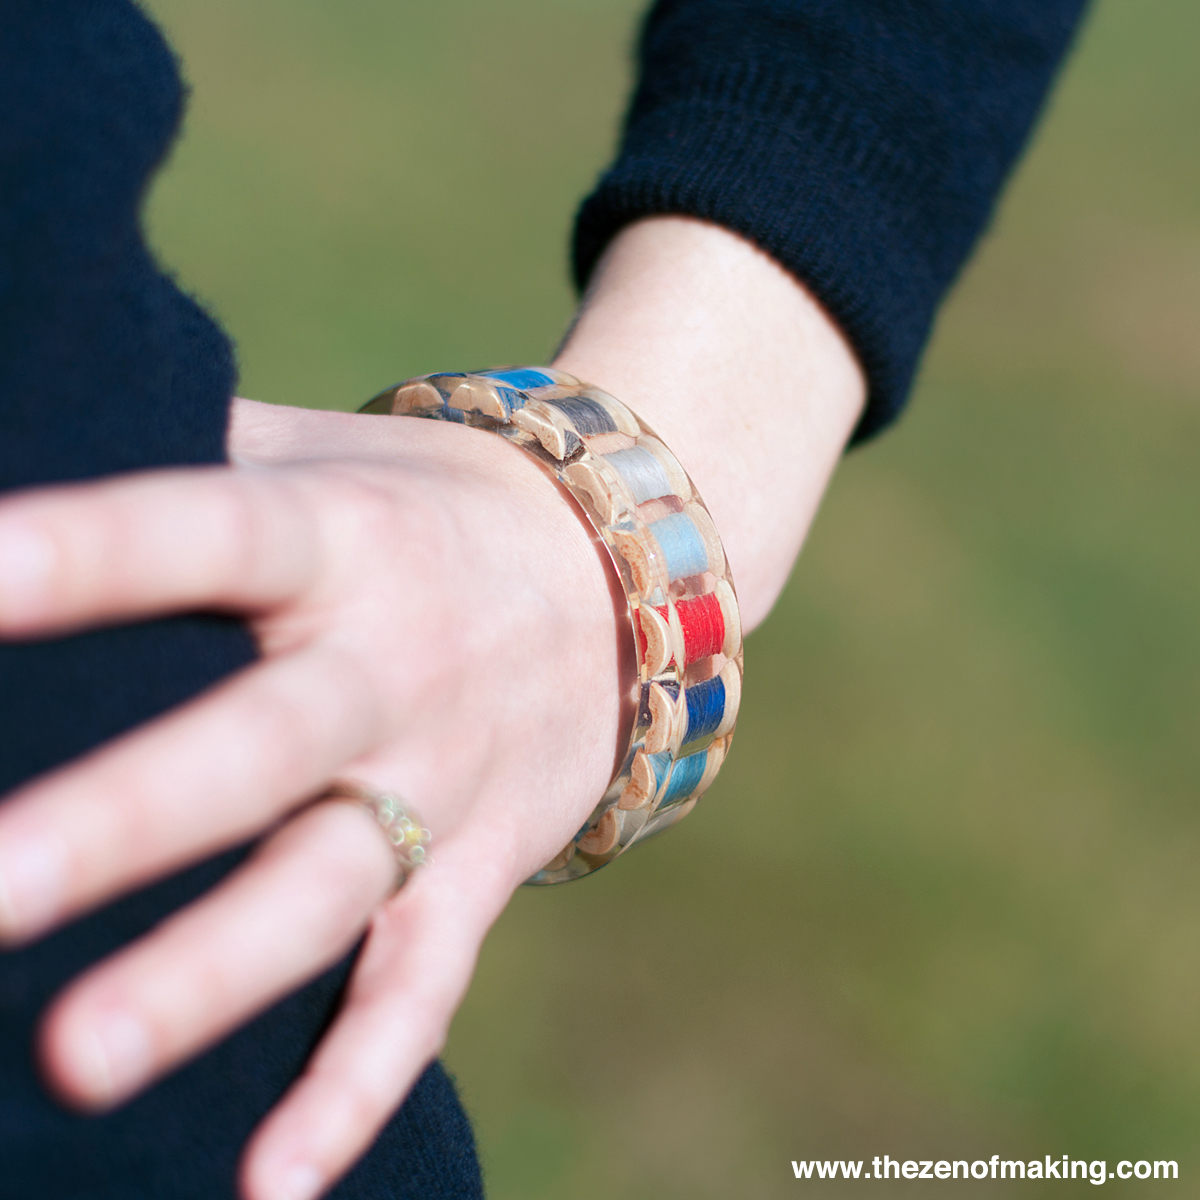
Looking for a handmade gift idea for the sewers and stitchers on your list? This sewing-themed bangle bracelet is sure to blow some minds and warm some hearts!
As someone who is primarily a fabric and fiber crafter, I am still both utterly fascinated by and more than a little bit afraid of the idea of encasing items in resin. And, because I never do anything halfway, I decided that my first really big project would involve encasing many, many individual pieces of thread-wrapped wood in a bangle bracelet, which presented the danger of releasing air bubbles into the resin and ruining my entire project if I didn’t prepare them properly. (Fun fact: As you might expect, in addition to releasing bubbles, wood also floats in slow-hardening resin!) Luckily, I’d done quite a bit of research when writing my resin sewing thread and embroidery floss pendant tutorial, so I felt pretty confident going in. And now, having dodged the difficulties and found the fixes, I’m ready to walk you through the entire thread spool bracelet-making process in this tutorial!
A little heads up before you get started: Beginners can absolutely make this resin thread spool bracelet, but this is one of those projects where you simply can’t cut corners and end up with a bracelet that you’ll be happy with. You’ll need to carve out a chunk of uninterrupted time away from kids, partners, dogs, and cats when you’ll be able to pay attention to both the instructions and the resin.
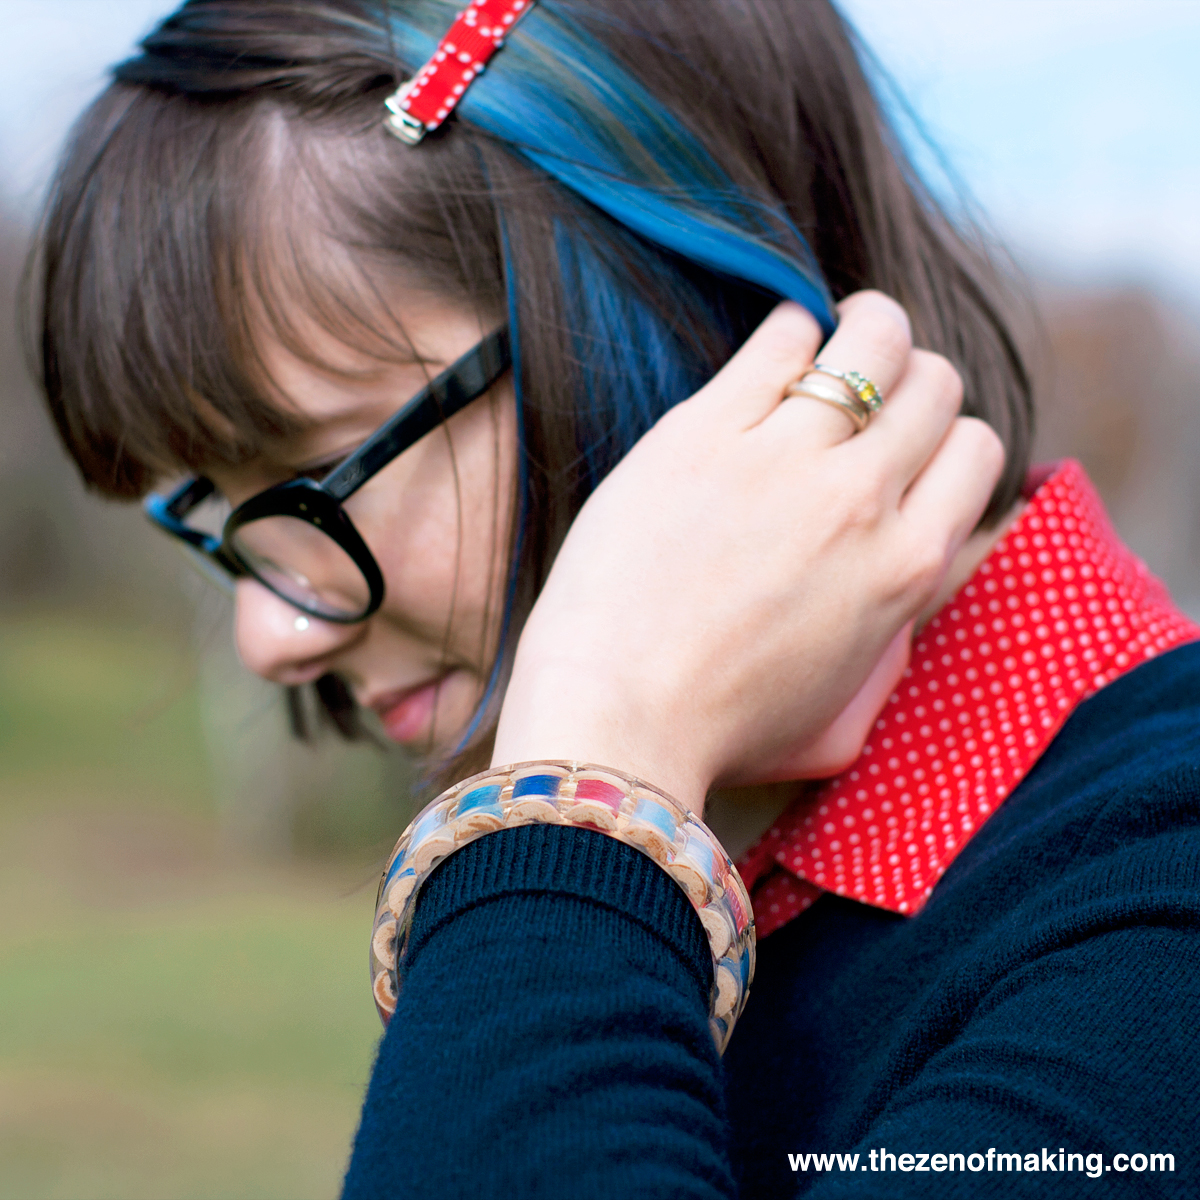
(Can I also just say that my hair dye game was really on point in the photo above? It only looked like that for about 24 hours total, but those 24 hours sure were magical.)
SAFETY NOTE:
Using casting resin isn’t just making, it’s SCIENCE. Mixing resin and hardening agents together causes a chemical reaction, and this reaction can be dangerous. (We’re not talkin’ Mod Podge, my friends. This is the real deal.) Whenever you work with resin, make sure you do so in a well ventilated area that’s away from pets and kids, and be sure to follow the instructions on the package to the letter. Wear gloves. Wear a mask and eye protection if you need to. Be smart and be safe.
Please note that the links to supplies and tools that are provided below are affiliate links, and I will be compensated if you choose to make a purchase after clicking through.
Supplies:
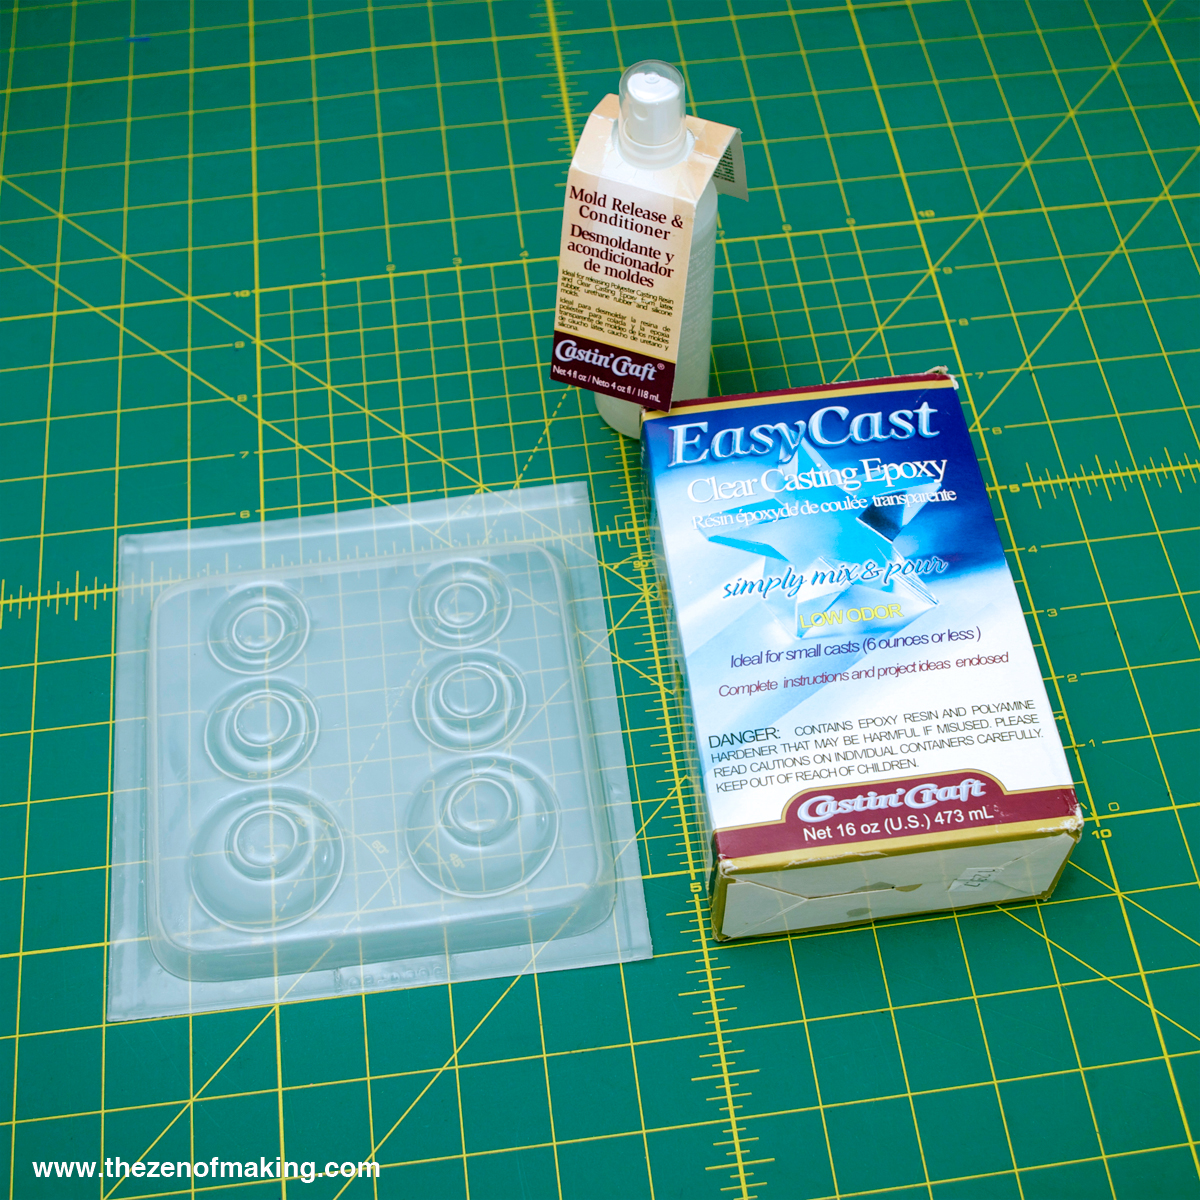
* Epoxy resin, clear formula for crafting or jewelry-making (See safety note above. Take all necessary precautions and wear proper protective gear when working with resin.)
* Mold release and conditioner
* 9 mini wooden spools, ⅝" tall x ½" diameter
* Spray acrylic sealer or Mod Podge
* Colorful thread or embroidery floss
Tools:
* Bangle bracelet resin jewelry mold, ¾" deep, 2⅝" internal diameter, ⅜" thick
* Resin mixing cups, stir sticks, and brushes set
* Nail file with shine and buff surfaces or ultra-fine sandpaper
* Sandpaper, fine grit
* Detail paintbrush
* Kraft paper or newspaper to protect your worktable
* Masking tape
* Hacksaw
* Needle-nose pliers
* Thread snips
* Straight pin or toothpick to position the items in the resin
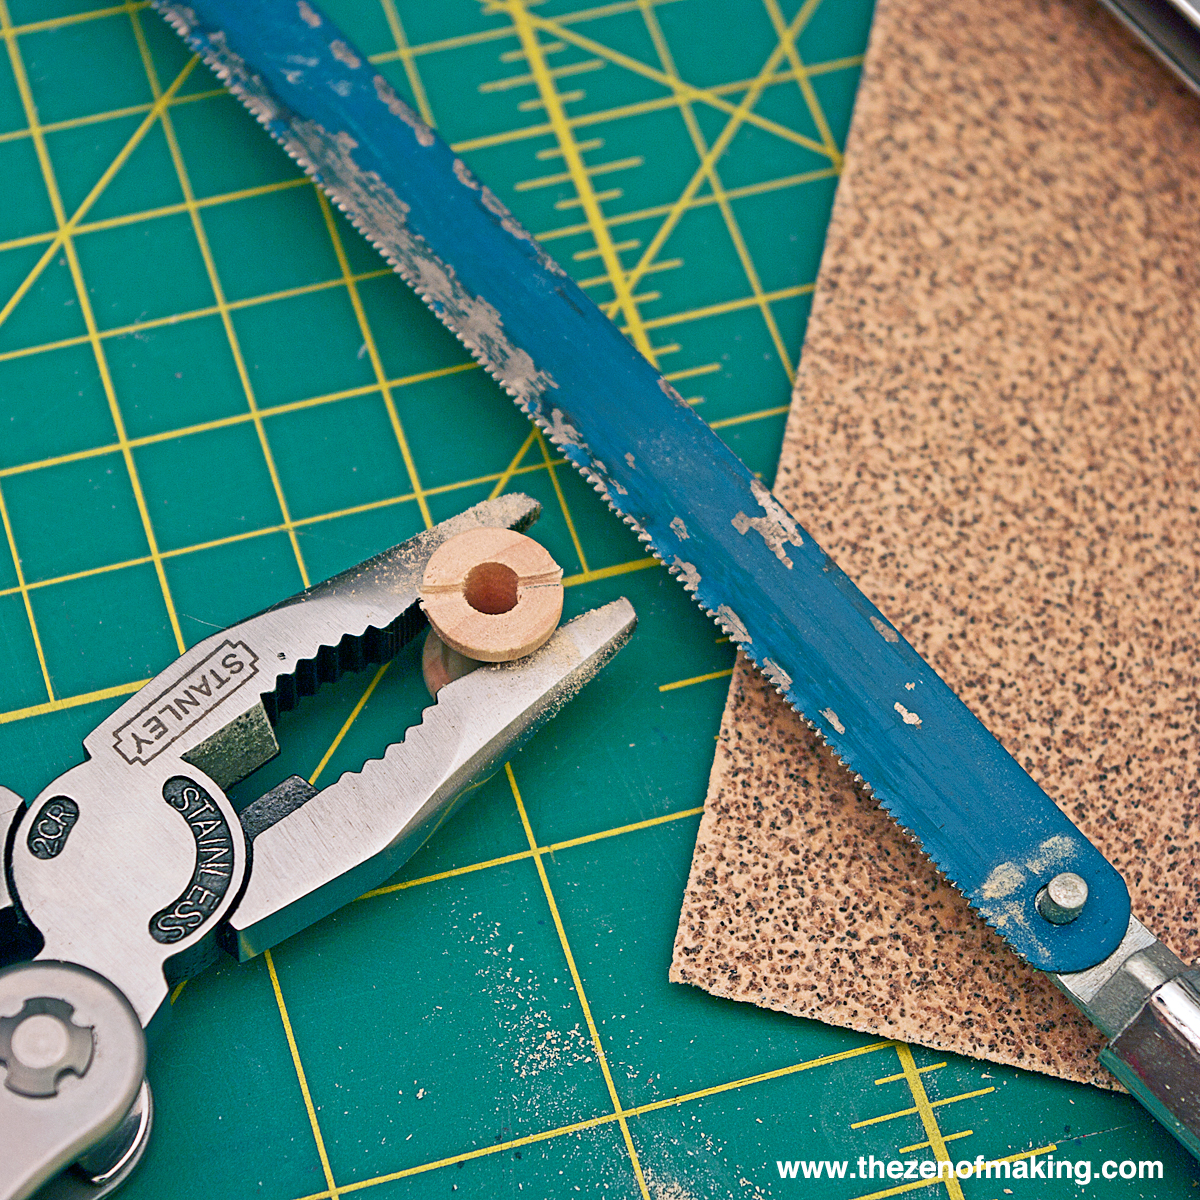
Step 1:
First, we’ll prepare the thread spools.
Gripping each spool firmly with needle-nose pliers, use a hacksaw to carefully split 9 wooden spools in half.
Step 2:
Use fine grit sandpaper to smooth and even out the cuts on the back of each split spool.
Test each spool in the resin mold to make sure it fits inside easily, with a bit of room to spare. If a spool is too thick, use the sandpaper to remove additional width from the back, then check the fit again.


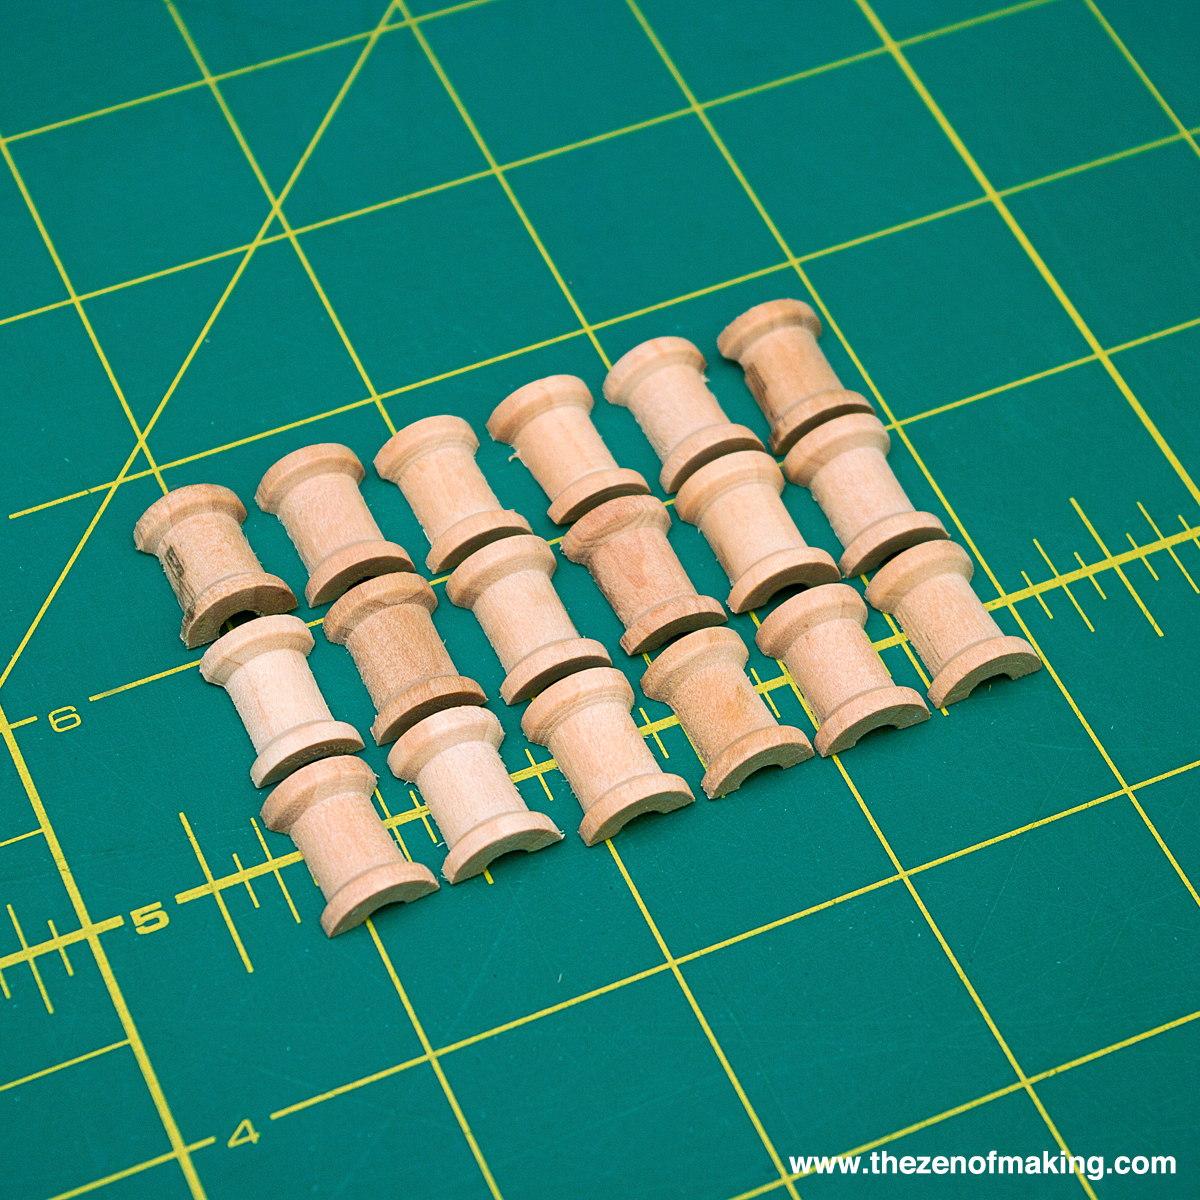
Step 3:
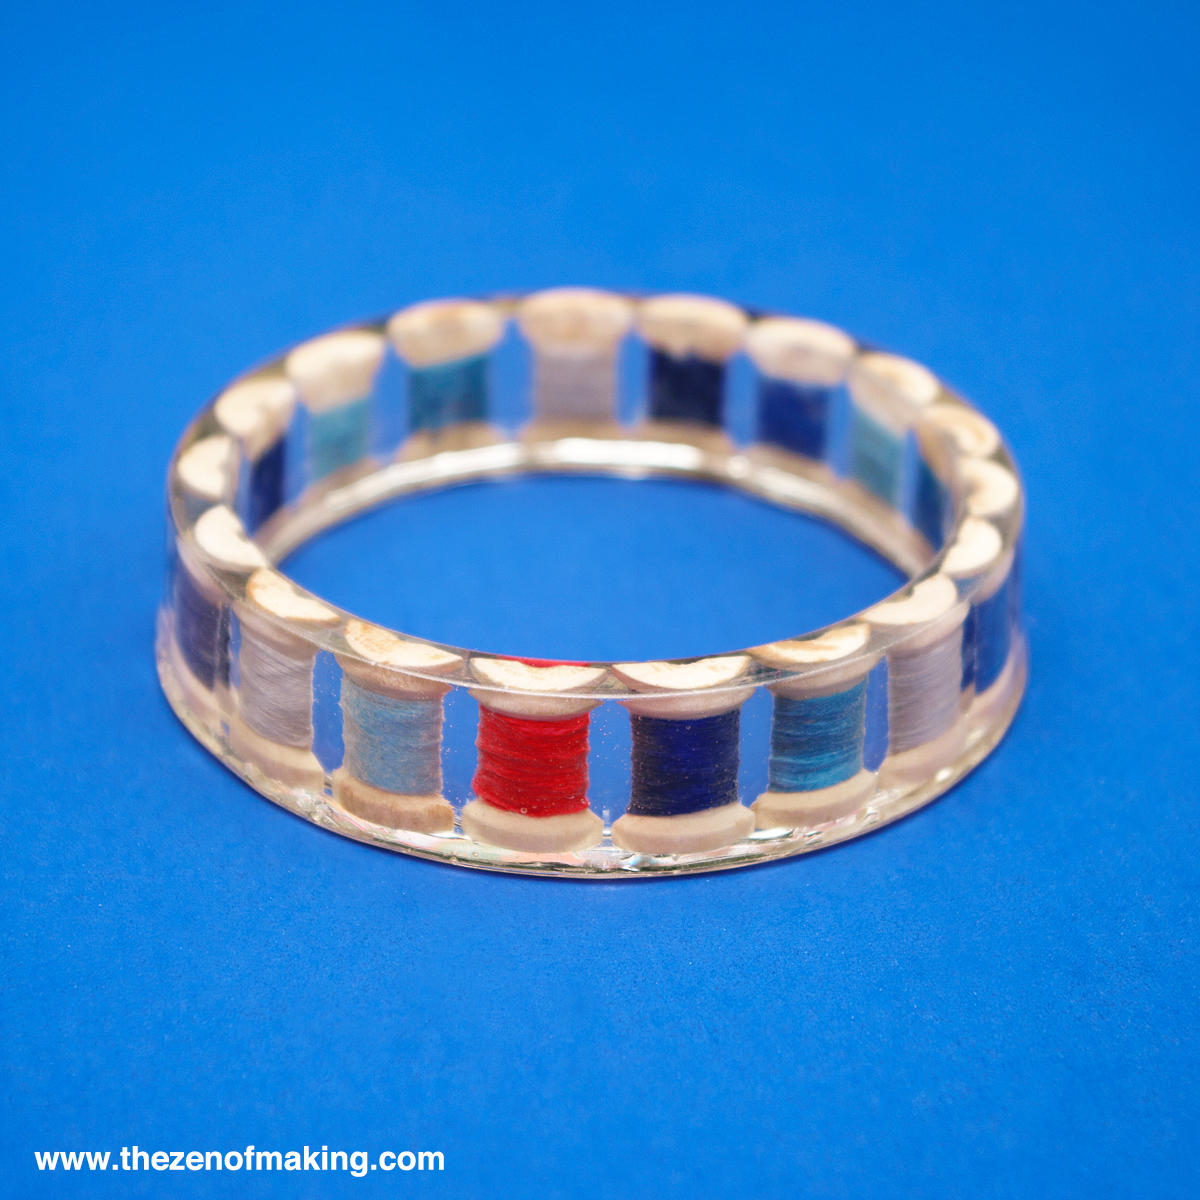
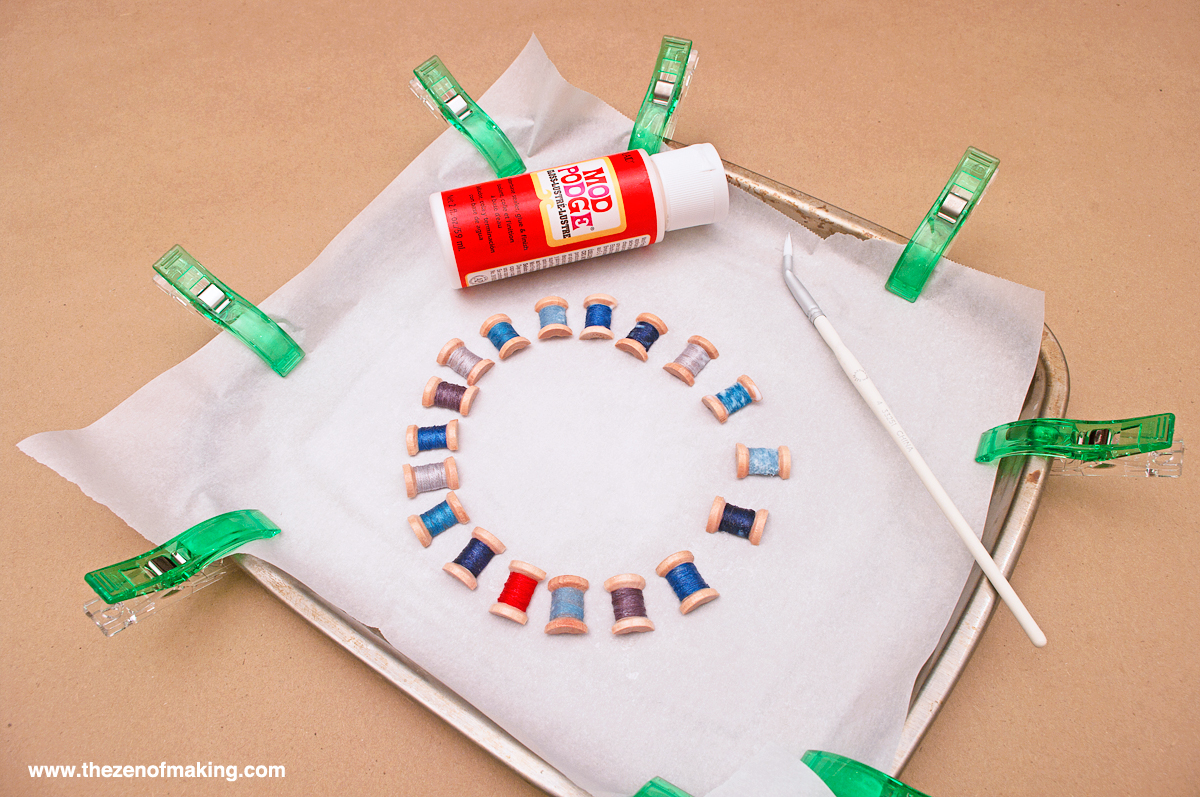
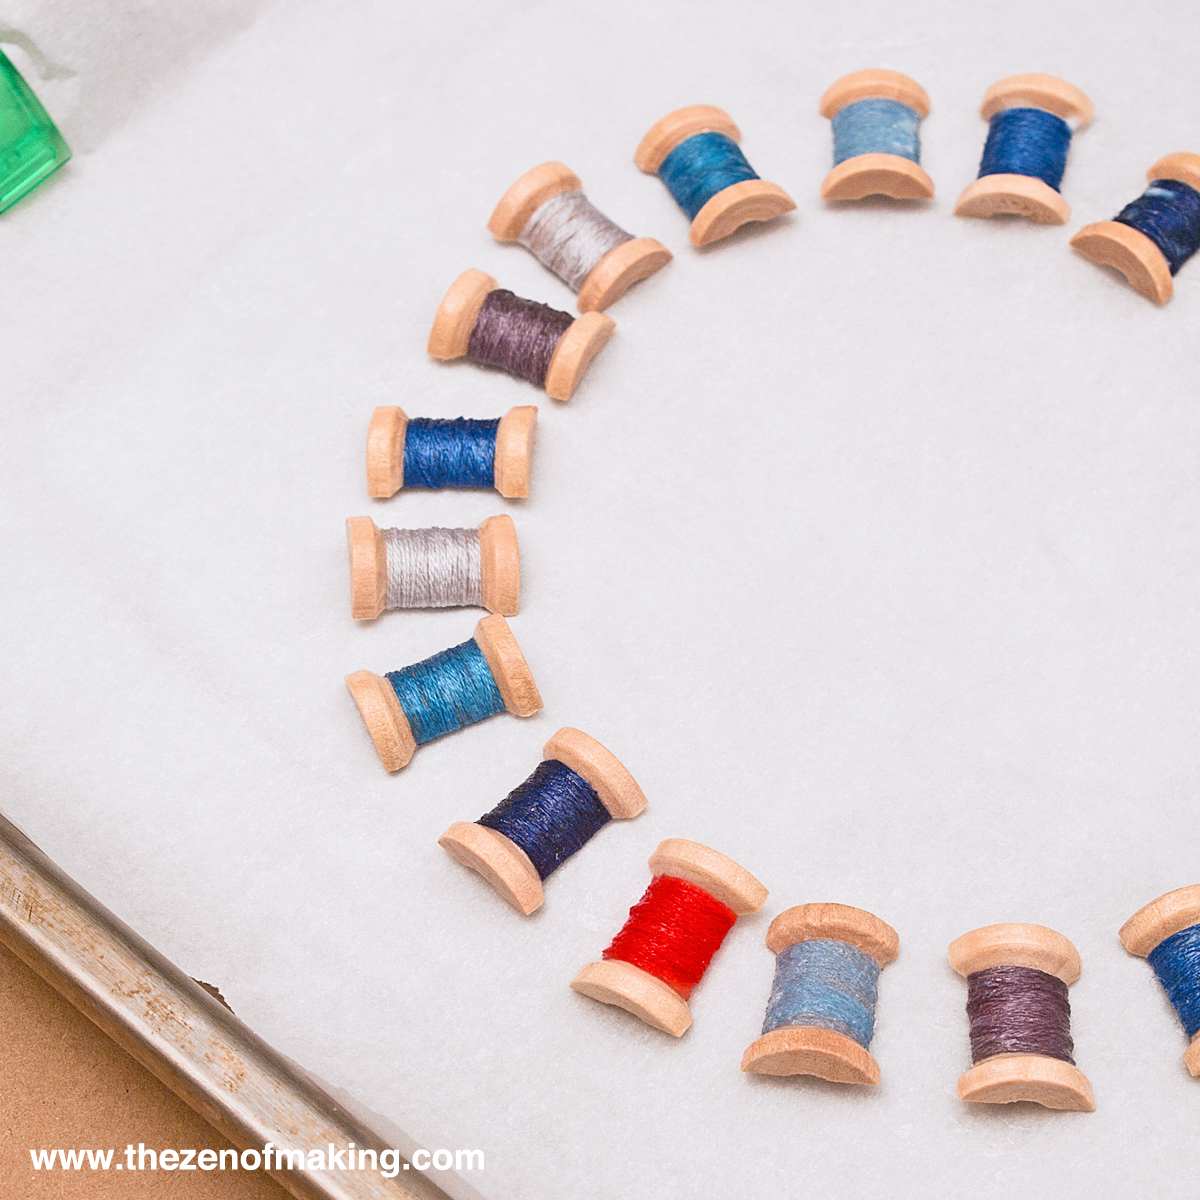
Wrap a thin layer of your favorite thread or embroidery floss around each spool. I used pearl cotton embroidery floss.
When it comes to wrapping the spools, less is better. If you make the thread layer too thick, the spools won’t fit in the mold.
Once again, test each spool in the resin mold to make sure it fits inside easily. If it doesn’t, remove some thread from the spool.
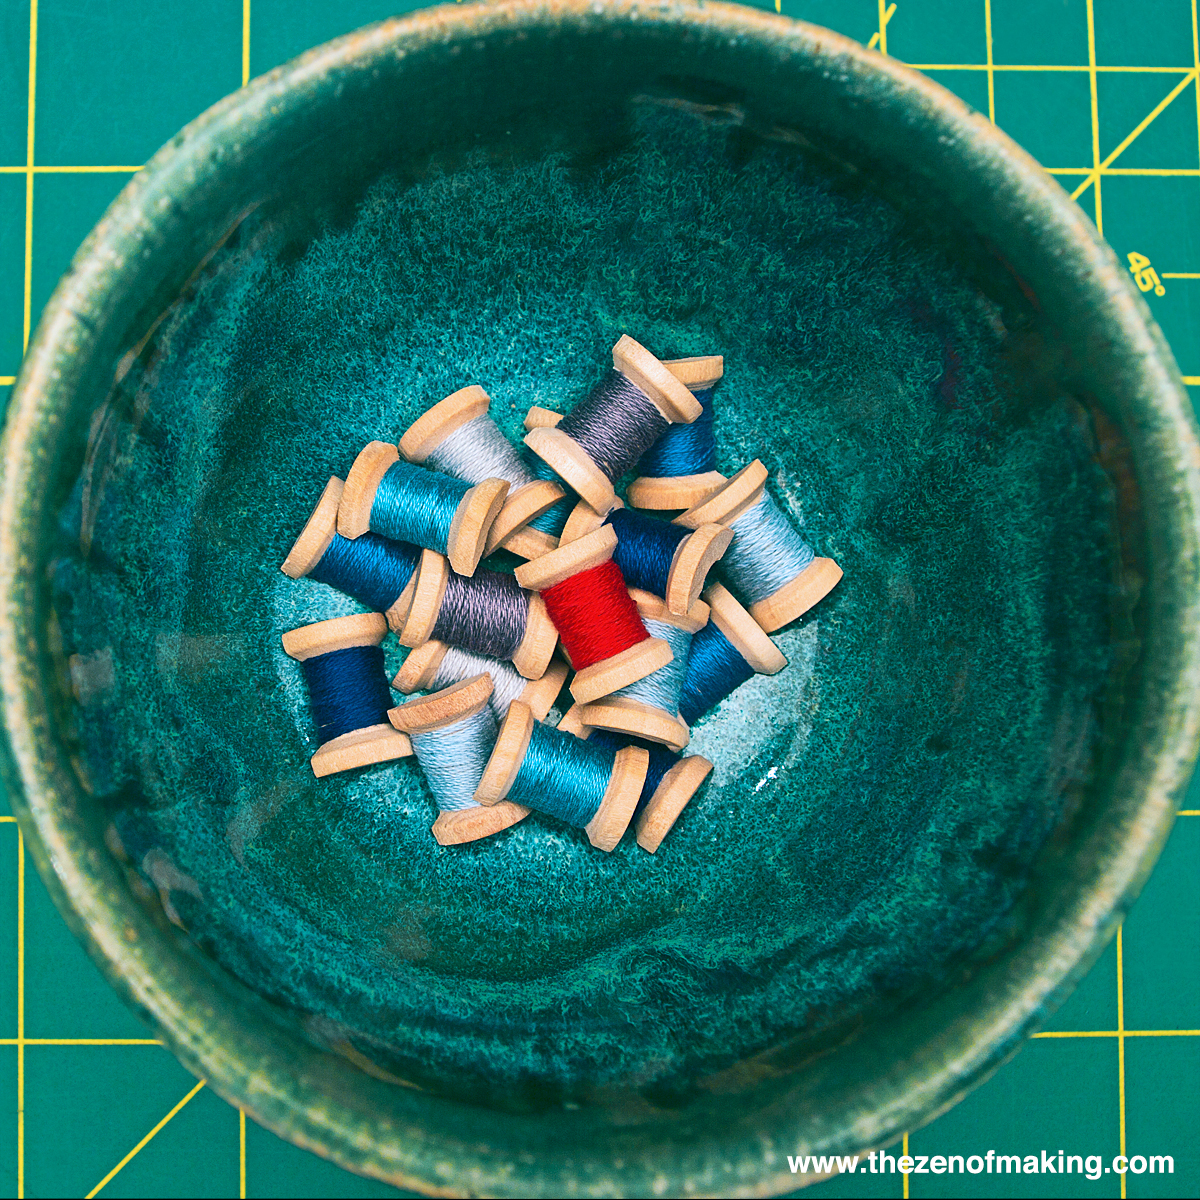
Step 4:
Take a moment to arrange your spools in the color order that you’d like them to appear in your finished bracelet. (This will be extremely helpful later when you’ve mixed the resin and you’re working very quickly.)
Step 5:
Using either a thin layer of Mod Podge or a spray acrylic sealant, thoroughly seal each of the spools—front, back, top, and bottom—then allow them to dry completely. (I let mine dry for 24 hours.)
Tip: Mod Podge will work in a pinch, but you’re less likely to get clouding in your resin if you use a spray acrylic.
Both wood and thread will release bubbles into resin as it hardens, which can make your finished object cloudy and unattractive. It’s extremely important that each of the spools are completely sealed before you use them.
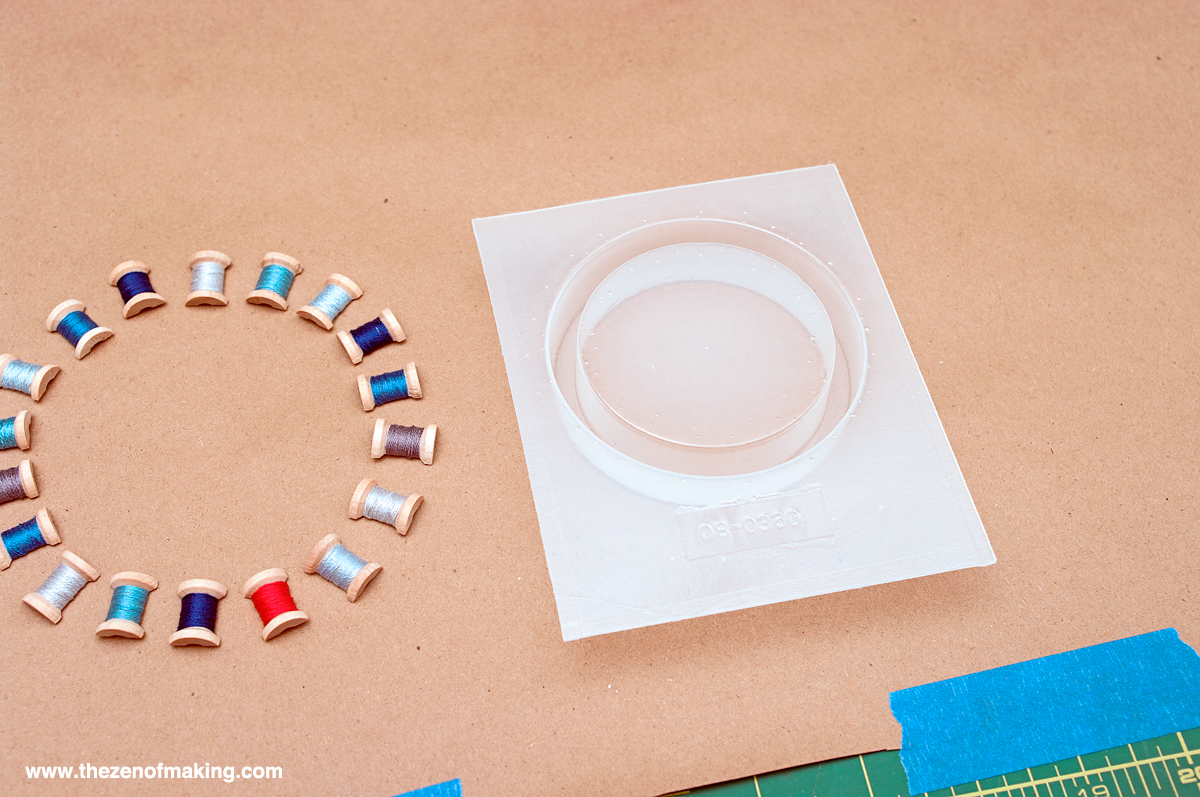
Step 6:
While you’re waiting for your sealed spools to dry, apply several coats of mold release spray to your clean bracelet mold according to the package instructions. Allow the mold to dry completely between each coat.
Tip: If you want your bracelet to have a glossy, glass-like finish when you’re done, don’t even think about skipping this step!
Step 7:
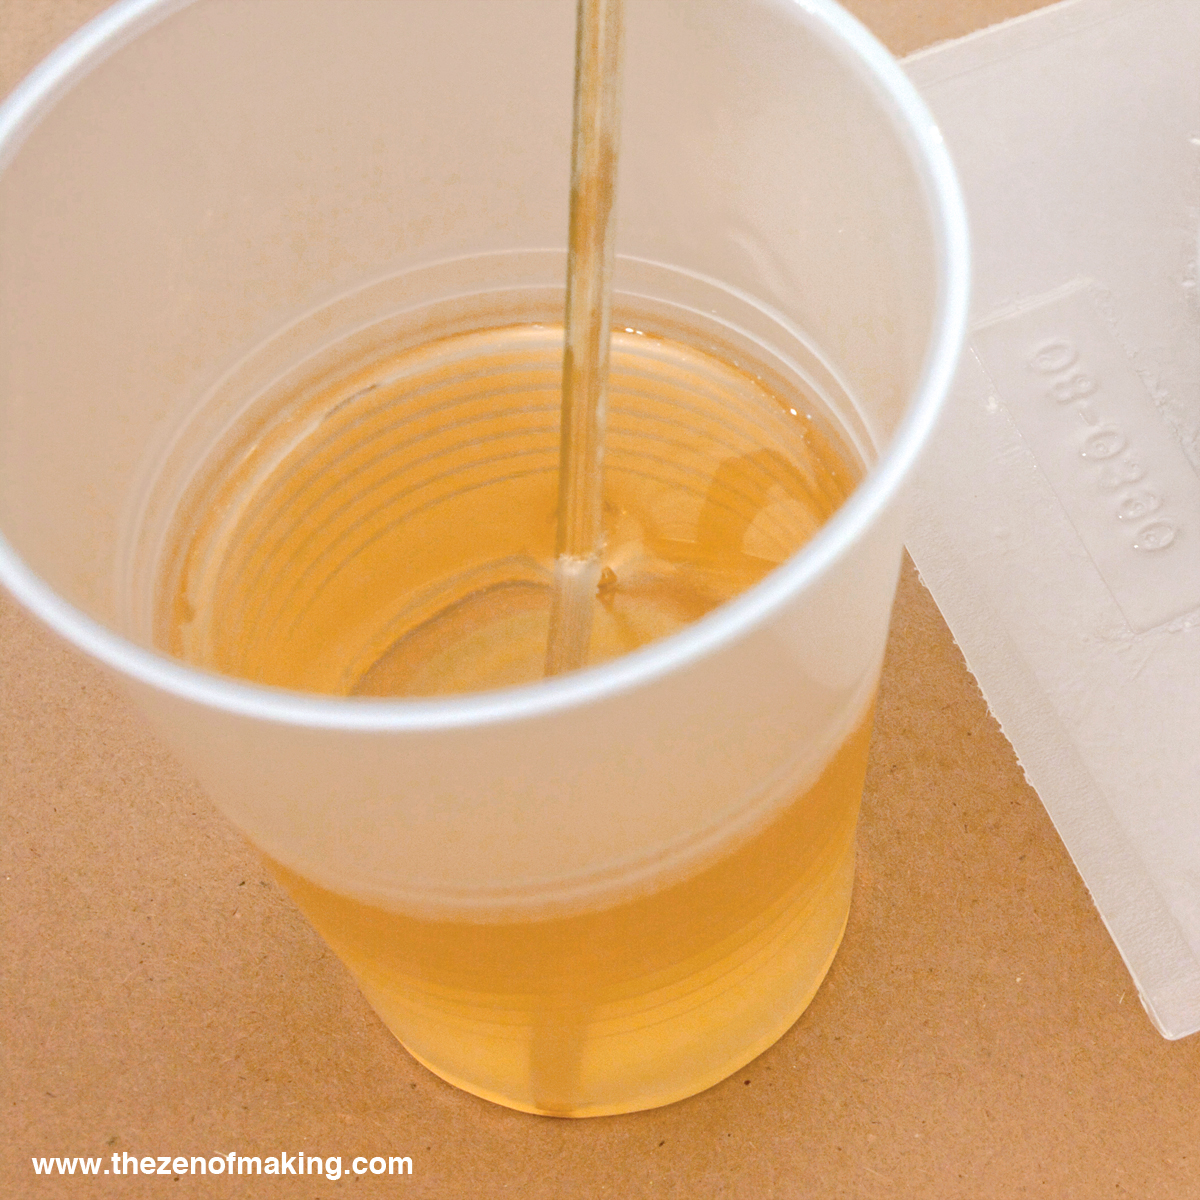
Once your spools have been sealed and the mold has been conditioned, cover your workspace with kraft paper or newspaper, then mix the resin with the hardener EXACTLY according to the instructions on the package.
There is zero room for error here. If you aren’t precise in your ratios and mixing, your resin won’t set and harden, and there won’t be anything you can do to fix it.
SAFETY NOTE: (Shared at the beginning of this post, but it bears repeating.)
Using casting resin isn’t just making, it’s SCIENCE. Mixing resin and hardening agents together causes a chemical reaction, and this reaction can be dangerous. (We’re not talkin’ Mod Podge, my friends. This is the real deal.) Whenever you work with resin, make sure you do so in a well ventilated area that’s away from pets and kids, and be sure to follow the instructions on the package to the letter. Wear gloves. Wear a mask and eye protection if you need to. Be smart and be safe.
Step 8:
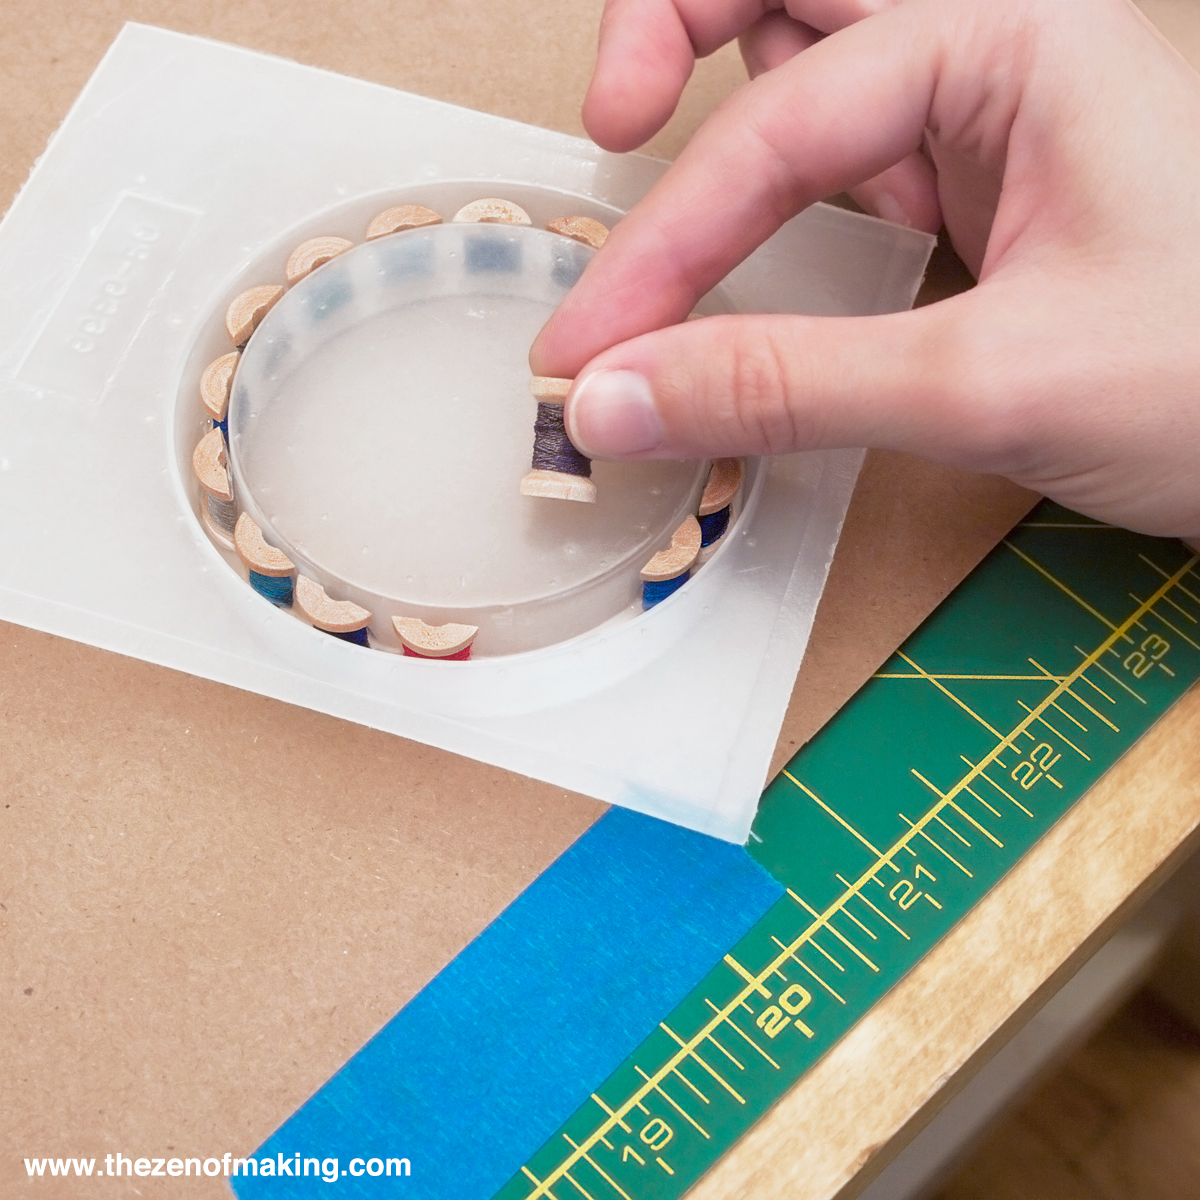
Working quickly so your resin doesn’t harden before you’ve finished, pour a small amount of mixed resin in the bottom of the mold, then place each spool in the mold.
Step 9:
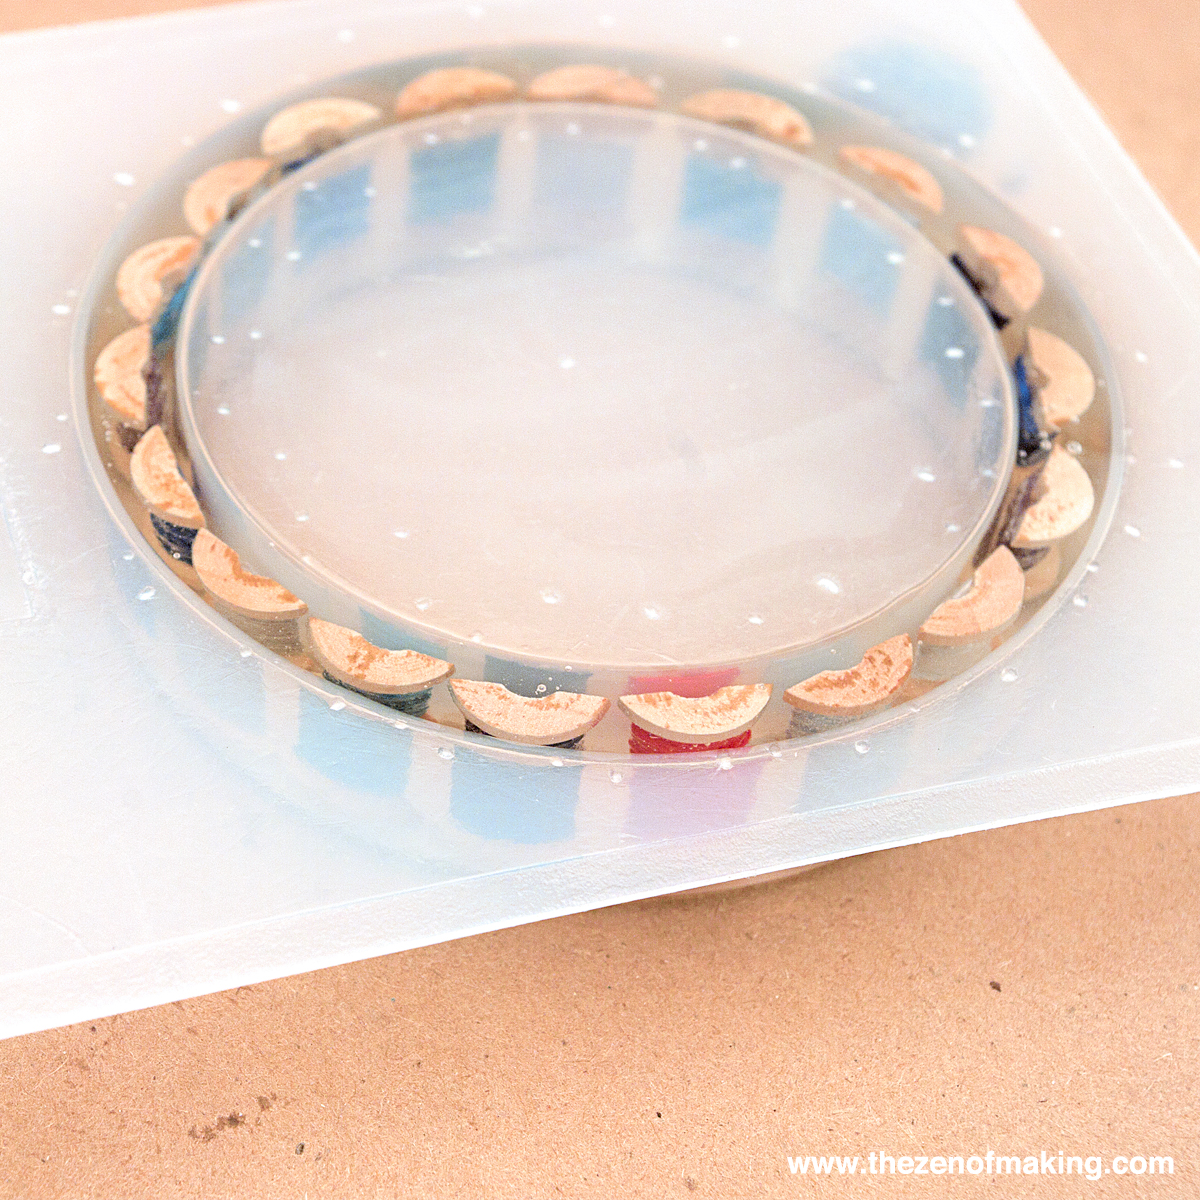
Once each spool is in place, carefully fill the mold the rest of the way with resin, covering the spools. Do not overflow the mold.
Here’s where things can get a little bit tricky, so stay with me: Wood floats, and that remains true when you’re working with slow-hardening resin. So, to prevent the spools from breaking the surface of the mold while the resin is hardening, use a toothpick to continuously work your way around the bracelet, systematically pressing the spools back down below the surface one at a time. Proceed this way until the resin hardens enough that the spools stop floating toward the surface. (Be careful—if you keep poking at the resin when it’s already firm, you can leave permanent marks on the surface of the bracelet.)
Once the resin begins to harden, set the mold aside in a flat, dry place, keeping it away from dust/kids/pets until it achieves a FULL HARD CURE.
Keep in mind that a full hard cure can take up to 48 hours—or longer if the weather is humid—so make sure you check your resin package for curing times.
Step 10:
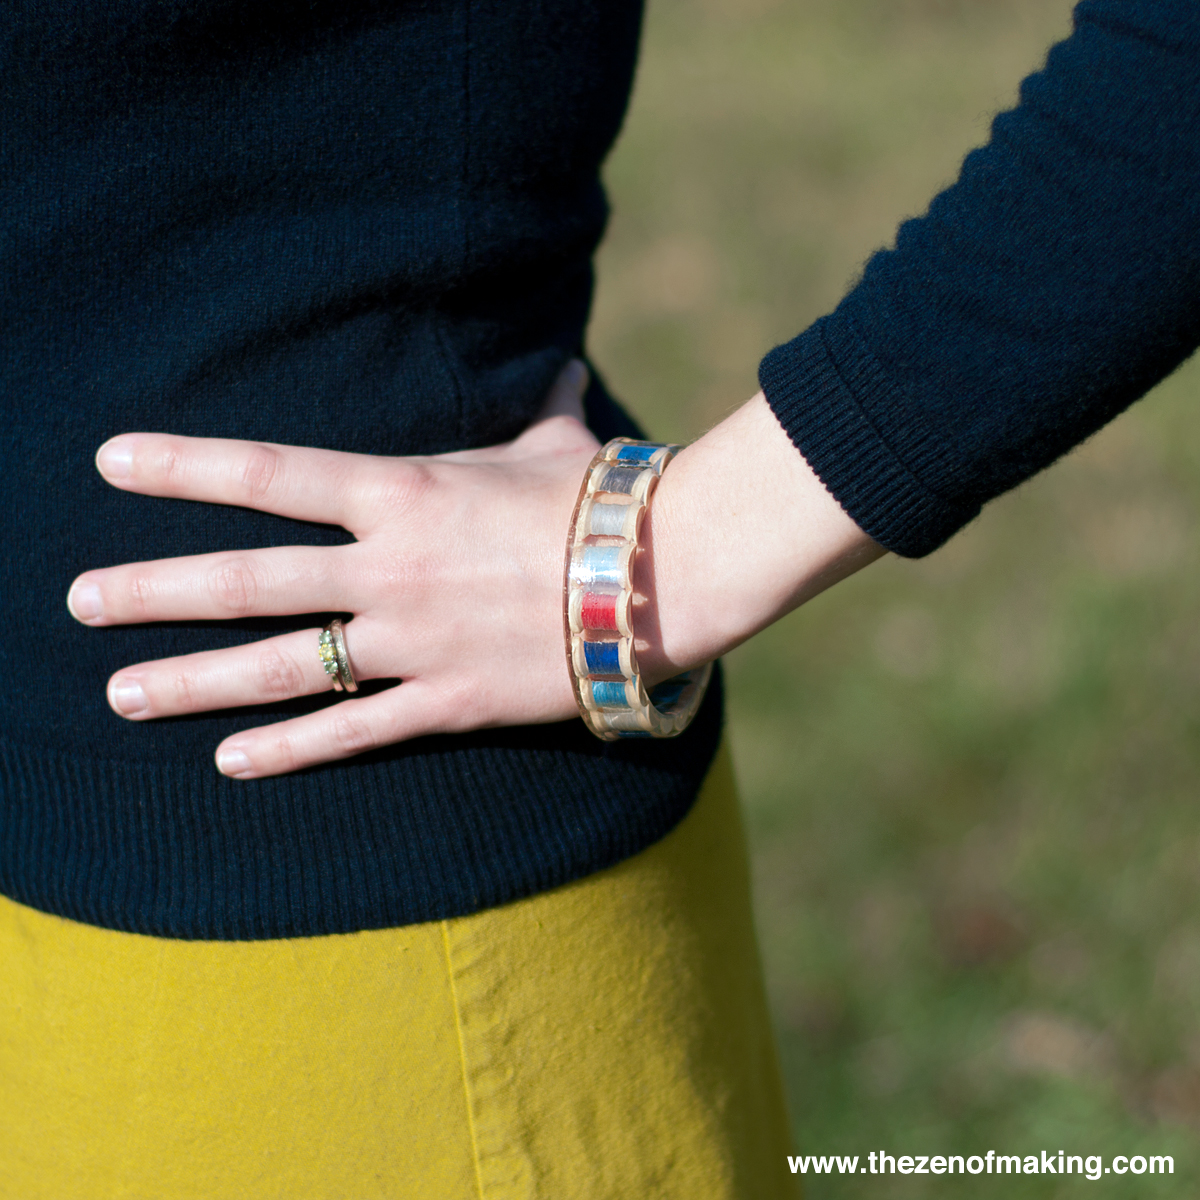
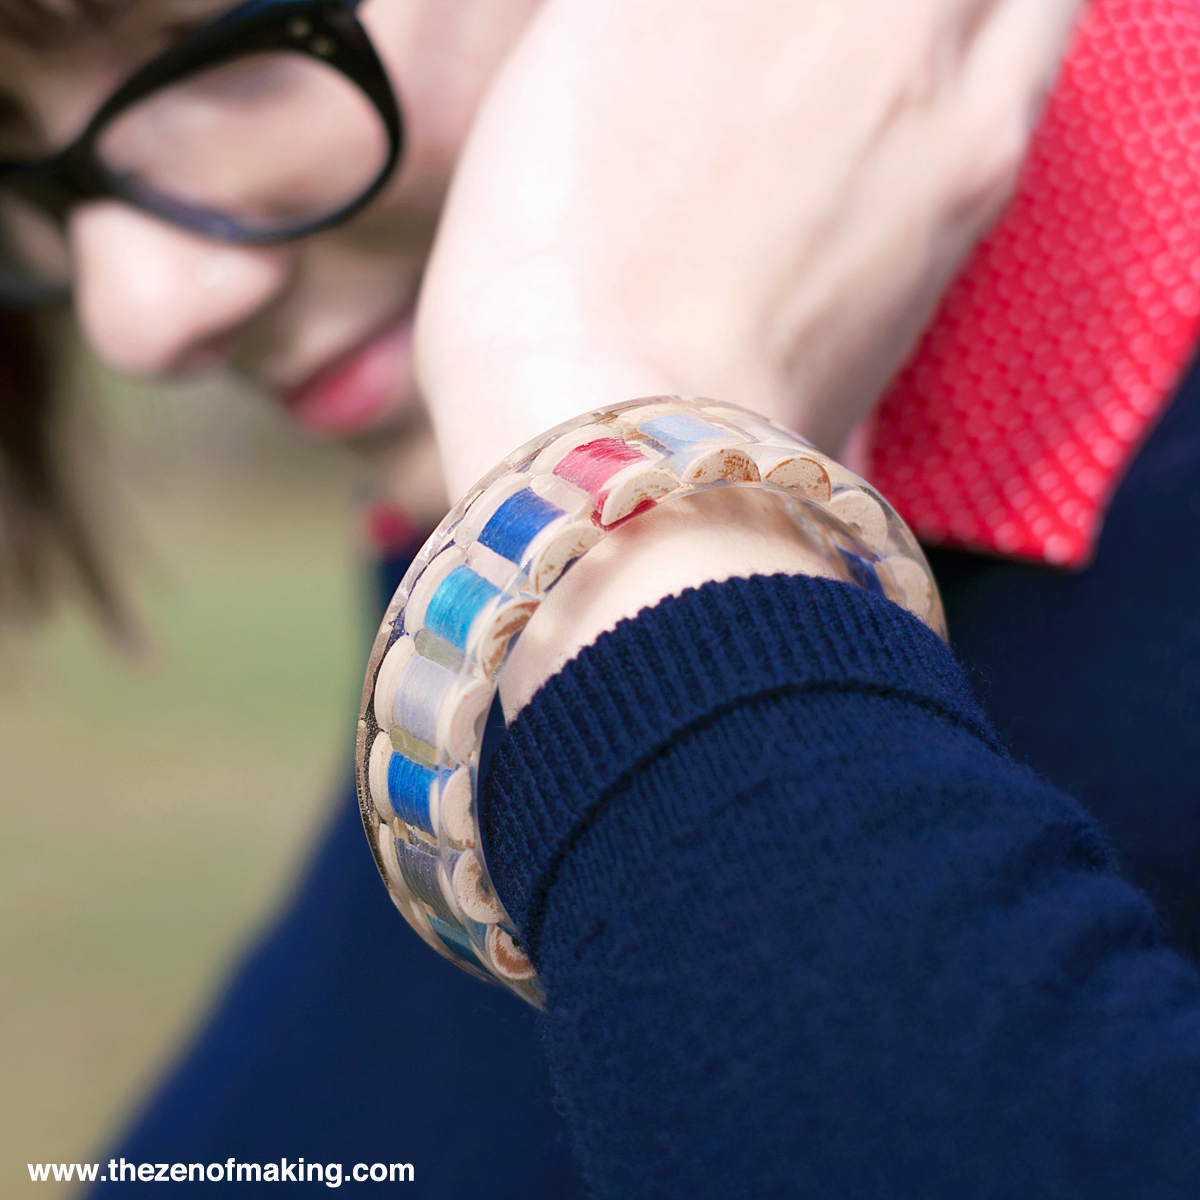
Release your cured bracelet by pressing gently on the back of the mold. Fully cured items should separate from the mold and pop out easily.
Carefully remove any rough/sharp spots along the edges of the bracelet with the smooth and shine surfaces of a nail file. Then, if you’ve removed any rough spots or notice any dull or cloudy spots on your bracelet, use a brush to apply a second layer of resin to the surface to restore the glossy shine. (Keep in mind that, whenever you add an additional layer of resin, you’ll need to allow the bracelet to cure again for the FULL hard curing time.)
Want to make a sewing-themed set?
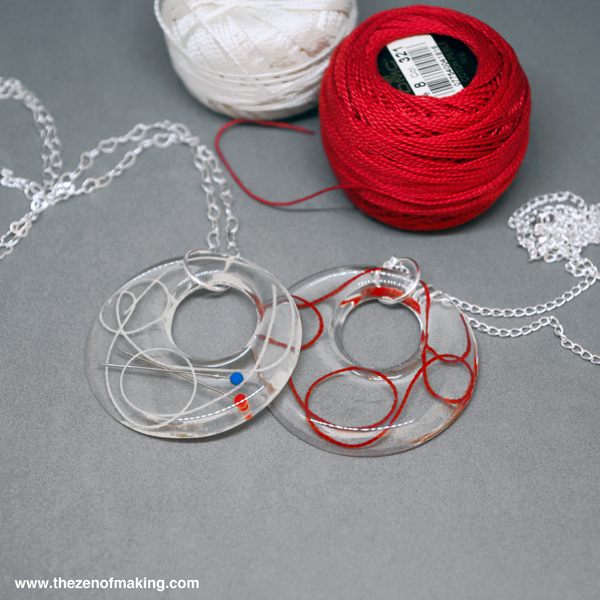
Check out my Resin Sewing Thread and Embroidery Floss Pendant Tutorial too!
This is such a cute resin idea! My grandma would love this bracelet and the matching necklaces. Thanks for the fun idea, I will use it to make a great birthday gift!
Epically freaking cool!! You’re an inspiration, woman! Thanks for sharing.