
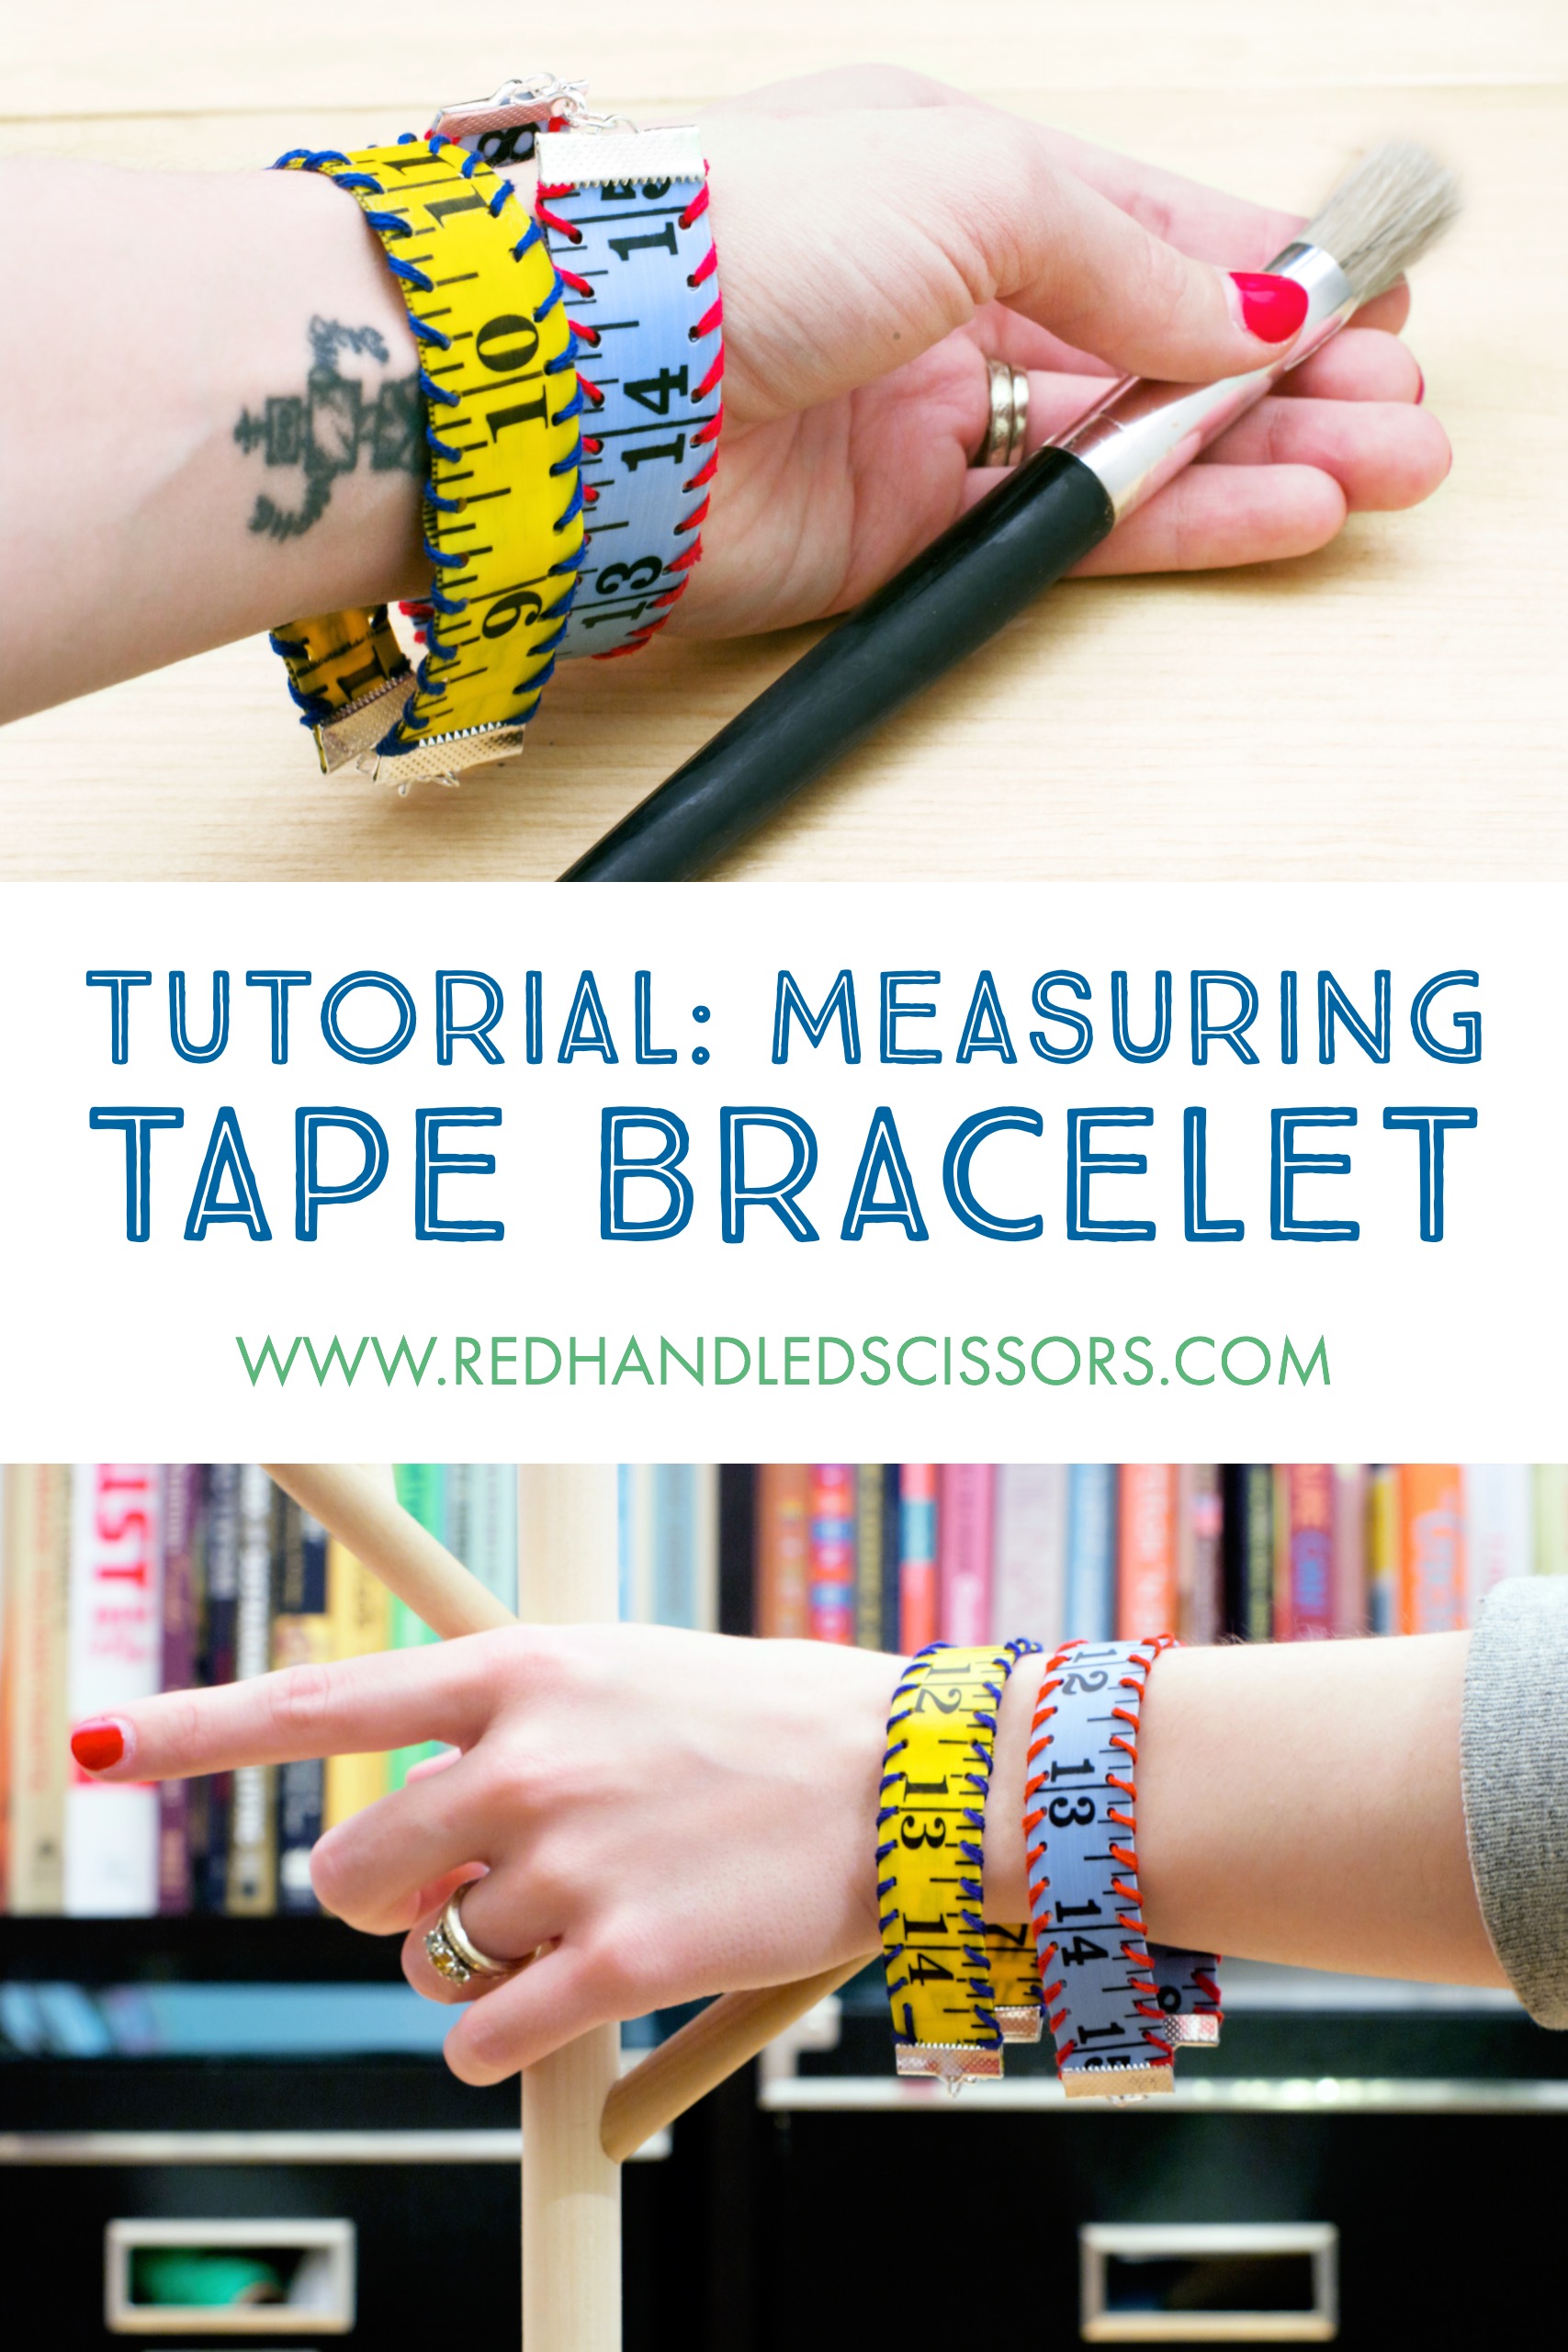
I have a confession to make: I am completely, hopelessly obsessed with sewing notions. No matter how many I have, every time I go to the craft store I always seem to bring home even more. As a result, I’ve managed to amass a pretty impressive collection of measuring tapes, glass-topped pins, and other sewing-related bits and baubles over the years, and now they’re threatening to take over my studio. You too? Show off your DIY cred—and put some of those extra notions to good use—with a measuring tape bracelet!


Here’s what you’ll need to make one bracelet:
Supplies:
* Plastic measuring tape, ⅝" wide
* Embroidery floss, 1 yard
* 2 Ribbon clasps, ¾" wide (You’ll also need 2 jump rings and a lobster clasp if the ribbon clasps don’t come with them.)
* Paper, one 8½" x 11" sheet
Tools:
* Scissors
* Leather punch with 2mm tip (or sewing awl)
* Round jewelry pliers
* Wonder clips
* Small darning needle
* Ruler
* Pencil
**Please note that the links provided above are affiliate links, and I will be compensated if you choose to make a purchase after clicking through.**

Step 1
Clip the metal end off of the measuring tape.
Fold the measuring tape in half, creating two layers, then wrap the folded tape around your wrist. Cut the non-folded ends to length so that the tape fits loosely around your wrist. Make sure to leave a little slack so that the finished bracelet isn’t too tight.


Step 2
Next, we’re going to create a template to keep your stitches spaced evenly.
Clamp the folded measuring tape together at the ends to create a long rectangle with two layers. Use a ruler and a pencil to trace the rectangle onto a sheet of paper, then cut the rectangle out. On each long side, measure ⅛" in from the edge, then use the ruler to draw a line down the length of each. To mark your stitch placement, make a dot every ¼" along the lines that you just drew.

Step 3
Use the leather punch to punch a hole through the template at each dot that you made in step 2, then use the wonder clips to attach the template to the folded measuring tape. Once the template is in place, use the leather punch to punch through both layers of the measuring tape at each hole.
Now, it’s time to sew the bracelet:

Step 4a
Thread the darning needle with a yard of embroidery floss, knotting off the end.
Starting at the non-folded end, insert the needle between the two measuring tape layers and into the first hole.

Step 4b
Thread the embroidery floss through the first hole until you reach the knot at the end. (The knot should now be sandwiched between the two layers of measuring tape.

Step 4c
Stitch around the outside edge of the measuring tape, stitching through the first hole from back to front, then continue stitching down the length of the bracelet, inserting the needle from back to front as you go. (This is called a whipstitch.)

Step 4d
Once you reach the end of the first edge, thread the needle between the measuring tape layers at the fold, bringing the needle and floss to the unstitched side. Stitch around the edge of the first hole from back to front, then continue stitching from back to front along the full length of the side.


Step 5
When you’ve sewn all the way around the outside edges of the bracelet, secure the stitches by reinserting the needle into the back of the last stitch, then knotting it off between the two layers. Trim extra floss length as needed.
Finally, we’ll attach the clasps:

Step 6
Center the ribbon clasp on each end of the bracelet, then use a pair of rounded jewelry pliers to clamp them into place. To finish, use the pliers to attach the jump rings and the lobster clasp as shown.


Done! Now, go forth and spread the measuring tape bracelet love!
Since I create pocket measuring tapes this is especially appealing. Terrific!
Thanks, Barbara! What kinds of measuring tapes do you make?
this is awesome! We should be featuring it on Dollar Store Crafts in the next week
Thanks, Carissa!
Thanks for this tutorial, this would make an excellent young kids class! I look forward to making bunches of these. Once I start cutting apart one of my measuring tapes, I can’t see myself stopping at just one bracelet!
You’re welcome! Make sure you share pictures so we can see what awesome bracelet designs you come up with. :)
Great project and so simple. This is an idea that would also work with some of the heavily embroidered ribbons and woven trims, and there wouldn’t even be any hole punching involved, just the sewing. It can’t get much esier than that.
What a clever girl you are! I sew a LOT so this is a cute statement that says “I’m a sewist” :) . Love it!