
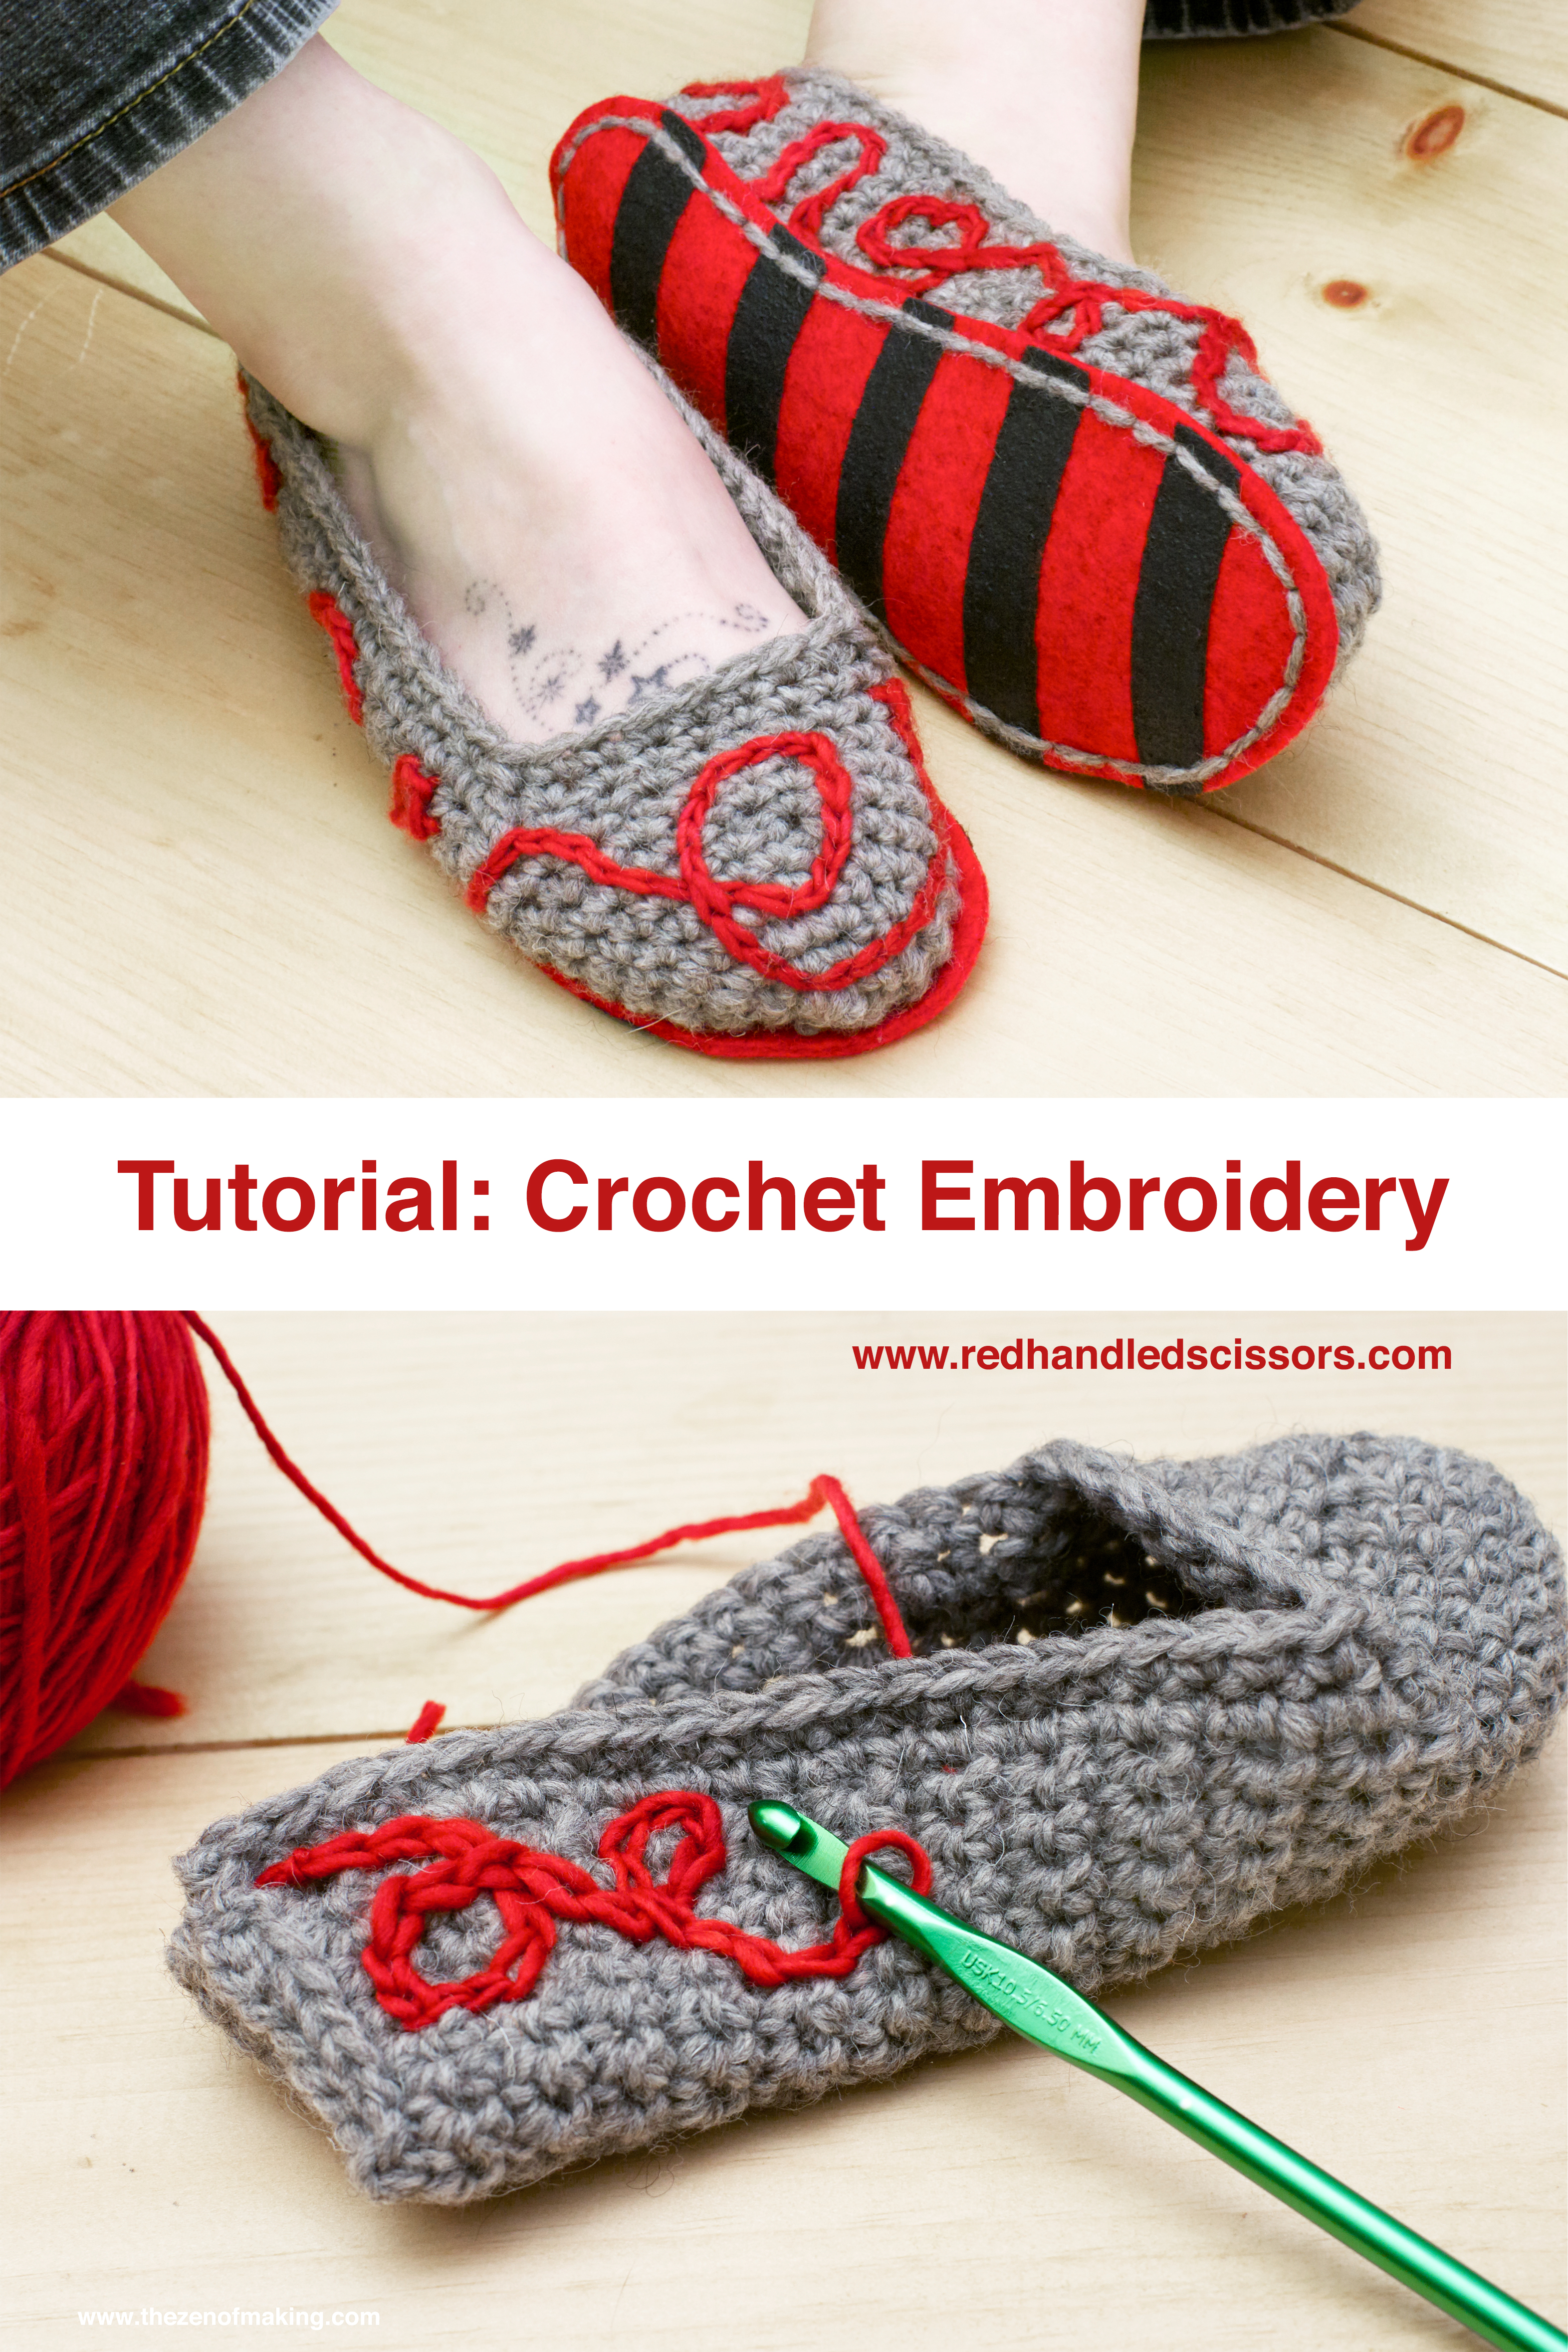
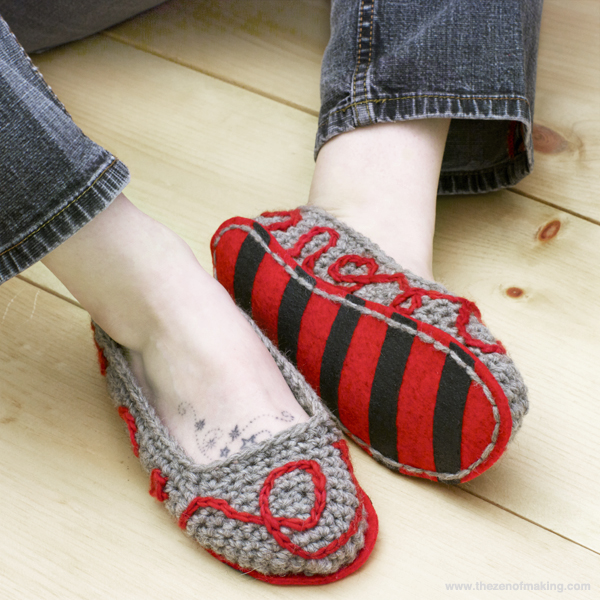
Add eye-catching embroidered embellishments to your knit and crochet projects with this simple crochet embroidery tutorial!
The freehand squiggle pattern that I used for this post is just to show you how it’s done. You can use the same method to create words, shapes, or just about anything else that you can come up with!

Supplies:
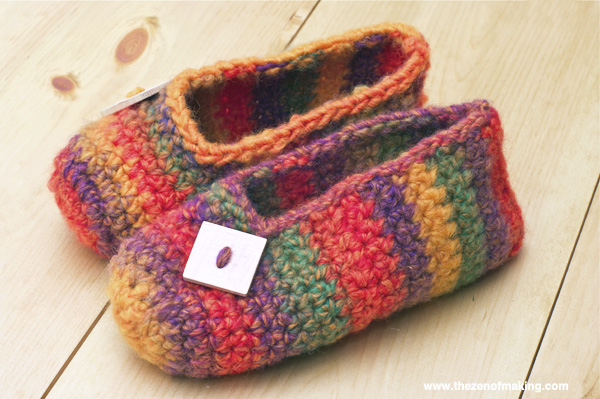
* A crocheted or knitted item that you’d like to embellish. (I crocheted some slippers.)
* Yarn in a contrasting color
Tools:
* Crochet hook in a size that fits the contrasting yarn
* Darning needle
To make your own slippers, head over to my Crocheted Rainbow Striped Slippers tutorial. If you need to learn the basics of crochet before you get started, check out this Crochet 101 video tutorial that I made for CRAFT!
**Please note that the links provided above are affiliate links, and I will be compensated if you choose to make a purchase after clicking through.**

Step 1
Make a slipknot with your yarn and secure it loosely around the hook. (This is the same kind of slipknot that you make at the beginning of all crochet projects.)

Step 2
Remove the slipknot from the hook carefully, making sure that the loop stays open.
On the front of your project, insert the hook into an open space between two stitches, then use the hook to pull the loop of the slipknot through the back of the project to the front.

Step 3
In steps 3, 4, and 5, we will make the first crochet embroidery stitch using a slip stitch.
Keep the slipknot loop around the hook and on the front side of the project, then insert the point of the hook into the next open space between two stitches. (Depending on what shape you’re making, this can be the next stitch to the right, the stitch below, or the stitches diagonally up and down.)

Step 4
With the point of the hook sticking through the back side of the piece, wrap the yarn around the hook counterclockwise as shown, creating a new loop.

Step 5
Use the hook to pull the new loop of yarn through the hole to the front side of the project, bringing the new loop through the center of the slipknot loop. Allow the slipknot loop to drop off of the hook as the new loop pulls through. This is called a slip stitch.
The slipknot loop is now your first stitch. The new loop should be the only loop of yarn on your hook.
Note: To keep the first stitch neat and tight, you can hold the base of the slipknot in place on the back side of the project while you work the first slip stitch.


Step 6
To make the next slip stitch, insert the point of the hook into the next open space between stitches and repeat steps 4 and 5.


Step 7
Continue making your pattern with slip stitches. When you’re done, cut the yarn leaving a few inches of extra length, then finish off your work by pulling the tail of the yarn tightly through the last loop of your embroidery design. Pull the extra length of yarn through to the back side of the project, then use a darning needle to weave in all loose ends.
Note: If the two ends of your design meet (like the ends of my slipper squiggles coming together at the heel), you can connect the two ends with a slip stitch before finishing off.

Hooray for crochet embroidery! Now, what are YOU going to make?
Start with these tutorials:
|
|
|
|
just great! :-)
hope you are fine and not freezing ;-) it’s pretty cold in Poland already, and snooooooowing!
Thanks!
Not snowing yet in NYC (though it did snow in October), but it’s pretty chilly. Keep warm!
wondering where pattern for the slipper in crochet embroidery tutorial can be found, Thank you for the patterns.
I used the Rainbow Striped Slippers crochet pattern that I linked to in the post above (I just used gray yarn instead). If you want your slippers to look just like mine, there’s a note in the slippers pattern post for adjusting the pattern to make a pair of ballet flat-style slippers. This note appears under the instructions for rows 10-16 : https://www.redhandledscissors.com/2012/10/pattern-rainbow-striped-crocheted-slippers.html
Happy hooking!
I try to embroider in different directions and it seems to be very awkward when I try to do angles.How do u keep the tension without pulling yarn and making the stitches look different?
I usually just flip the project around as I work so it’s facing a less awkward stitching direction.
As far as tension is concerned, I find that, as long as I avoid pulling too hard, most of the stitches end up about the same size. But, if one looks funny, I either lightly tug on the working yarn to make it tighter or gently pull on the stitch to loosen it up until it looks right.
For me, the first few stitches always feel a bit funny, but once I get into the rhythm, it gets much easier.