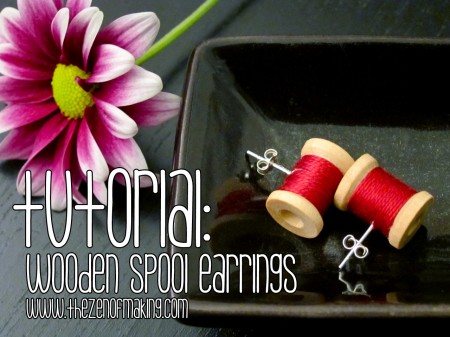
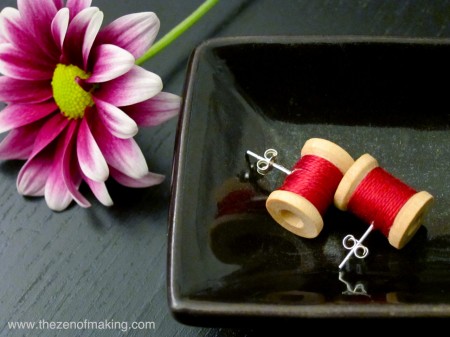
Sewing geeks, represent: Enhance your crafty fashion cred with a pair of wooden thread spool earrings made with real mini spools!
Wooden spool earrings are a fun, quick craft—you can make a pair in less than an hour—and they make great gifts for sewing-obsessed pals.
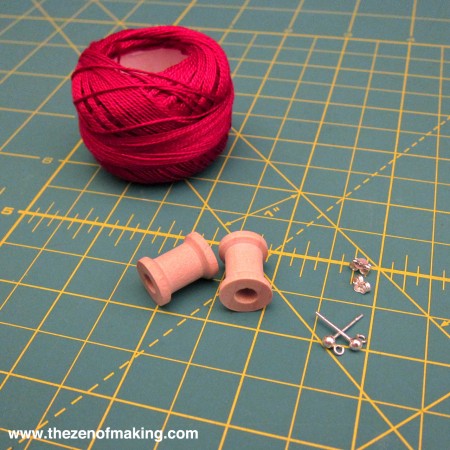
Supplies:
* 2 flat 4mm earring posts
* 2 earring backs
* 2 mini wooden spools, 5/8″ long, 1/2″ diameter or smaller
* Cotton pearl embroidery floss, size 8
* Amazing GOOP adhesive
Tools:
* Toothpick
* Ultra fine point marker
* Dremel tool (optional—see step 2)
**Please note that the links provided above are affiliate links, and I will be compensated if you choose to make a purchase after clicking through.**
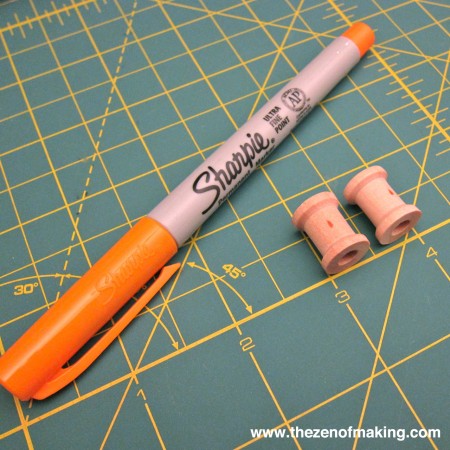 Step 1
Use a marker to draw a dot in the center of each wooden spool, making sure that the mark falls in the same place on both spools. You will attach the earring posts here.
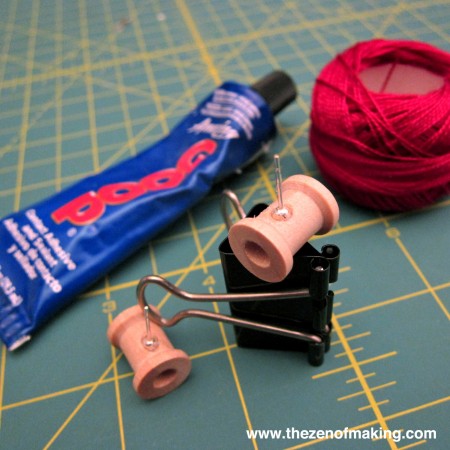 Step 2
Center the earring posts on the marks that you made in step 1, then secure them in place using Amazing Goop. (Make sure that the posts are perpendicular to the spools. If they’re at an angle, the finished earrings won’t be comfortable to wear!)
If, like mine, your earring posts are round instead of flat, you can use a Dremel tool or drill to make a recessed hole in each spool to hold the posts. To do this, match the drill bit to the size of the earring head, then drill slowly and carefully into the marks that you made in step 1. The goal is to make a slightly recessed hole WITHOUT drilling all the way through the side of the spool and into the center. Once you’re done drilling, insert the posts into the holes, then glue them in place.
 Step 3
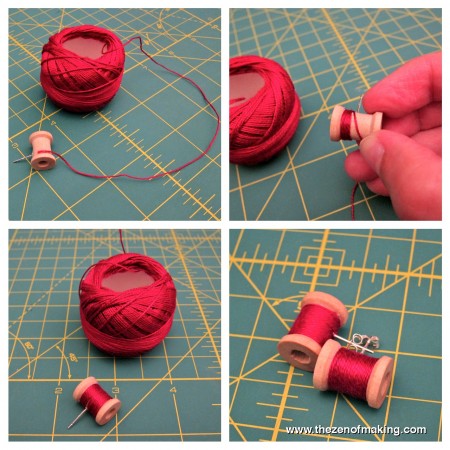
To wrap the spools, use Amazing Goop to glue the first end of the floss in place on the back of the spool (the same side as the earring post), then slowly wind the floss around the spool, using a toothpick to add a dot of glue to the wood each time you reach the back. Once you’ve covered the entire spool, glue the second end of the floss in place on the back of the earring, cutting away any excess length. (Click on the image above to see a larger version.)

 Step 4
Allow the glue to dry completely before wearing.
I’m finished with this project, but I still have a whole jar of leftover wooden spools sitting in my studio, just begging to be turned into something awesome. What should I make next?

That’s super cool!. Thanks for sharing :)
Thank you!
I love this!! Your creations are so inspiring!
Thanks, Christine!
these spool earrings are super cute! these will make a perfect gift for my granddaughter (and for me!)! thank you for your contribution to the crafting world. Keep the projects coming :)
Very nice idea – this gives me some ideas for future use of all those spools I have. :-)