

When preparing for my September wedding, I got mighty crafty. One of my larger projects was making the tablecloths for our reception. This turned out to be a much bigger job than expected, but, with some cutting and sewing help from a few generous pals, I managed to turn out 15 tablecloths in record time. Well worth the work, the tables looked great, and the fabric matched the autumn mood perfectly. After our post-wedding brunch, I talked a few friends and relatives into taking one with them, but the rest ended up coming back home with me. As a result, over the past month, I’ve spent many-an evening eyeing them on the dresser, trying to figure out what in the world I was going to do with so many tablecloths.
It turns out that, in addition to having too many tablecloths, I also have too much dried catnip. Every time we get a new toy/scratch pad/bed for the cats, we also seem get another giant bag of the stuff. Don’t get me wrong, our kitties like to take the occasional roll around in the kitty weed, but our supply far outpaces our demand.
Given the materials available, I decided to try my hand at making cat toys. What else could I do?
Fifteen-Minute Fabric Scrap Catnip Mousies
Materials:
* Fabric Scraps
*Sewing machine (hand stitching will work too, but will take longer)
*Twine, cut in 3″ pieces
*Dried catnip
*Cardboard, pencil, and scissors

1. Make your pattern. I traced a wine bottle for the bottom shape, which ended up being the perfect size after stuffing and sewing.

2. Trace the pattern twice, then cut out the pieces for the front and back of the mousie.
3. Using a small, straight stitch on your sewing machine (or tight hand-stitches), sew both sides together (inside out), leaving the back open for stuffing.

4. Fip the sewn pieces right-side-out. With the help of your cat, make a paper funnel and fill the toy with catnip.Once full, knot two sides of a 3″ piece of twine for a tail, and insert one end into the opening. Stitch and back-stitch the opening closed, securing the tail in place.
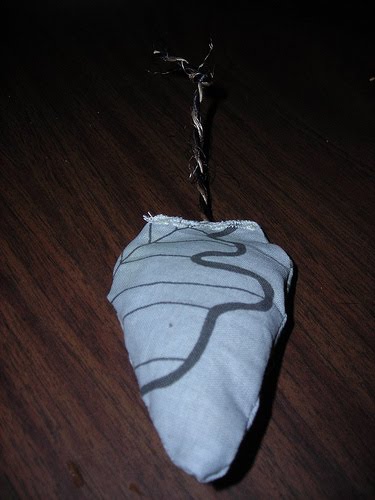

5. Finished mousies (with a little fur–Pixel didn’t want to give his up for photos). If you want to get creative, you can also add ears or embroider eyes.

6. Bask in the kitty love.
cute! I love the end result of your project. My kitties are right here next to me.
cute! I love the end result of your project. My kitties are right here next to me.