

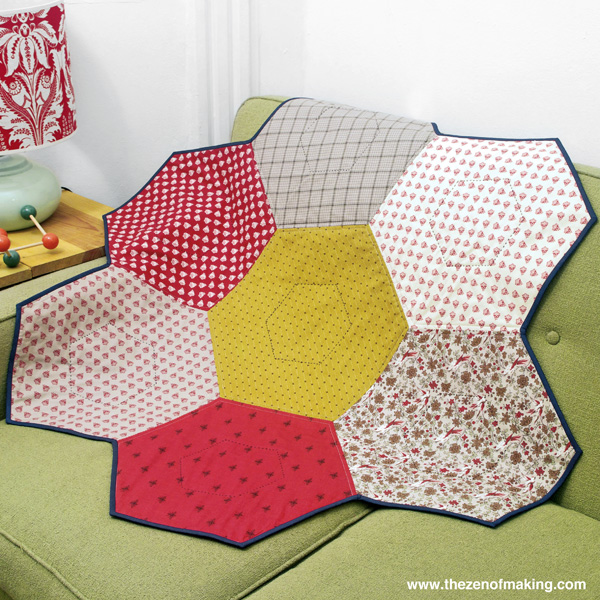
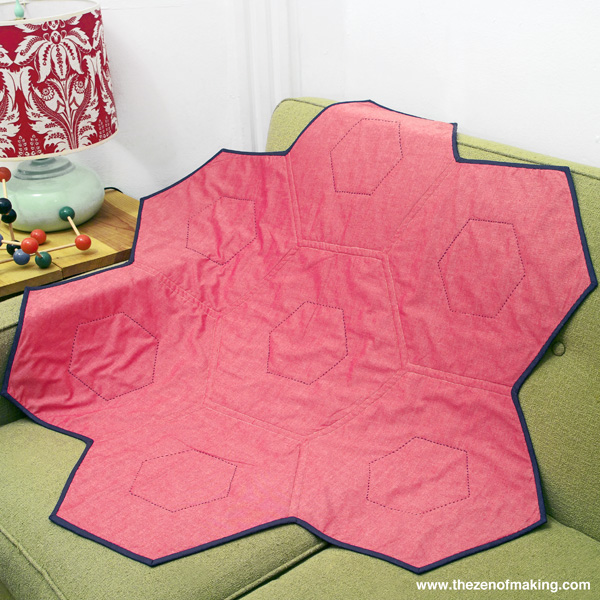
Hello, hexie lovers! I’d like to introduce you to my new favorite thing to make: the giant hexie flower lap quilt. (Also affectionately known around my apartment as the big-ass hexie quilt.)
Seven blocks. English paper piecing. Can be hand or machine quilted. No squaring, no fuss.
Finished dimensions: About 41½" x 41½".
This project is part of the 12 Hexies (or Less) Blog Hop, generously organized by my pal Diane from CraftyPod. You can read more about the hop here, then scroll down to the bottom of this post to see more projects.
Please note that the links to supplies and tools that are provided below are affiliate links, and I will be compensated if you choose to make a purchase after clicking through.
Supplies:
* Giant Hexie Flower Quilt 8" Hexagon Template PDF, printed at actual size (full scale)
* 22" x 28" Poster board, 5 sheets
* Cotton fabric in coordinating colors, 7 fat quarters
* Backing fabric, 1½ yards of 45" wide fabric
* ½" double fold bias binding, about 4 yards (you can also use fabric to make your own binding)
* Cotton batting, crib size (at least 45" wide)
* Glue stick
* Hand quilting thread, a color that will blend in with your fabrics
* Pearl cotton embroidery thread, a color that will contrast with your fabrics
* Machine sewing thread, a color that will contrast with your fabrics
Tools:
* Fabric scissors
* Hand quilting needle
* Paper scissors
* Clover Wonder Clips or straight pins
* Quilt basting pins
* Fabric chalk liner or chalk fabric pencil
* Quilting ruler
* Sewing machine
* Pen or pencil
* Scotch tape
Step 1:
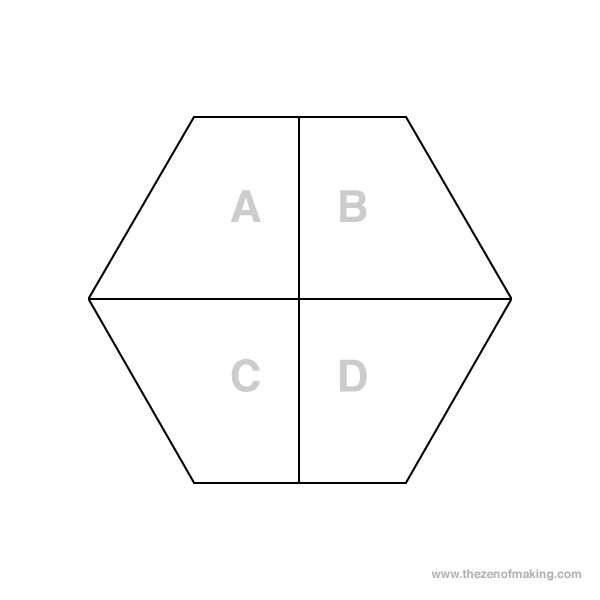
Print the Giant Hexie Flower Quilt 8" Hexagon Template PDF at full scale, then cut out each piece.
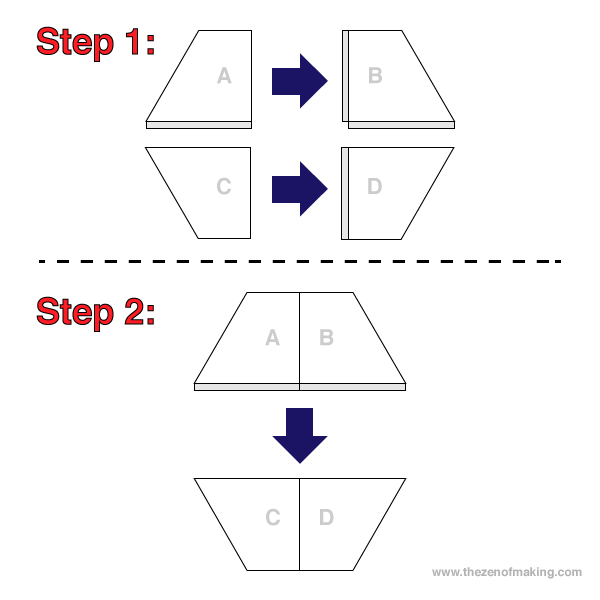
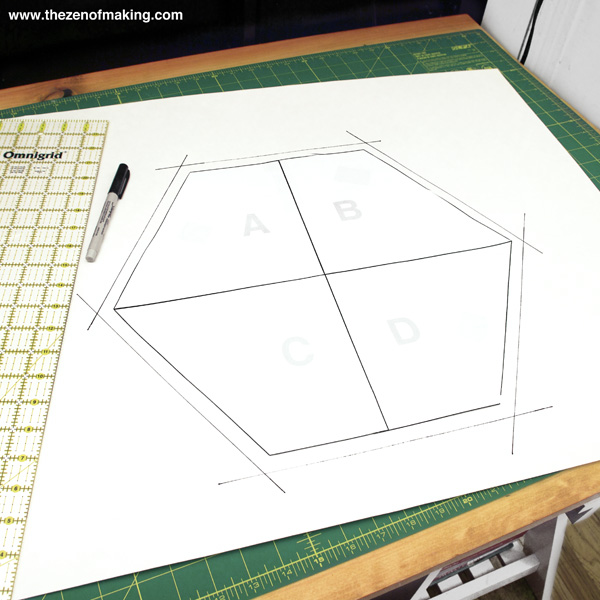
Using scotch tape to join the pieces, assemble the 8" hexagon template as shown above.
When the template is assembled, carefully trace the outline of the hexagon shape onto a piece of poster board, then use scissors to cut it out. Repeat the tracing and cutting process until you have 7 posterboard hexagons. (Two hexagons should fit on each 22" x 28" sheet.)
Tip: I use a couple of loops of scotch tape to hold the template in place on the poster board so it doesn’t move while I’m tracing.
Step 2:
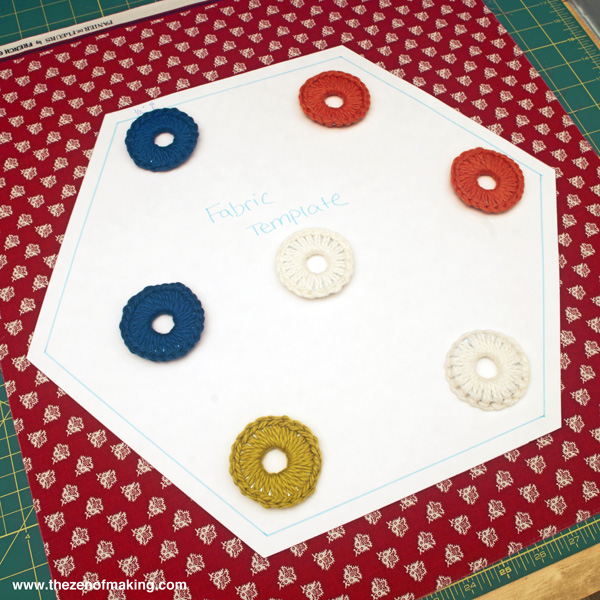
Make your fabric template.
Place your hexagon template in center of your last piece of poster board. Trace around it, then use your quilting ruler and a pencil to draw a ½" seam allowance around the outside edge. Carefully cut the fabric template out along the seam allowance line you just drew.
Step 3:
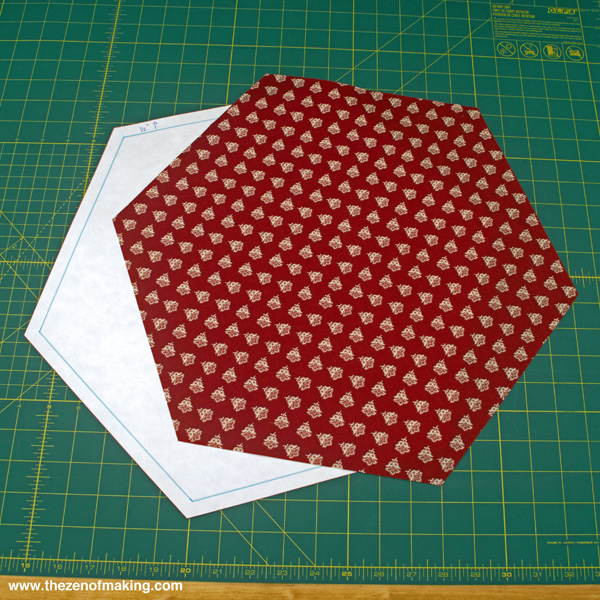
Using the fabric template you made in step 2 as your guide, cut out 7 fabric hexagons.
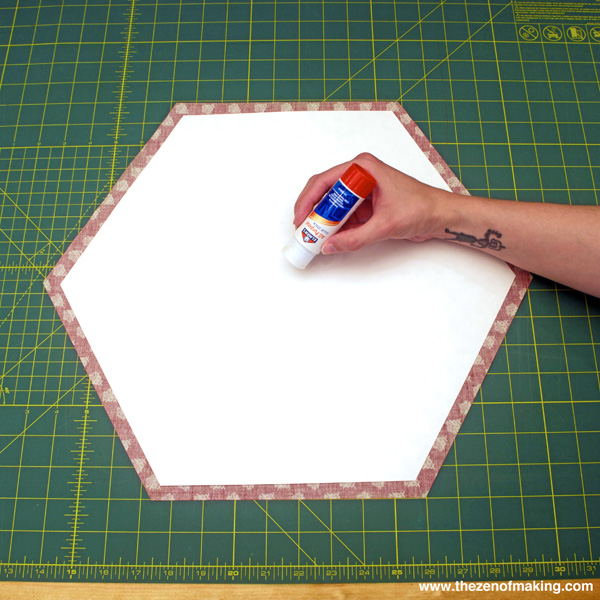
Step 4:
Use a glue stick to lightly glue one of the poster board hexagon templates in place on the wrong side of each fabric hexagon (the back of the fabric). Take care to center each poster board template on the fabric so that an even ½" of fabric is visible all around the outside edge.
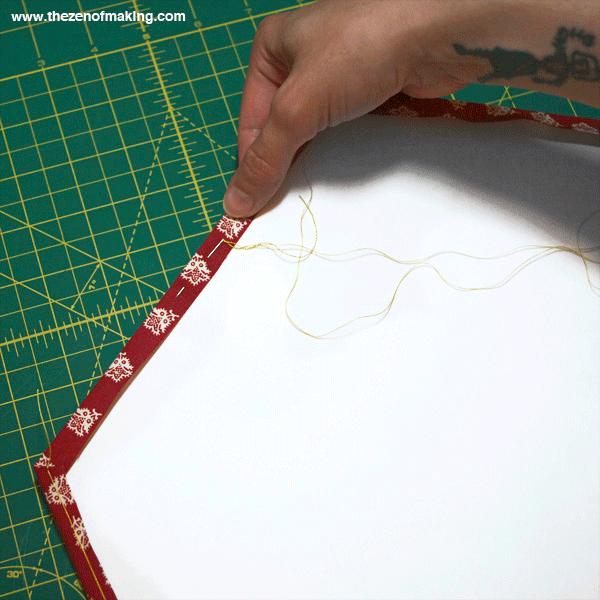
Step 5:
Baste the fabric around the poster board hexagon template.
You can use the basting method that I showed you in Tutorial: English Paper Piecing, Hexies Part 1, but with one small change: because the hexies in this project are so big, you’ll want to make a stitch THROUGH THE POSTER BOARD TEMPLATE on each side.
Tip: Once you’ve basted all of the pieces, use an iron to press a crisp seam around the outside edges of each hexagon.
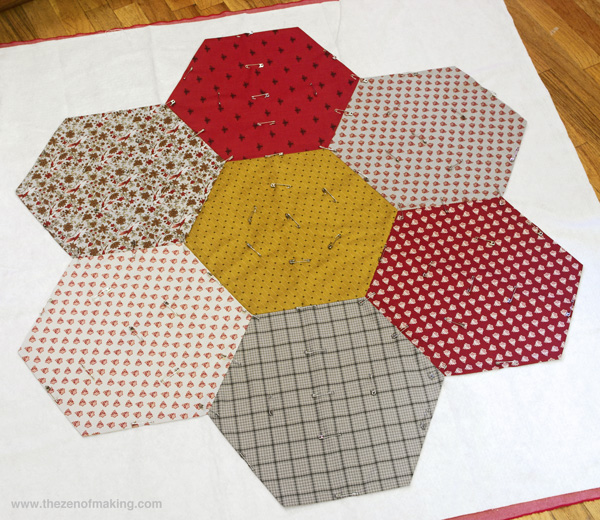
Step 6:
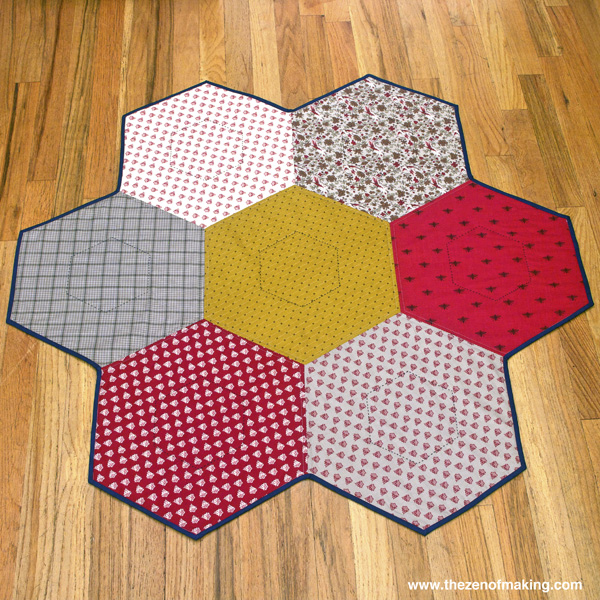
Once all 7 hexagons have been basted, it’s time to construct the hexie flower block.
If you’re not familiar with piecing hexagons, you can find step-by-step instructions for joining hexagons into flower blocks here: Tutorial: English Paper Piecing, Hexies Part 2.
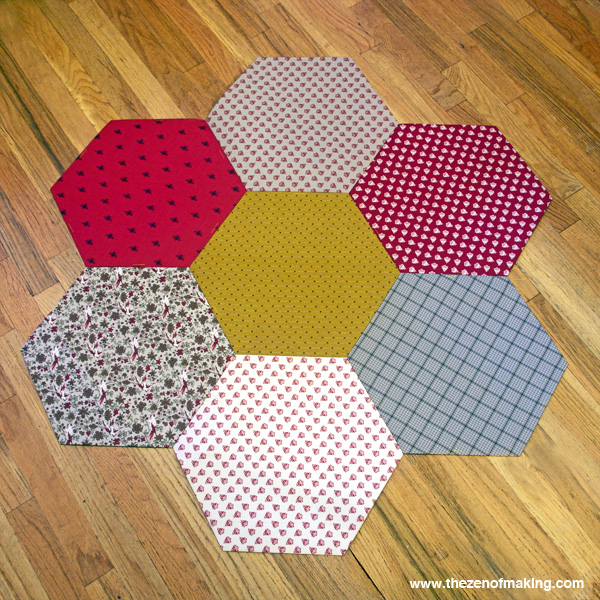
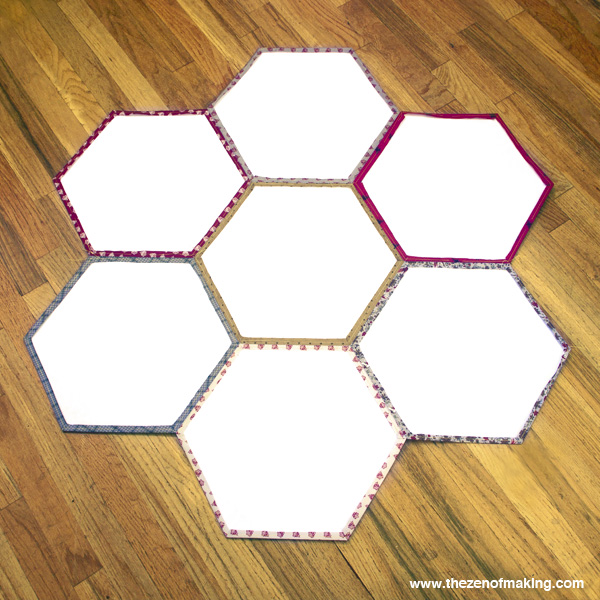
When you’re done, your gigantic pieced flower should look like the photos above.
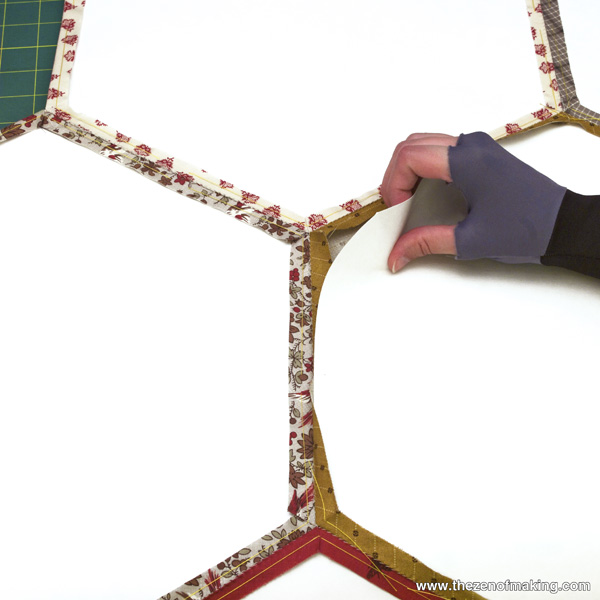
Step 7:
Now that your flower block has been fully constructed, cut the basting stitches from step 5, then gently remove the poster board templates.
Step 8:
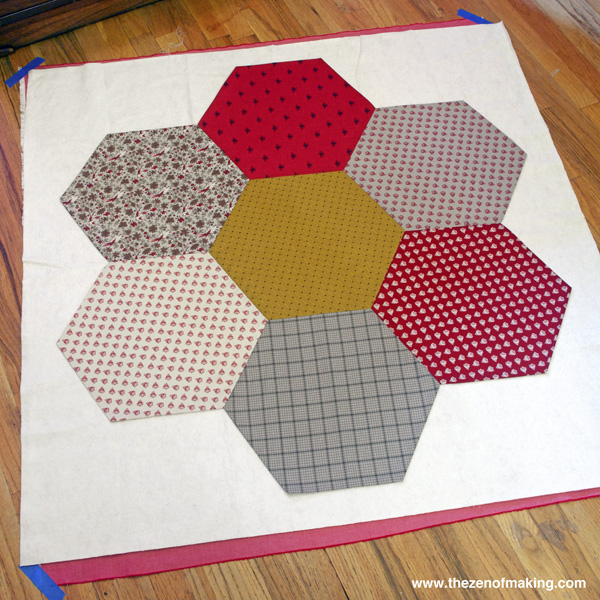
It’s time to turn that quilt top into a quilt!
Make a quilt sandwich by layering the following:
First, lay the backing fabric down with the right side facing down. Next, center the batting on top of the backing fabric. Finally, with the right side facing up, center the hexie flower quilt top on top of the batting.
Step 9:
Pin baste the quilt by inserting evenly-spaced curved safety pins through all three layers of the quilt.
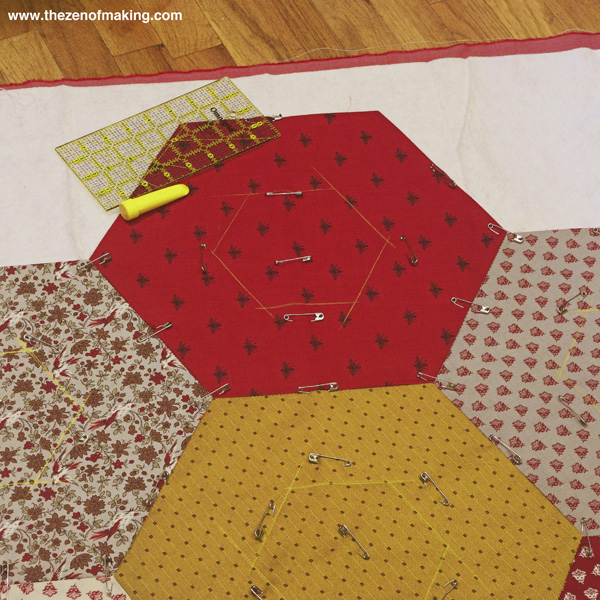
Step 10:
It’s time to quilt!
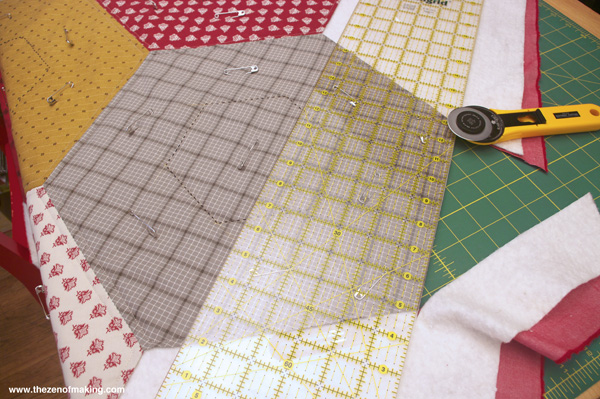
Use a quilting ruler and fabric chalk to mark your quilting lines.
Step 11:
Quilt through all three layers.
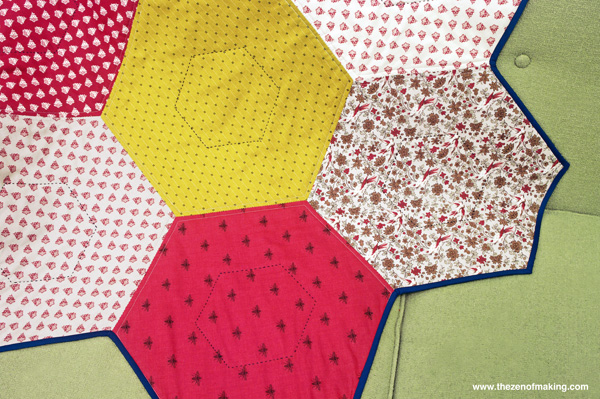
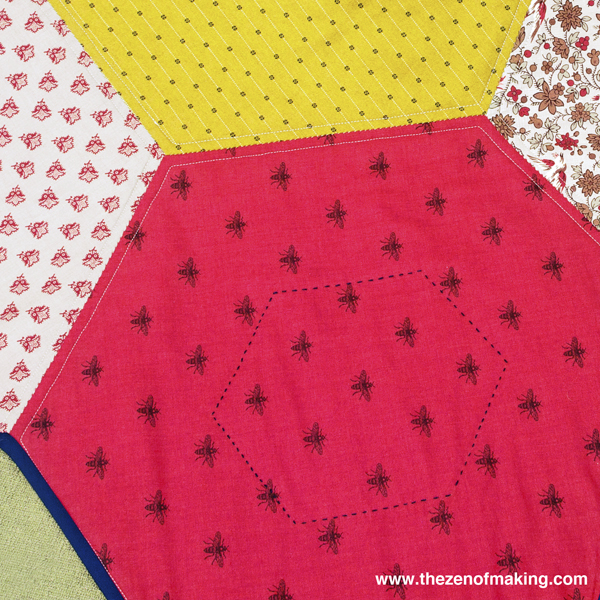
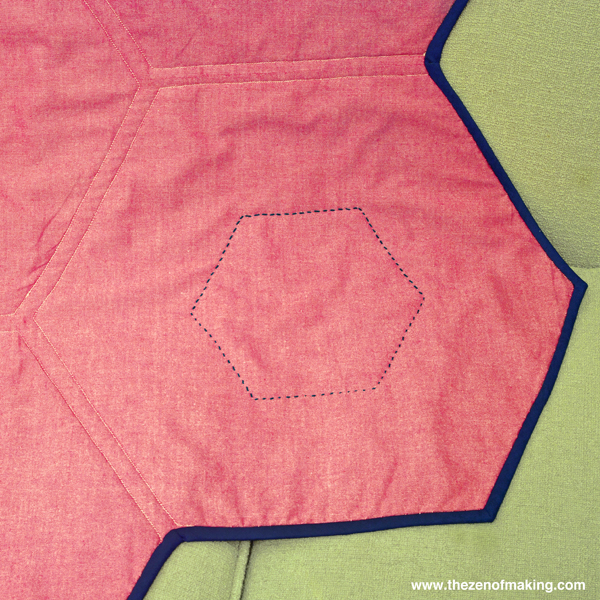
For my quilt, I used pearl cotton embroidery floss to hand quilt the center of each hexagon, then I machine quilted a ¼" boarder around the edges.
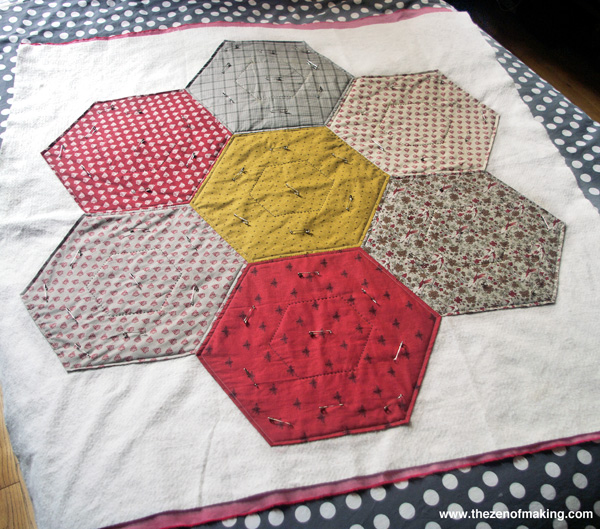
Step 12:
When you’re finished quilting, carefully cut away the extra backing fabric and batting around the outside edges of the flower.
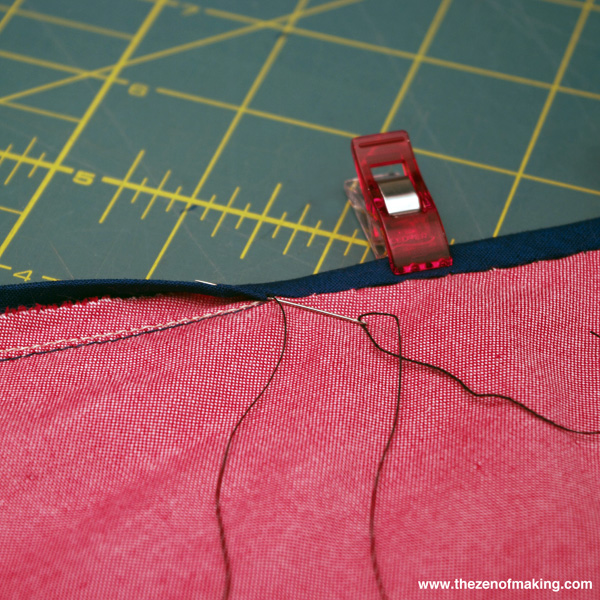
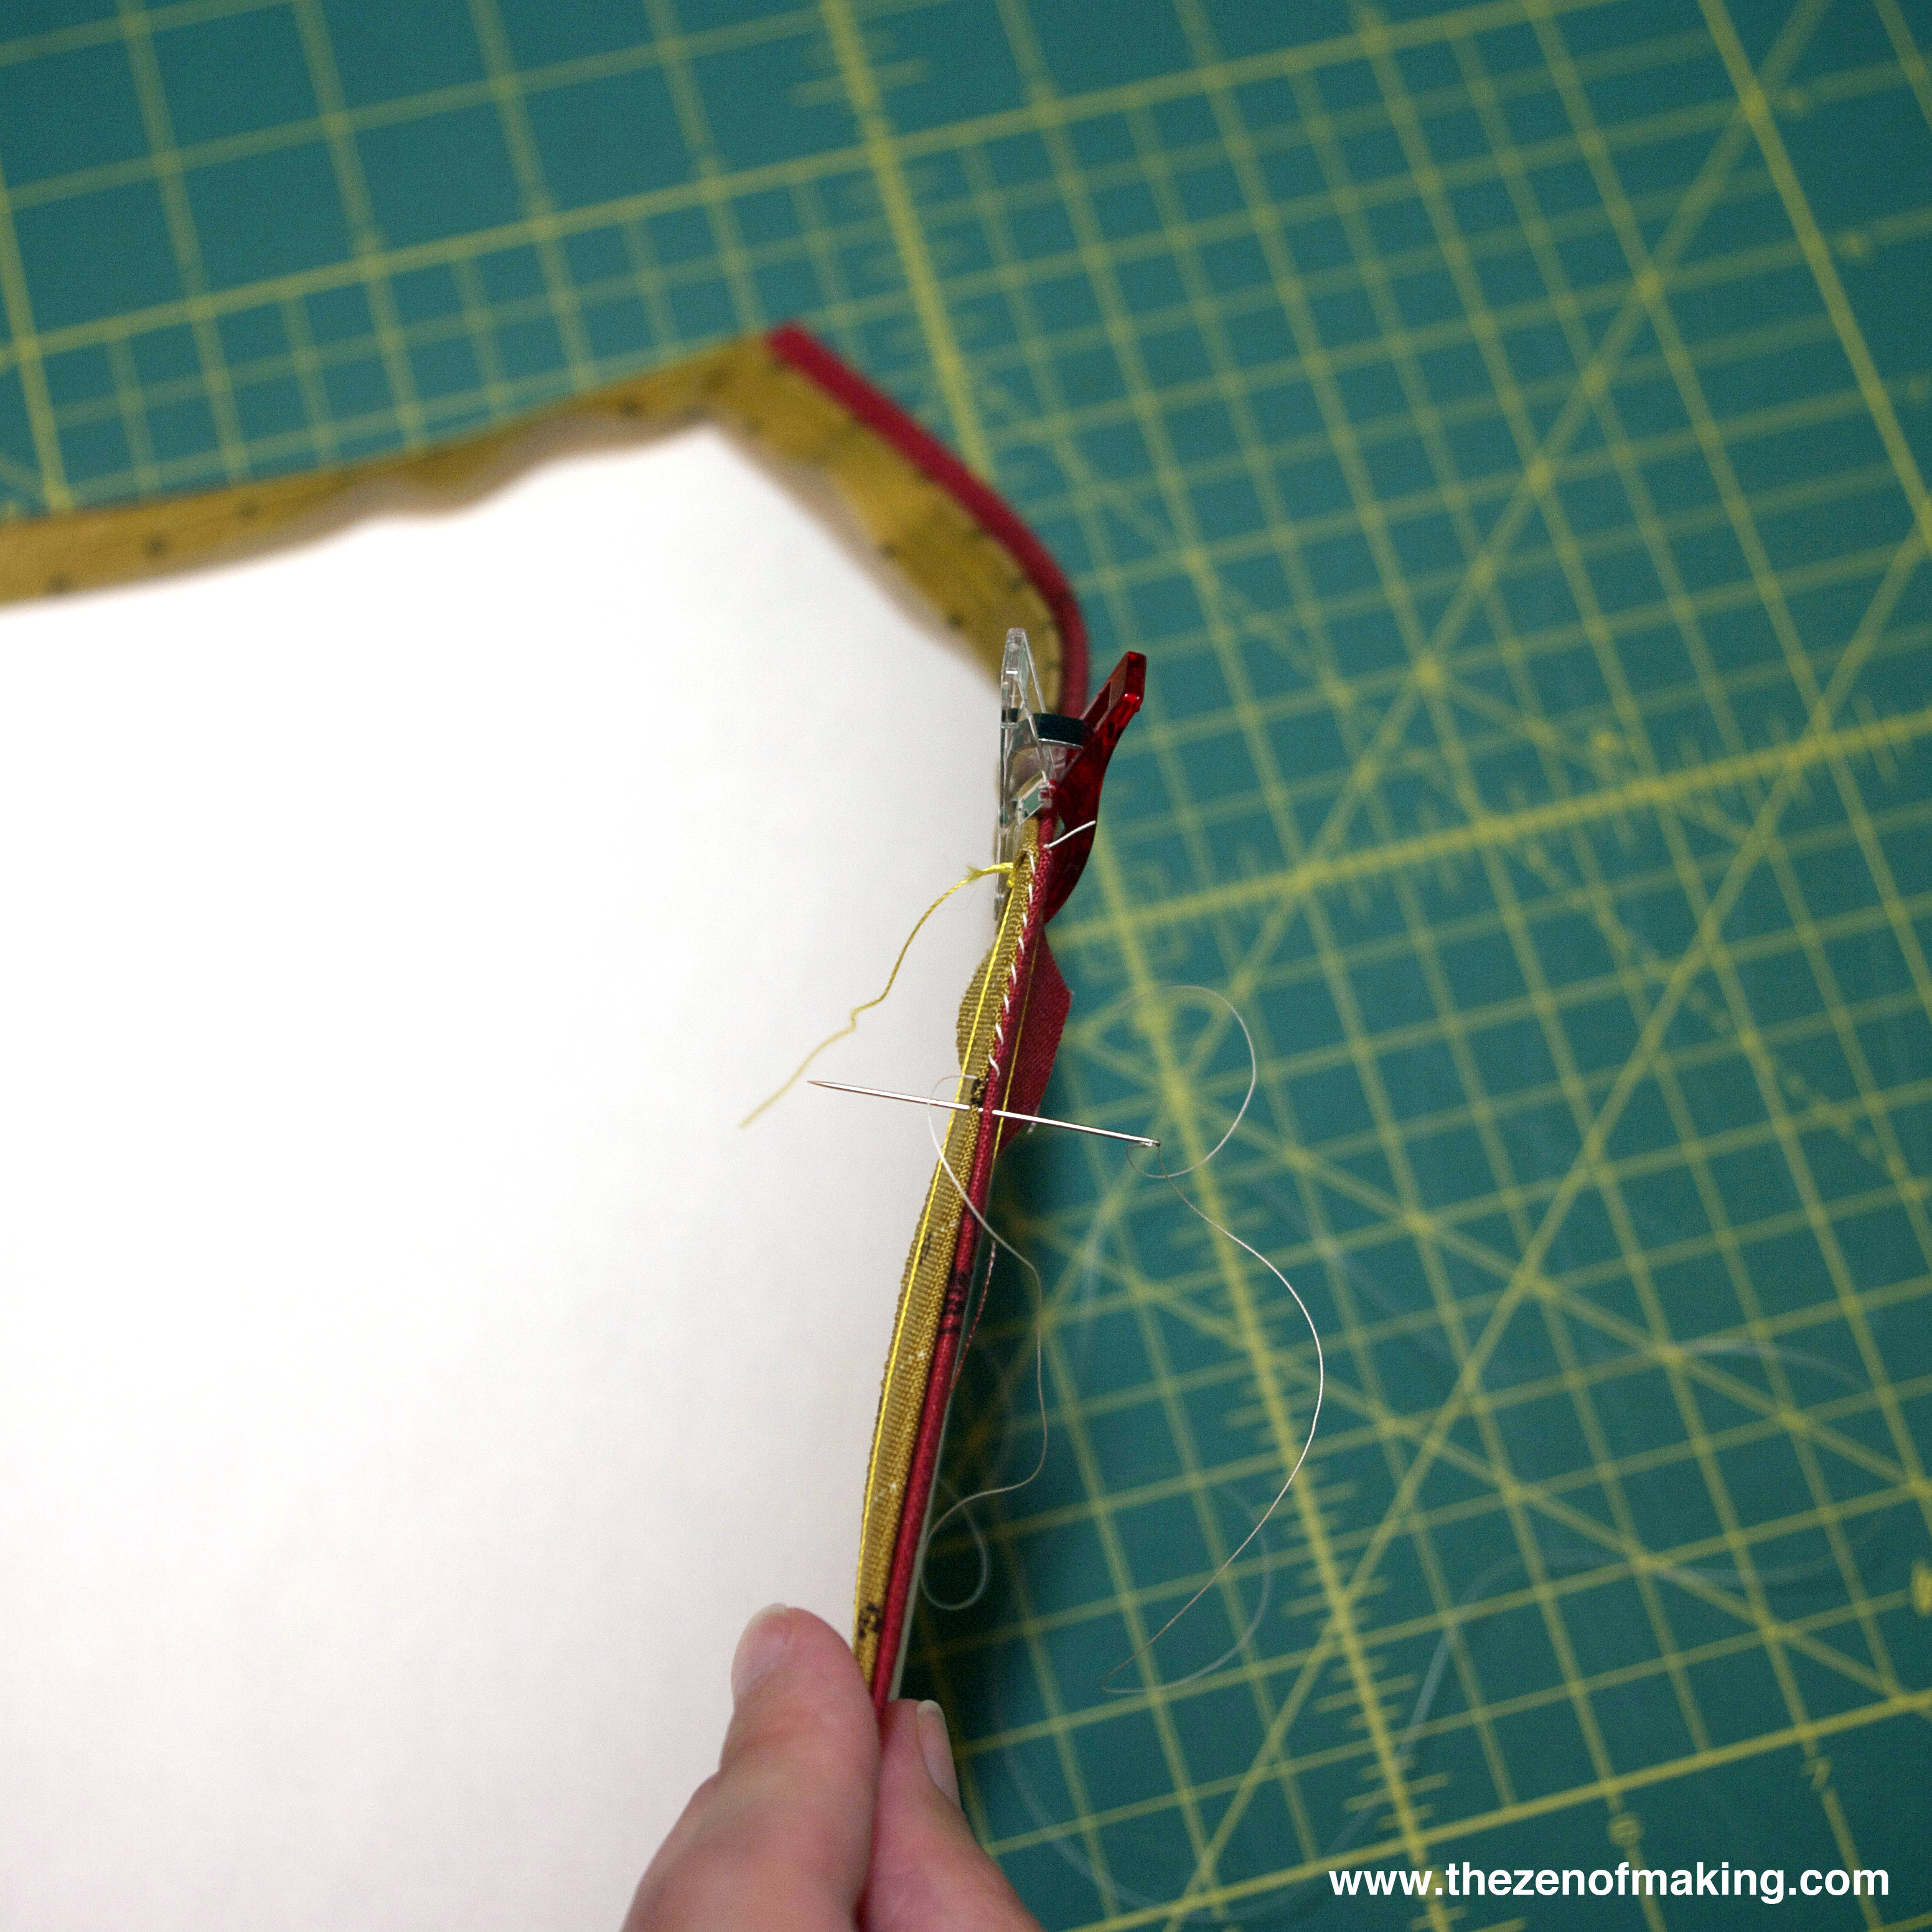
Step 13:
Bind the quilt using your favorite method.
I used my sewing machine to apply the binding to front, then folded the binding over the edge and used blind stitch on the back, per the technique described in Quilting Happiness: Projects, Inspiration, and Ideas to Make Quilting More Joyful (affiliate link), one of my favorite go-to quilting books.
Tip: Since this quilt has so many corners, I took the time to baste the fold at each corner in advance, which gave me nice neat angles when I was hand-sewing the binding on the back.
** Yes, yes. I know that I’m going to Quilting Hell for using bias tape to bind my quilt. (For those of you who don’t know, bias tape doesn’t always wear as well as quilt binding that is cut with the grain of the fabric. For this reason, many quilters choose to cut strips of fabric to make their own binding.) Alas, I was in a hurry this time, so I took a chance. In the future, should this choice come back to bite me in the backside, rest assured that I will re-bind the quilt using more acceptable methods. ;)
Step 14:
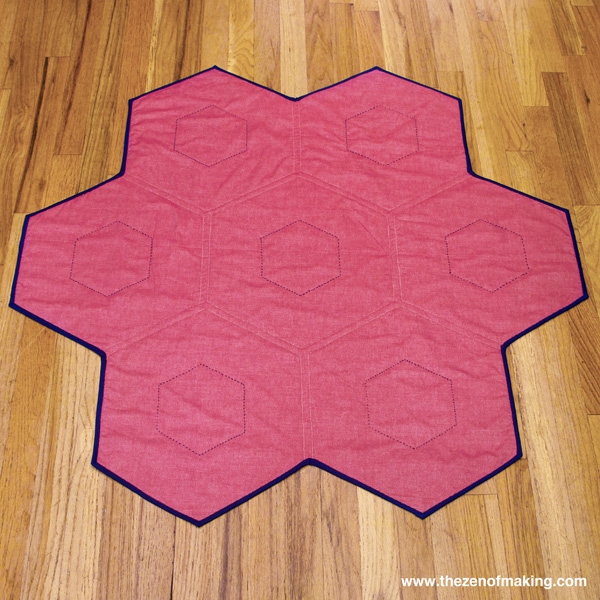
Done! Wash and press your finished quilt as needed.
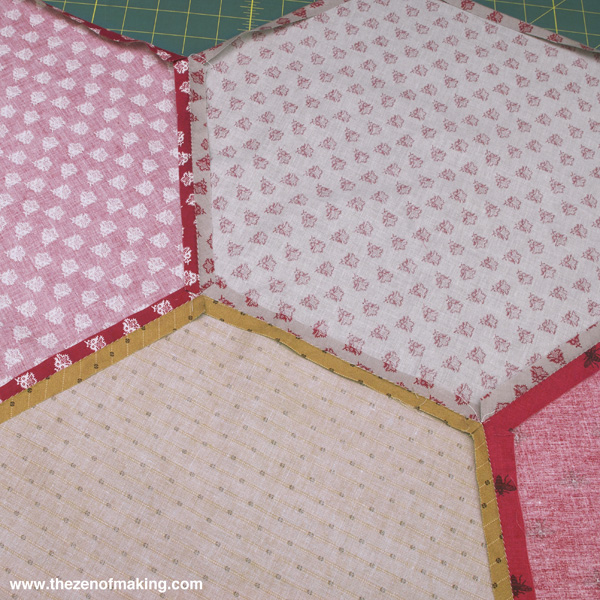
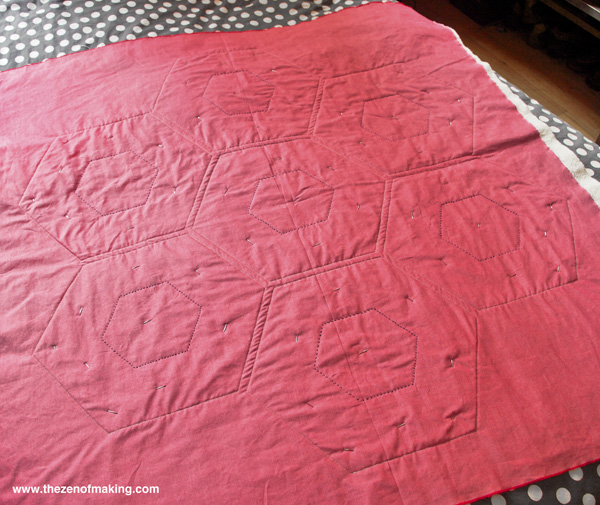
Here are a few more detail shots of the finished quilt and quilting:
Guys, I think I’m in love!
More posts from the 12 Hexies (or Less) Blog Hop:
Cute idea. Thanks for sharing.
You are my hero. This is uhmazing!
Thanks, ladyfriend! This was one of those rare and wonderful projects that actually turned out better than I’d initially imagined. I really, really love this quilt. (I know you’re not supposed to say that about your own projects, but I can’t help it!)
looks great. love seeing your in progress photos and the finished tutorial. Thanks!
Thank you! I’m so pleased with how it turned out. :)
And I thought your hexie carrying case was brilliant – you are so creative with hexagons! And now I know what to do with the Jay McCarroll FQ I’ve been hoarding…
Thanks! This is definitely a good project for showing off beautiful fabric. I’d initially envisioned it in solid colors, but I’m so glad I decided to use prints instead!
I don’t think you’look be going to quilter’s hell for using bias tape. If I make this quilt, I would cut my binding on the bias rather than with the grain. There are so many corners, especially the interior angles, that bias binding is a must. The bias allows the binding to stretch over those awkward angles, which straight-cut binding would pucker. Which would suck, because this quilt is seriously adorable!! So, while store-bought bias tape is not my preference, it is for the limited color availibility, not because it is the wrong supply to use. ;)
I think you’re right. But, since I did fold and baste the corners to get crisp points, I *maybe* could have gotten away with using on-the-grain binding. I’m definitely not losing any sleep over the bias tape, though. ;)
Hard to lose sleep with that much awesome going on. ;)
Great tutorial!! Thanks for sharing!
beautiful
I love this so (sew?) much!! Using it to make a lap throw for my daughters wedding. Or I may go really big and use the hexies to make a queen sized ‘throw’. Thank you so much for sharing it!!
*** @nutmeg
Have you made one of these cuties with the stitch and turn method (no binding at all? I think I am going to try it. It has so little quilting on it I think it would turn out ok. Thanks for the tut.
Nope, I haven’t tried stitch-and-turn on these big hexies, but I don’t see any reason why it wouldn’t work. I think you should go for it! :)
Just came across your tutorial and I absolutely LOVE your lap quilt!! I am going to give this one a try for sure! Have never done paper piecing but think its time I learn lol and with your tutorial and pics I think I can do it. My granddaughters will love them (and have to make one (or a couple) for myself lol. Thanks for the tutorial! Glad I came across it!!
This looks like such a fun project to do! I’ve been looking for something to do with my free time and this will be it. Thank you so much for sharing the steps, you make it look so easy! <3
Was looking for a huge hexi template, and I love this project; thanks!
Love it!! I made a double sided hexi quilt. One side is for Fall, the other Christmas. Looks great on my couch. Thanks for the idea.