 |
This is the first post in a week-long craft photography blog hop featuring Sister Diane from CraftyPod, Megan from RadMegan, Stacey from FreshStitches, Michele from Michele Made Me, and Haley from Red-Handled Scissors. (Hey, that’s me!) As soon as they become available, you’ll be able to find links to the other tutorials in this series at the bottom of this post! |
Retouching unsightly spots, stains, and scratches in the backgrounds of craft photos is one of the dirty little secrets of DIY pros. It’s like picking your nose or watching trashy reality TV—we all do it, but nobody ever talks about it.
The fact of the matter is, most professional crafters spend just as much time editing photos as they do actually making the project and writing the tutorial. For us, getting the right lighting, color, and look in a photo is every bit as important as good writing and top-notch crafting skills. The photo is, after all, what drives the pins, the shares, the likes, and, most importantly, the traffic.
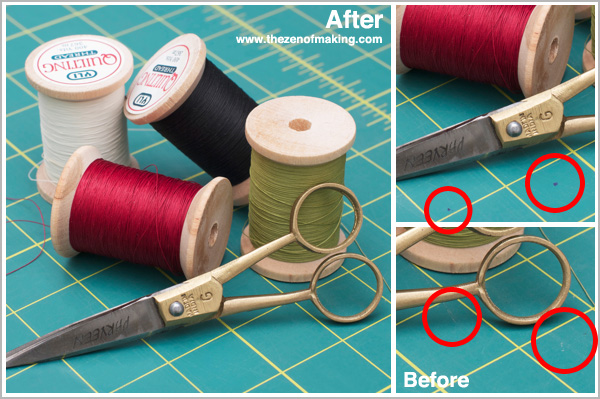
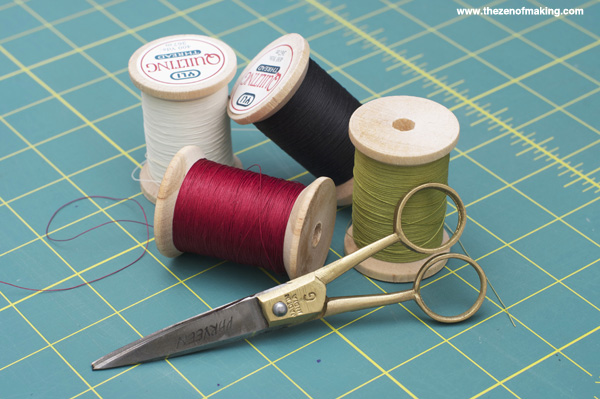
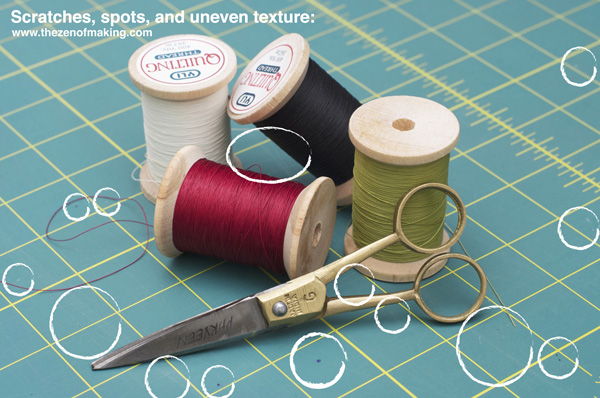
Before you start shaking your head, take a look at the photo below.
The spots and scratches on the cutting mat draw the eye away from the focus of the photo and make the items resting on it look a little bit messy and disorganized.
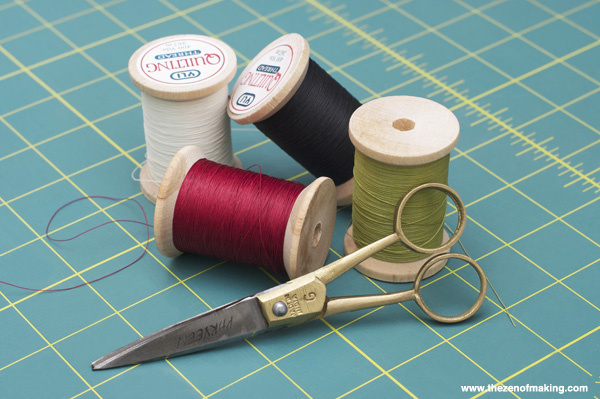
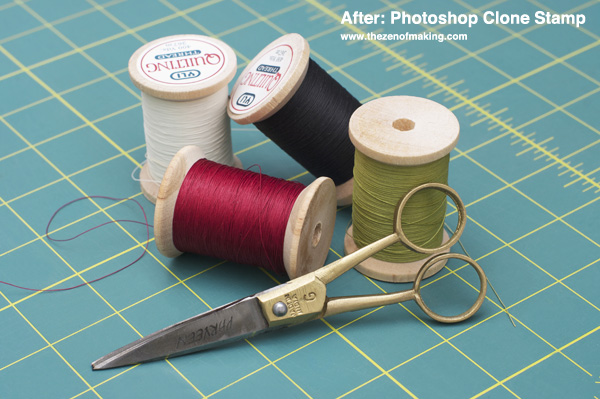
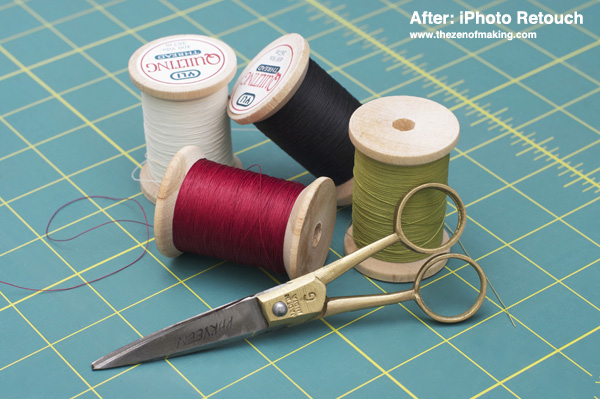
Now take a look at this one.
Without the distraction of spots and scratches, the photo looks much cleaner and more professional. (It’s also way more likely to get pinned or featured on one of the big craft-related sites.) See? Five minutes of editing really can make a huge difference!
Ready to try it for yourself? Let’s get started!
In this tutorial, I’ll show you how to retouch spots using both Photoshop and iPhoto. As you go through the steps, keep an eye out for the red circles on each photo—they’ll let you know you where to look and what to do.
If you don’t use a Mac or don’t have the applications above, don’t fret! The concepts in this tutorial are applicable to other photo editing programs or online tools—you’ll just have to poke around a bit to find the right options. For Windows users, I’ve also included the Windows keyboard strokes in Photoshop section of the tutorial.
Software used in this tutorial:
* Adobe Photoshop CS5 (for Mac)
* iPhoto (version 8.1.2)
**Please note that the links provided above are affiliate links, and I will be compensated if you choose to make a purchase after clicking through.**
Retouch Method 1: Simple Clone Stamping in Photoshop
Step 1
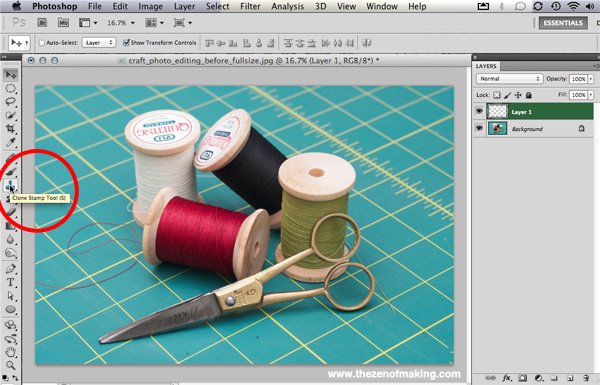
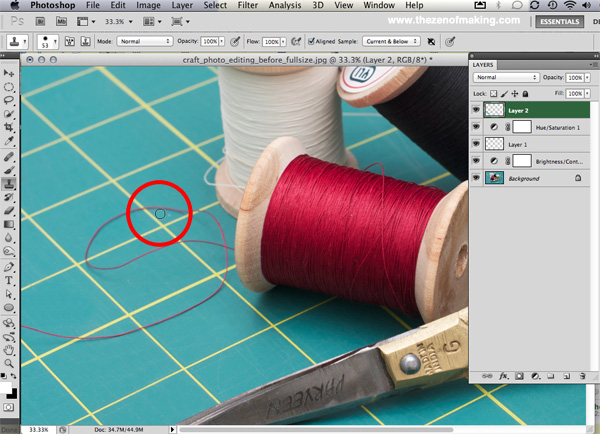
Open the photo in Photoshop and add a new layer. With the new layer selected, click on the clone stamping tool as shown above.
- Tip: Adding a new layer keeps you from editing the original photo directly. This way, if you stamp in the wrong spot, you’ll be able to use the eraser tool to fix any mistakes.
Step 2
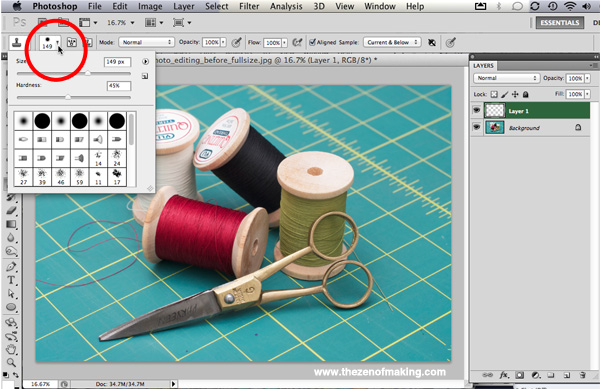
Adjust the size of the stamping brush to fit your needs. (Choose a size that closely matches the size of the spot that you’d like to cover.)
Step 3
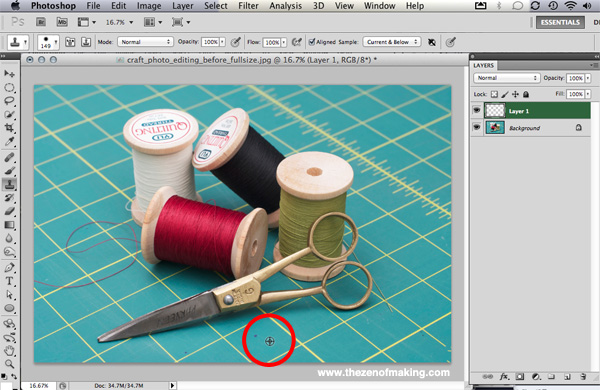
The clone stamping tool samples the color and texture from one area of a photo and duplicates it in another, stamping the new color over any spots or discoloration. When choosing an area to be your sample, make sure your selection is as close as possible to the spot that you’re trying to cover so that you get the right color. You can think of this process as inking your stamp.
To select your sample, hold down the option key, which will turn the mouse into a bulls eye. While still holding down the option key, center the bulls eye of the mouse mouse over the spot that you would like to use as your stamp sample, then click. Once you’ve clicked on your sample selection, release the option key. (Windows users: hold down the Alt key.)
Step 4
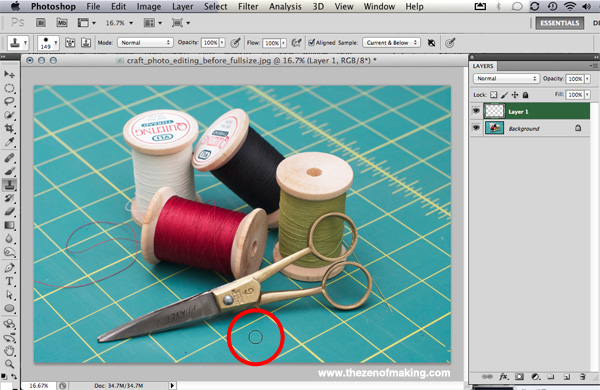
Once your stamp sample has been selected, move the mouse over the spot that you’d like to retouch. When you do this, the spot should disappear. If it does, click the spot to stamp. If it doesn’t, try selecting a stamp sample that’s closer to the spot to help you get the right color. (For scratches or larger areas, you can keep pressing the mouse button as you drag to paint longer lines. However, I generally have better luck with the sample-then-dot method.)
- Note: Once you’ve stamped on your photo, the sample selection will begin to change positions along with the movement of your mouse. For example, if you move the clone stamping tool to the left, your sample area will also move an equal distance to the left, maintaining the original distance between sample and the first stamp. This is great when you want to correct a long, straight line, but it can be frustrating if you’re jumping around to many different places on the photo.
To keep the stamp sample accurate, you should always select a new stamp sample near each individual spot that you’d like to correct.
Tip: To get the most accurate results when clone stamping, zoom in close, then use a small brush size.
After Editing: Photoshop Clone Stamp
Retouch Method 2: Using the Retouch Tool in iPhoto
Step 1
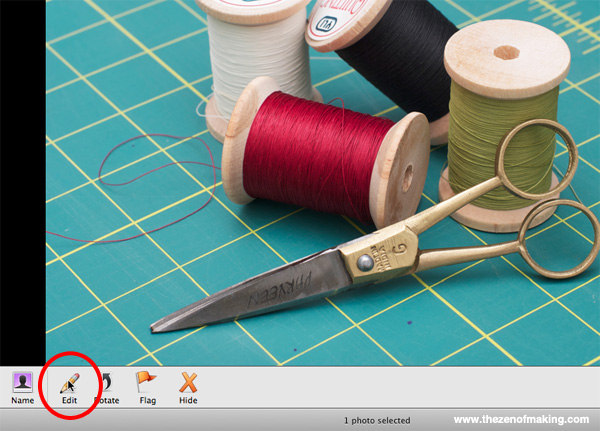
Open the photo in iPhoto, then click the “Edit” button.
Step 2
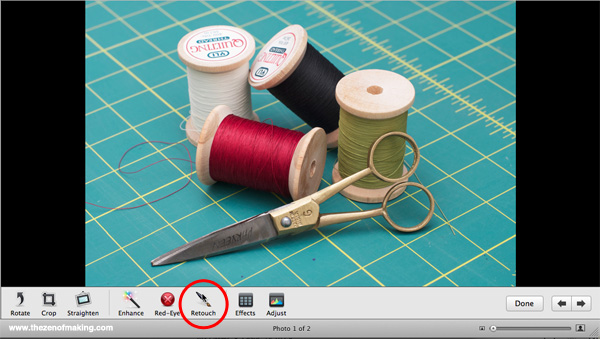
After clicking the “Edit” button, the editing menu should pop up along the bottom of your screen. When it does, click the “Retouch” button.
Step 3
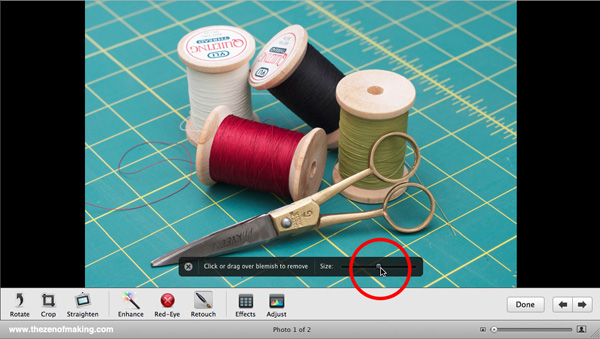
When “Retouch” is selected, a brush size menu will appear on the screen. Adjust the brush to a size that closely matches the spot that you’re trying to cover.
Step 4
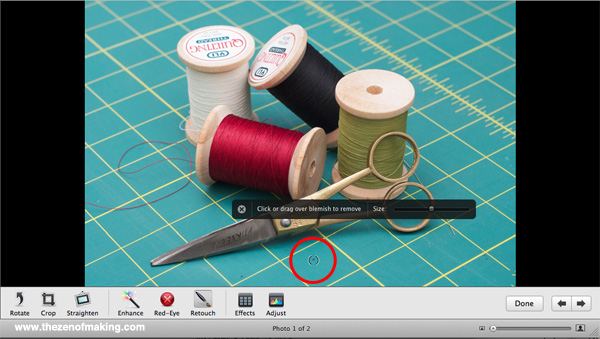
Unlike the Photoshop clone stamp tool, iPhoto automatically samples the the colors around the spot to be retouched. All you need to do is center the brush over the spot and click. (This makes retouching with iPhoto easier and faster than with Photoshop, but way less accurate.)
Step 5
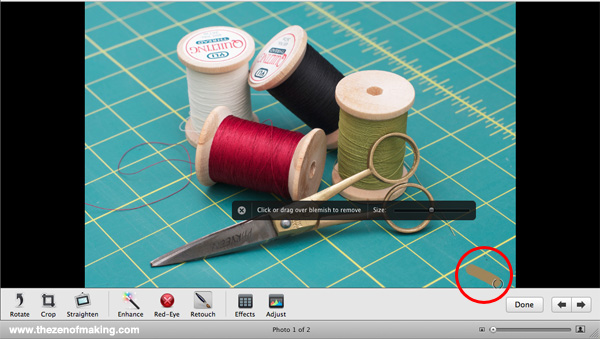
If you have long scratches or lines, hold the mouse down and trace the full line in one sweep. (You can also do this in Photoshop.)
Tip: Because iPhoto chooses the stamping sample for you, it’s not always completely accurate. To avoid smears and smudges in your images, take care to zoom in and use a small brush size when you get close to lines and objects. (There isn’t an eraser tool in iPhoto, but smears can be removed by clicking undo in the Edit menu as soon as they appear.)
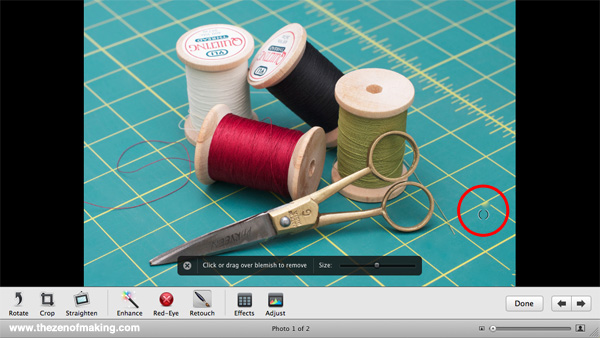
After Editing: iPhoto Retouch
That’s all there is to it. Now, go forth and retouch as you will! ♥
A Blog Hop of Excellent Photography Tricks for Crafters:

I use the IPhoto method but it’s quite imperfect. I’m so glad you went through the Photoshop method because I hadn’t taken the time to learn it. Thanks to you, now I have one more tool in my arsenal. Thanks so much Haley!
Thanks, Michele! I can’t wait to see your post later this week. :)
Thanks for this, I use the free (atm) web photo editing tool called PicMonkey to clone my distracting elements of my photos.
I use it to remove particles of dust off my floor, that I didn’t notice when I took the picture (like vacuuming, lol).
The editing out the dust (let’s be honest, cat hair) on the floor thing: I totally do it too.
Is PicMonkey’s cloning tool similar to Photoshop’s?
I assume it is the same or similar, I haven’t got Photoshop so I don’t know for sure. I do find it very useful and it has other clever effects too.
Thanks so much for this tutorial! I use Photoshop for editing but didn’t know how to use the clone stamping tool. It definitely makes a big difference in the overall appearance.
No problem! It’s definitely my go-to tool for photo cleanup.
Good lord, how many years have I been using iPhoto and never knew you could click and drag the Retouch tool? Thanks for that trick – I used it extensively in my post. :-)
LOVE this post Haley! This is one of my favorite tools too! You are the best!!
xoxo
radmegan
Thanks ! I really love it to find out this Awesome tutorial.I like it.
I’m late to the party, but this tutorial is great! I retouch almost everything before uploading it, so it’s always good to have more tools in the arsenal. Thanks for sharing!